Deploy CloudFront Extensions Console
Time to deploy: Approximately 20 minutes
Deployment steps
Sign in to the AWS Management Console and select the button to launch the CloudFormation template. You can also download the template as a starting point for your own implementation.

We launch this template in US East (N. Virginia) Region, please check the region on the right-upper corner and make sure it is correct.
Choose Next.
On the Specify stack details page, keep the name unchanged. Under Parameters, fill in each parameter by the instruction in Workshop field.
Parameter Default value Description Workshop Initial User Name - The initial username for the web console. Fill in your name. Initial User Email - The initial user email for the web console. Fill in your email address. Initial User Password - The Initial Password for the web console. Fill in your password. The password should be Length 8~16 with space, Must contain 1 uppercase, 1 lowercase, 1 number, 1 non-alpha numeric number, 1 number (0-9). eg. CFExt@2023 CloudFront Log Type no You can set it to yes-Realtimeto get monitoring metrics from realtime loge, or set it toyes-Non-Realtimeto get monitoring metrics from standard log. By default, it isno, which means it will not deploy monitoring feature. See Monitoring for more information.Choose yes-Non-Realtime. CloudFront Domain List - The CloudFront domain name list. Use comma as separation for multiple domain names. Use ‘ALL’ to monitoring all domains in your AWS account Fill in the sample website CloudFront domain name you deployed in Prerequisite, eg. d1jy0foe2tk2rx.cloudfront.net. Refer to CFDomainName in the Outputs tab of CFExtSampleWorkshop stack. Log Keeping Days 120 The number of days to keep CloudFront logs in the S3 bucket. Use the default value, no change is needed. Delete Log false You can set it to trueto delete original CloudFront standard logs in S3 bucket. By default, it isfalse. This only applies to non-realtime monitoringUse the default value, no change is needed. Use Start Time false You can set it to trueif the Time in metric data is based on start time, or set it tofalseif the Time in metric data is based on end time. This only applies to non-realtime monitoringUse the default value, no change is needed. Notification Email - Email address to receive SSL certificates notification. Fill in your email address. This can be the same with Initial User Email. Choose Next.
On the Configure stack options page, choose Next.
On the Review page, check both boxes I acknowledge that AWS CloudFormation might create IAM resources with custom names. and I acknowledge that AWS CloudFormation might require the following capability: CAPABILITY_AUTO_EXPAND.
Choose Create stack to deploy the stack.
You can view the status of the stack in the CloudFormation Console in the Status column. You should receive a CREATE_COMPLETE status in approximately 20 minutes.
After deployment, you will see two CloudFormation stacks, cloudFrontExtensionsConsole and a nested stack.

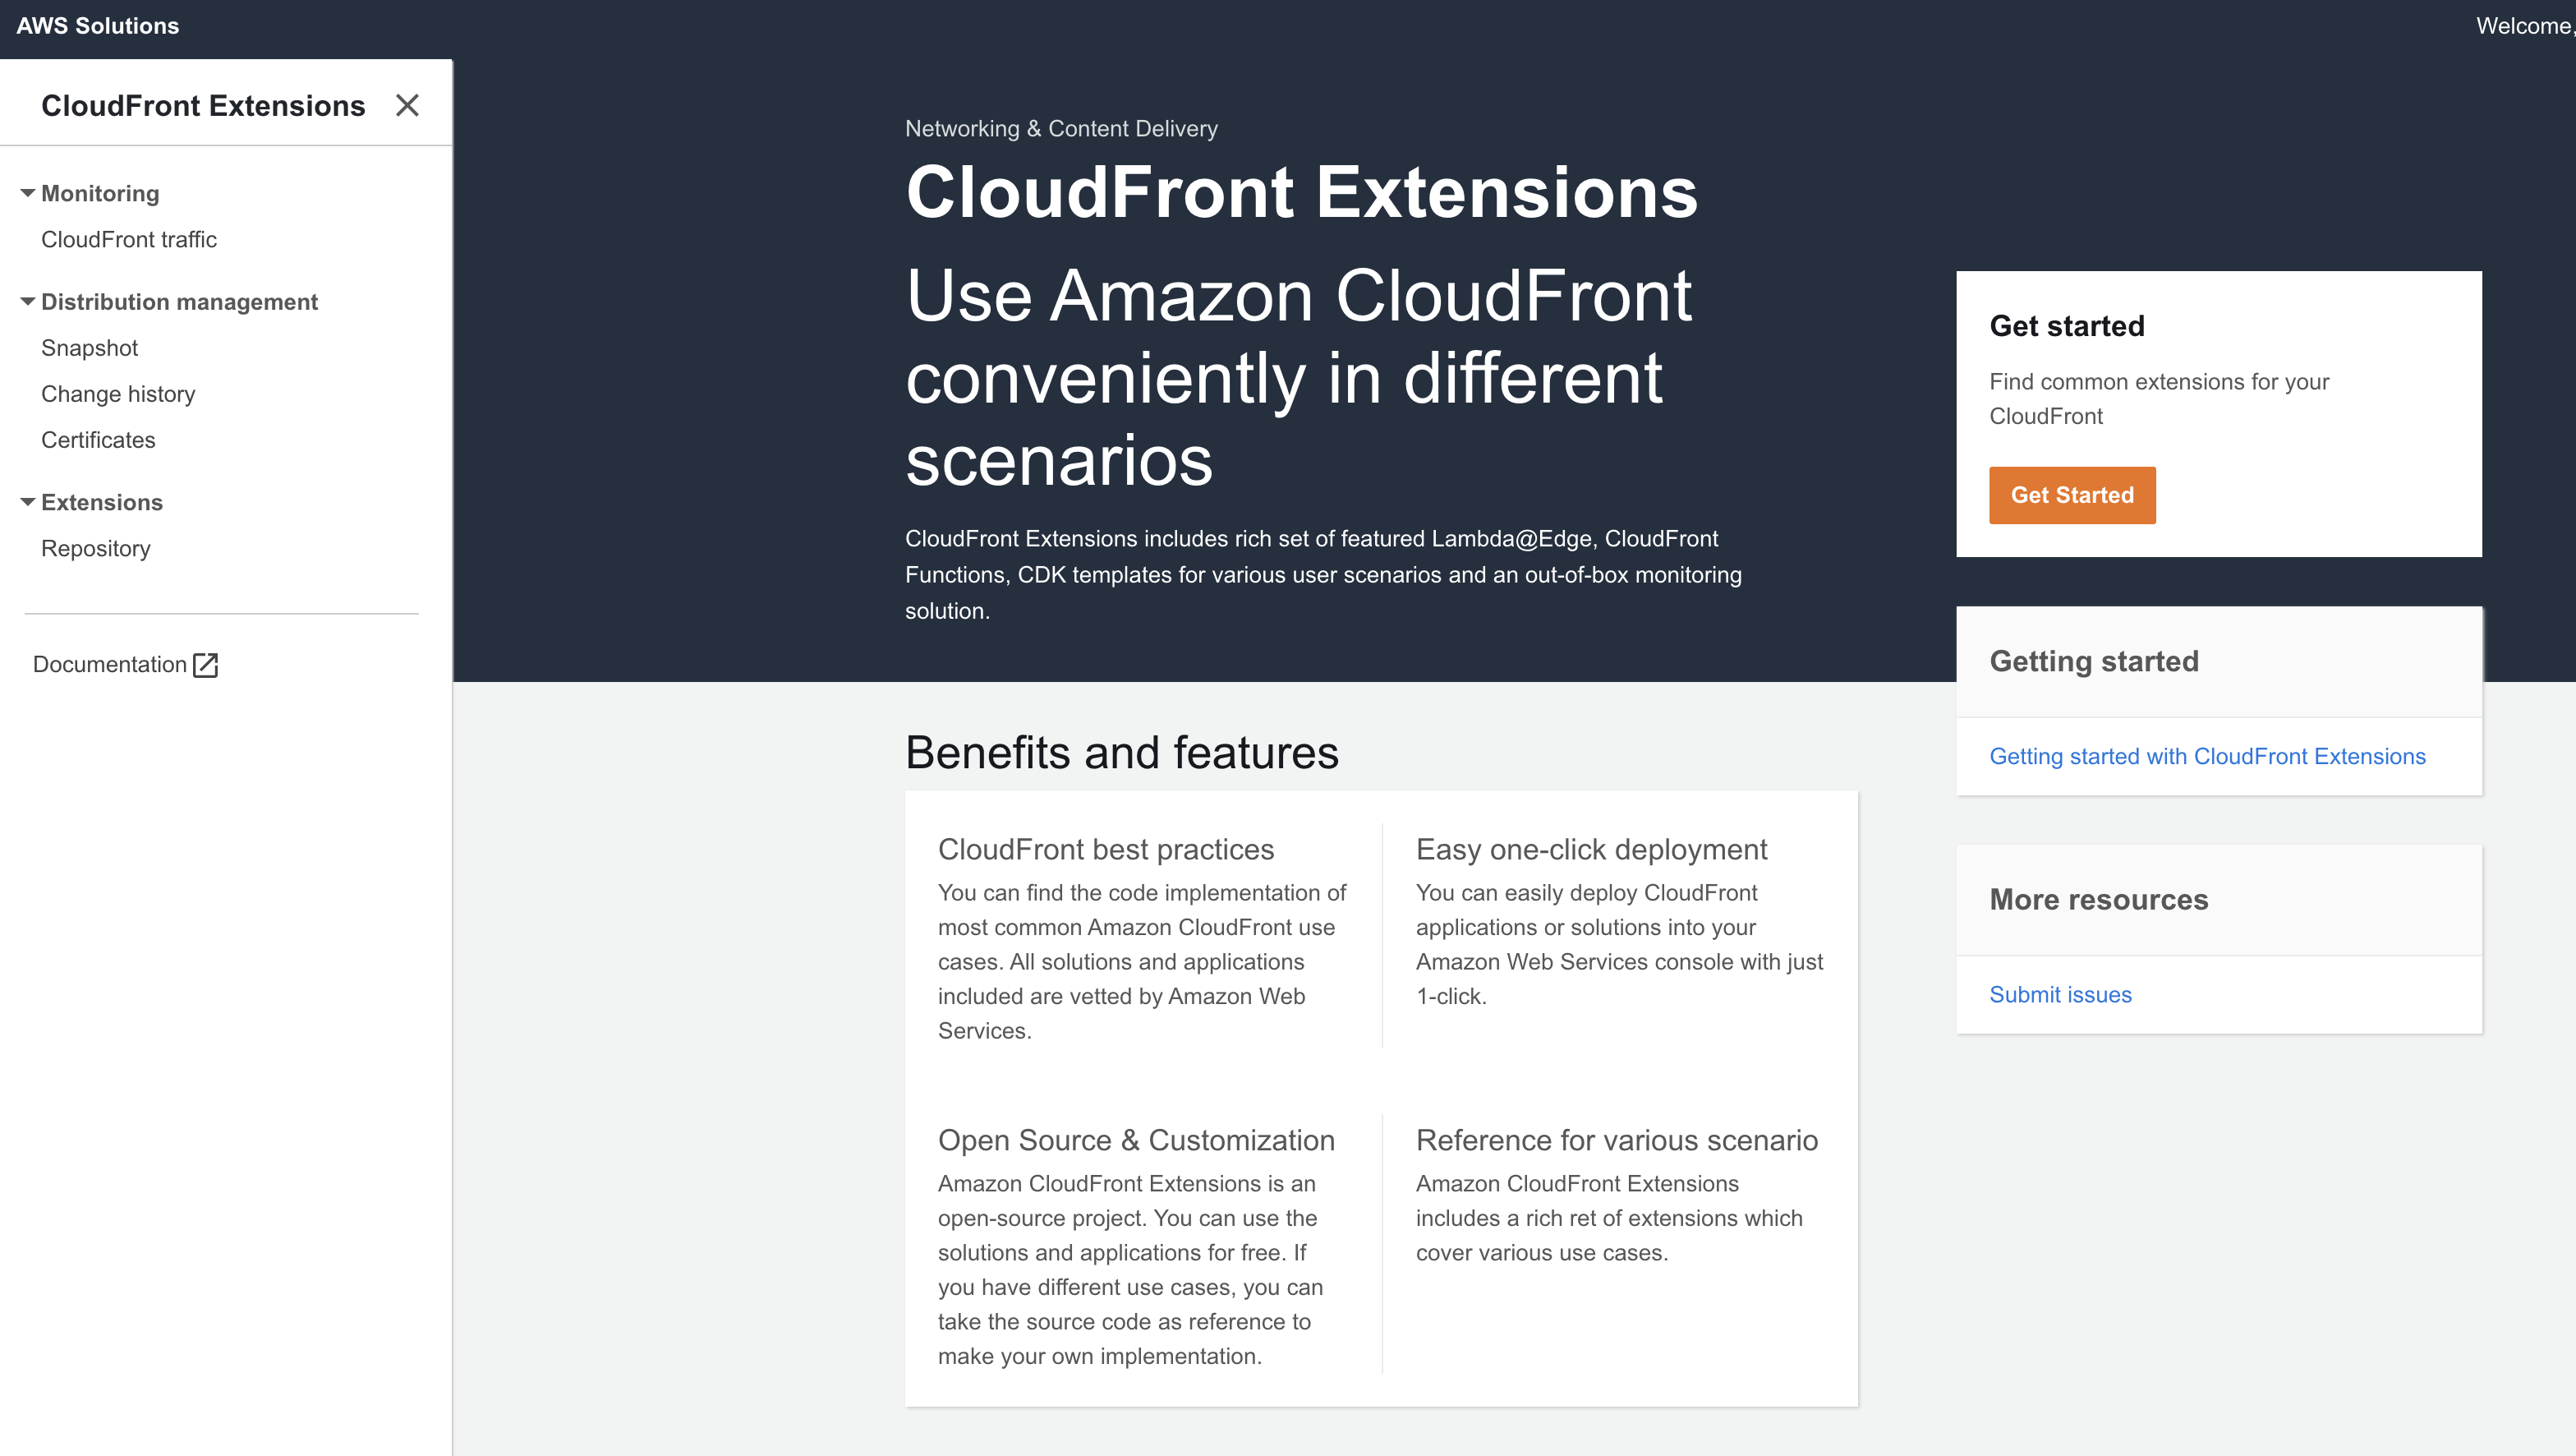
Open CloudFront Extensions Console
This solution will deploy a CloudFront distribution that hosts CloudFront Extensions console.
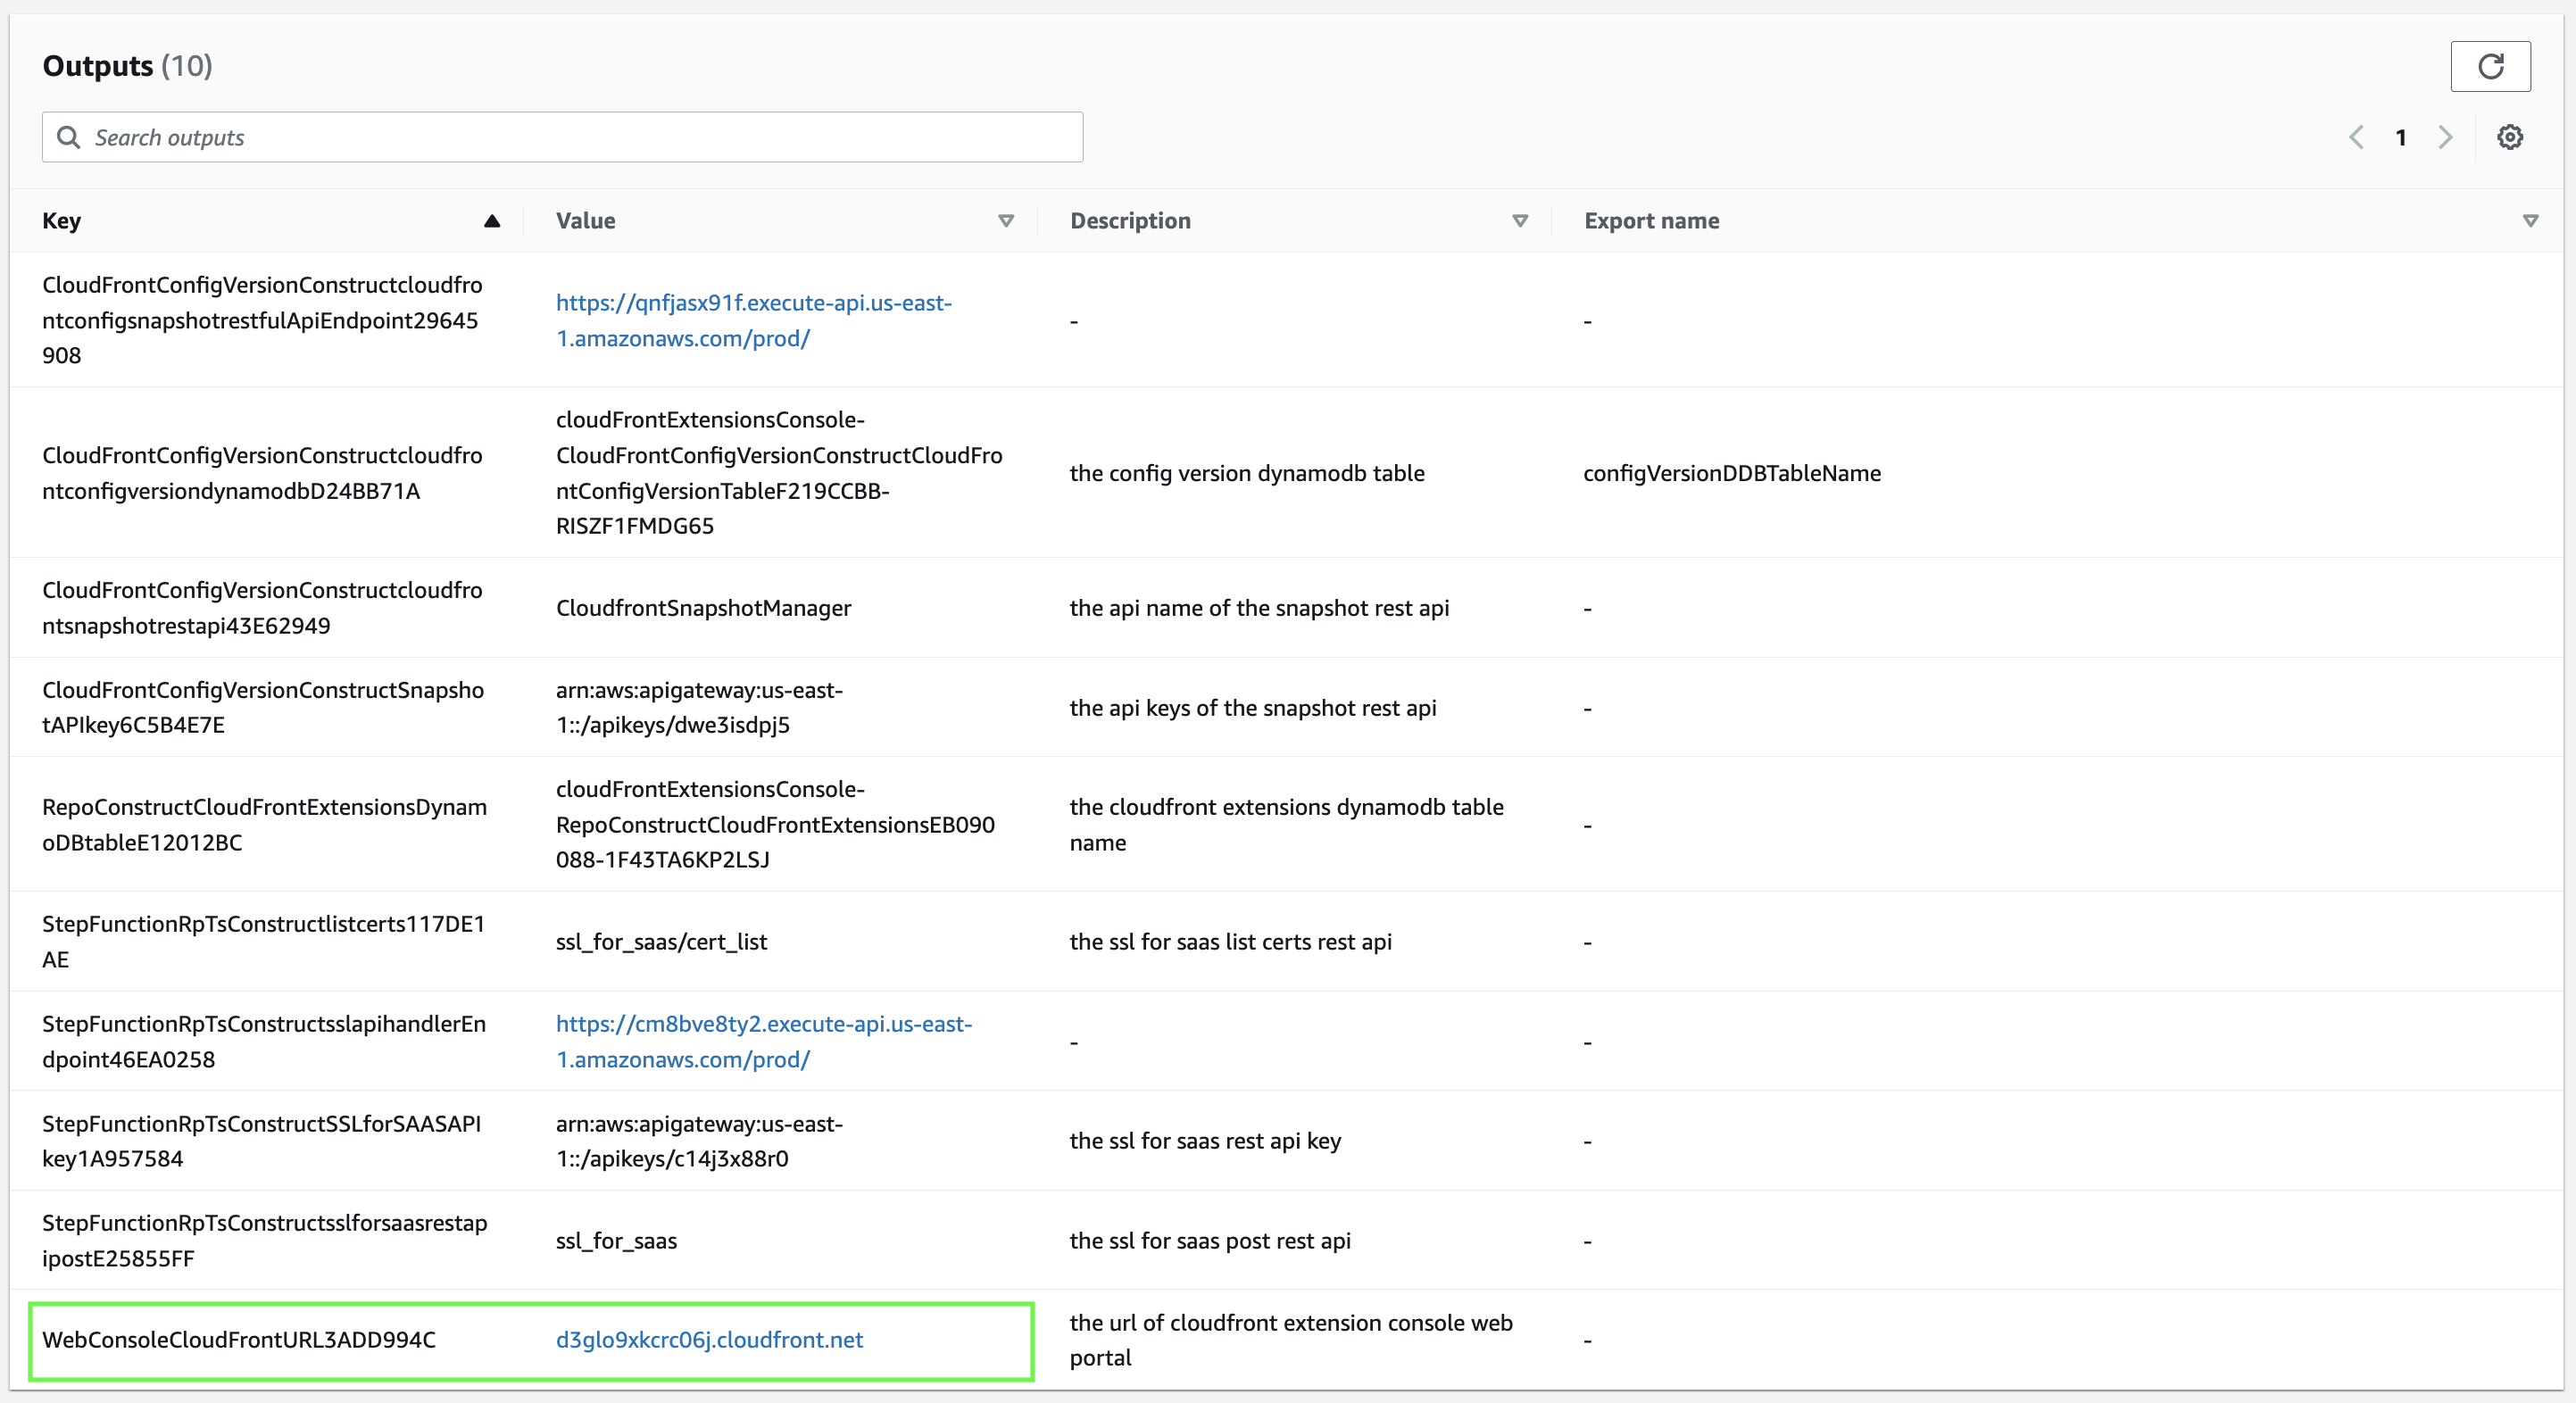
Choose the Outputs tab of cloudFrontExtensionsConsole stack.
You will find CloudFront Extensions console URL in WebConsoleCloudFrontURL. Open the url in the browser.
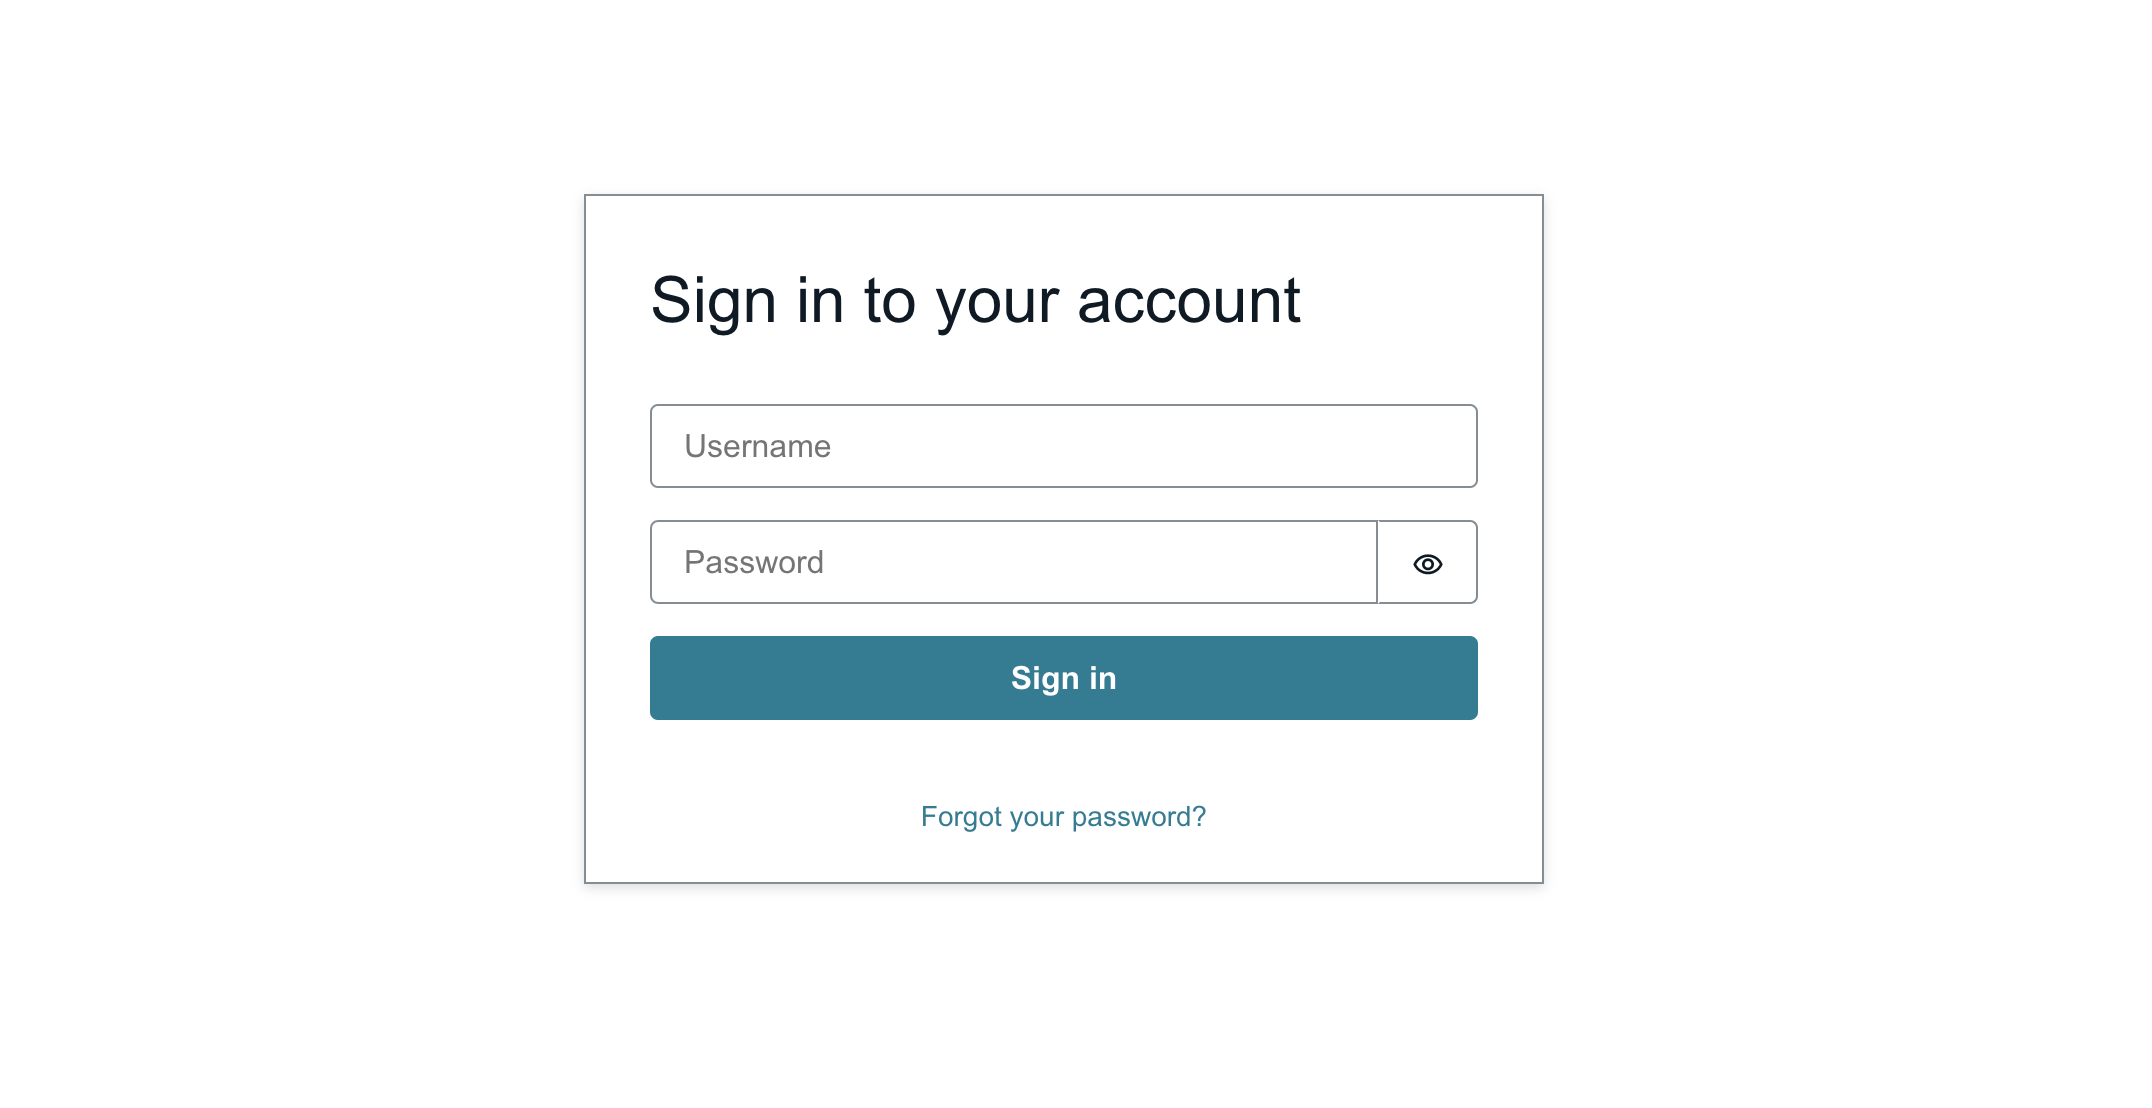
In the sign-in page, type in your user name and password (Email is set in Initial User Name, password is set in Initial User Password when you deploy the stack). Choose Sign in.
Now you can see the CloudFront Extensions Console, keep it open since we will do further steps on it later.