Create SSL certificate
The sample website can be accessed by inputing xxx.cloudfront.net in the browser currently. It is not an user-friendly name and you would like to give the website a meaningful name such as www.amazon.com. In this section, you will associate a domain name with the sample website. After association, you can access the sample website by the domain name.
You can use CloudFront Extensions to automatically create or import SSL Certificates and associate them to new CloudFront distributions. The solution provides two kinds of jobs: Create Certificates Job and Import Certificate Job. You can use them on web console or via API calls.
Follow below steps to create a SSL certificate:
Navigate to CloudFront Extensions console (you can find the link in the Outputs tab of cloudFrontExtensionsConsole stack).
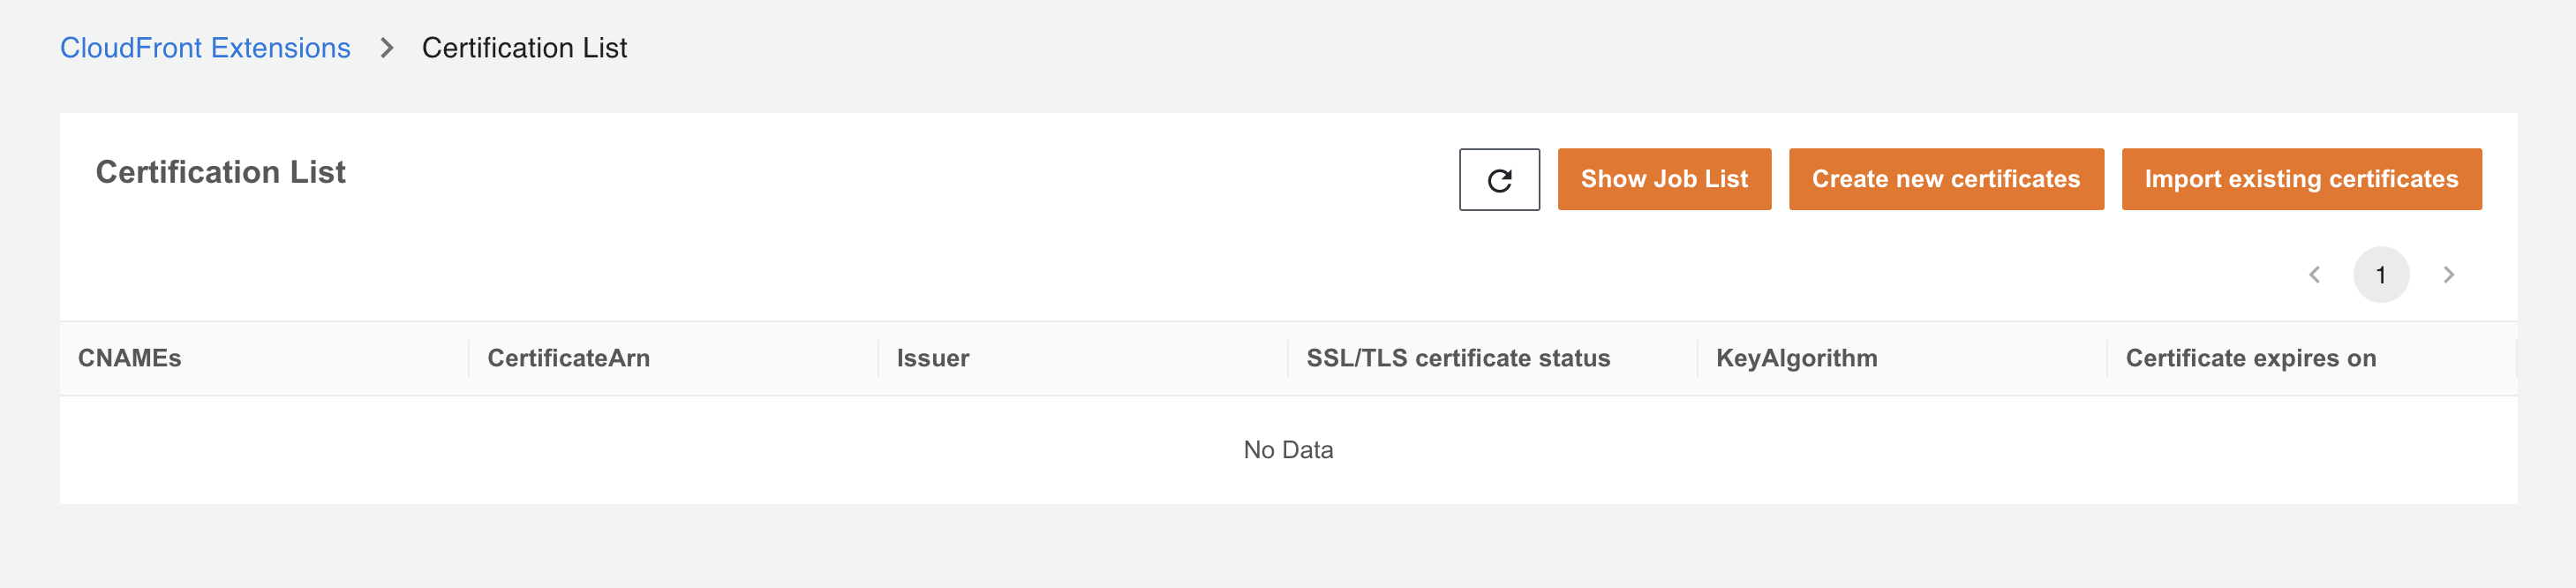
In the navigation panel, under Distribution management, choose Certificates.
Choose Create New Certificate.
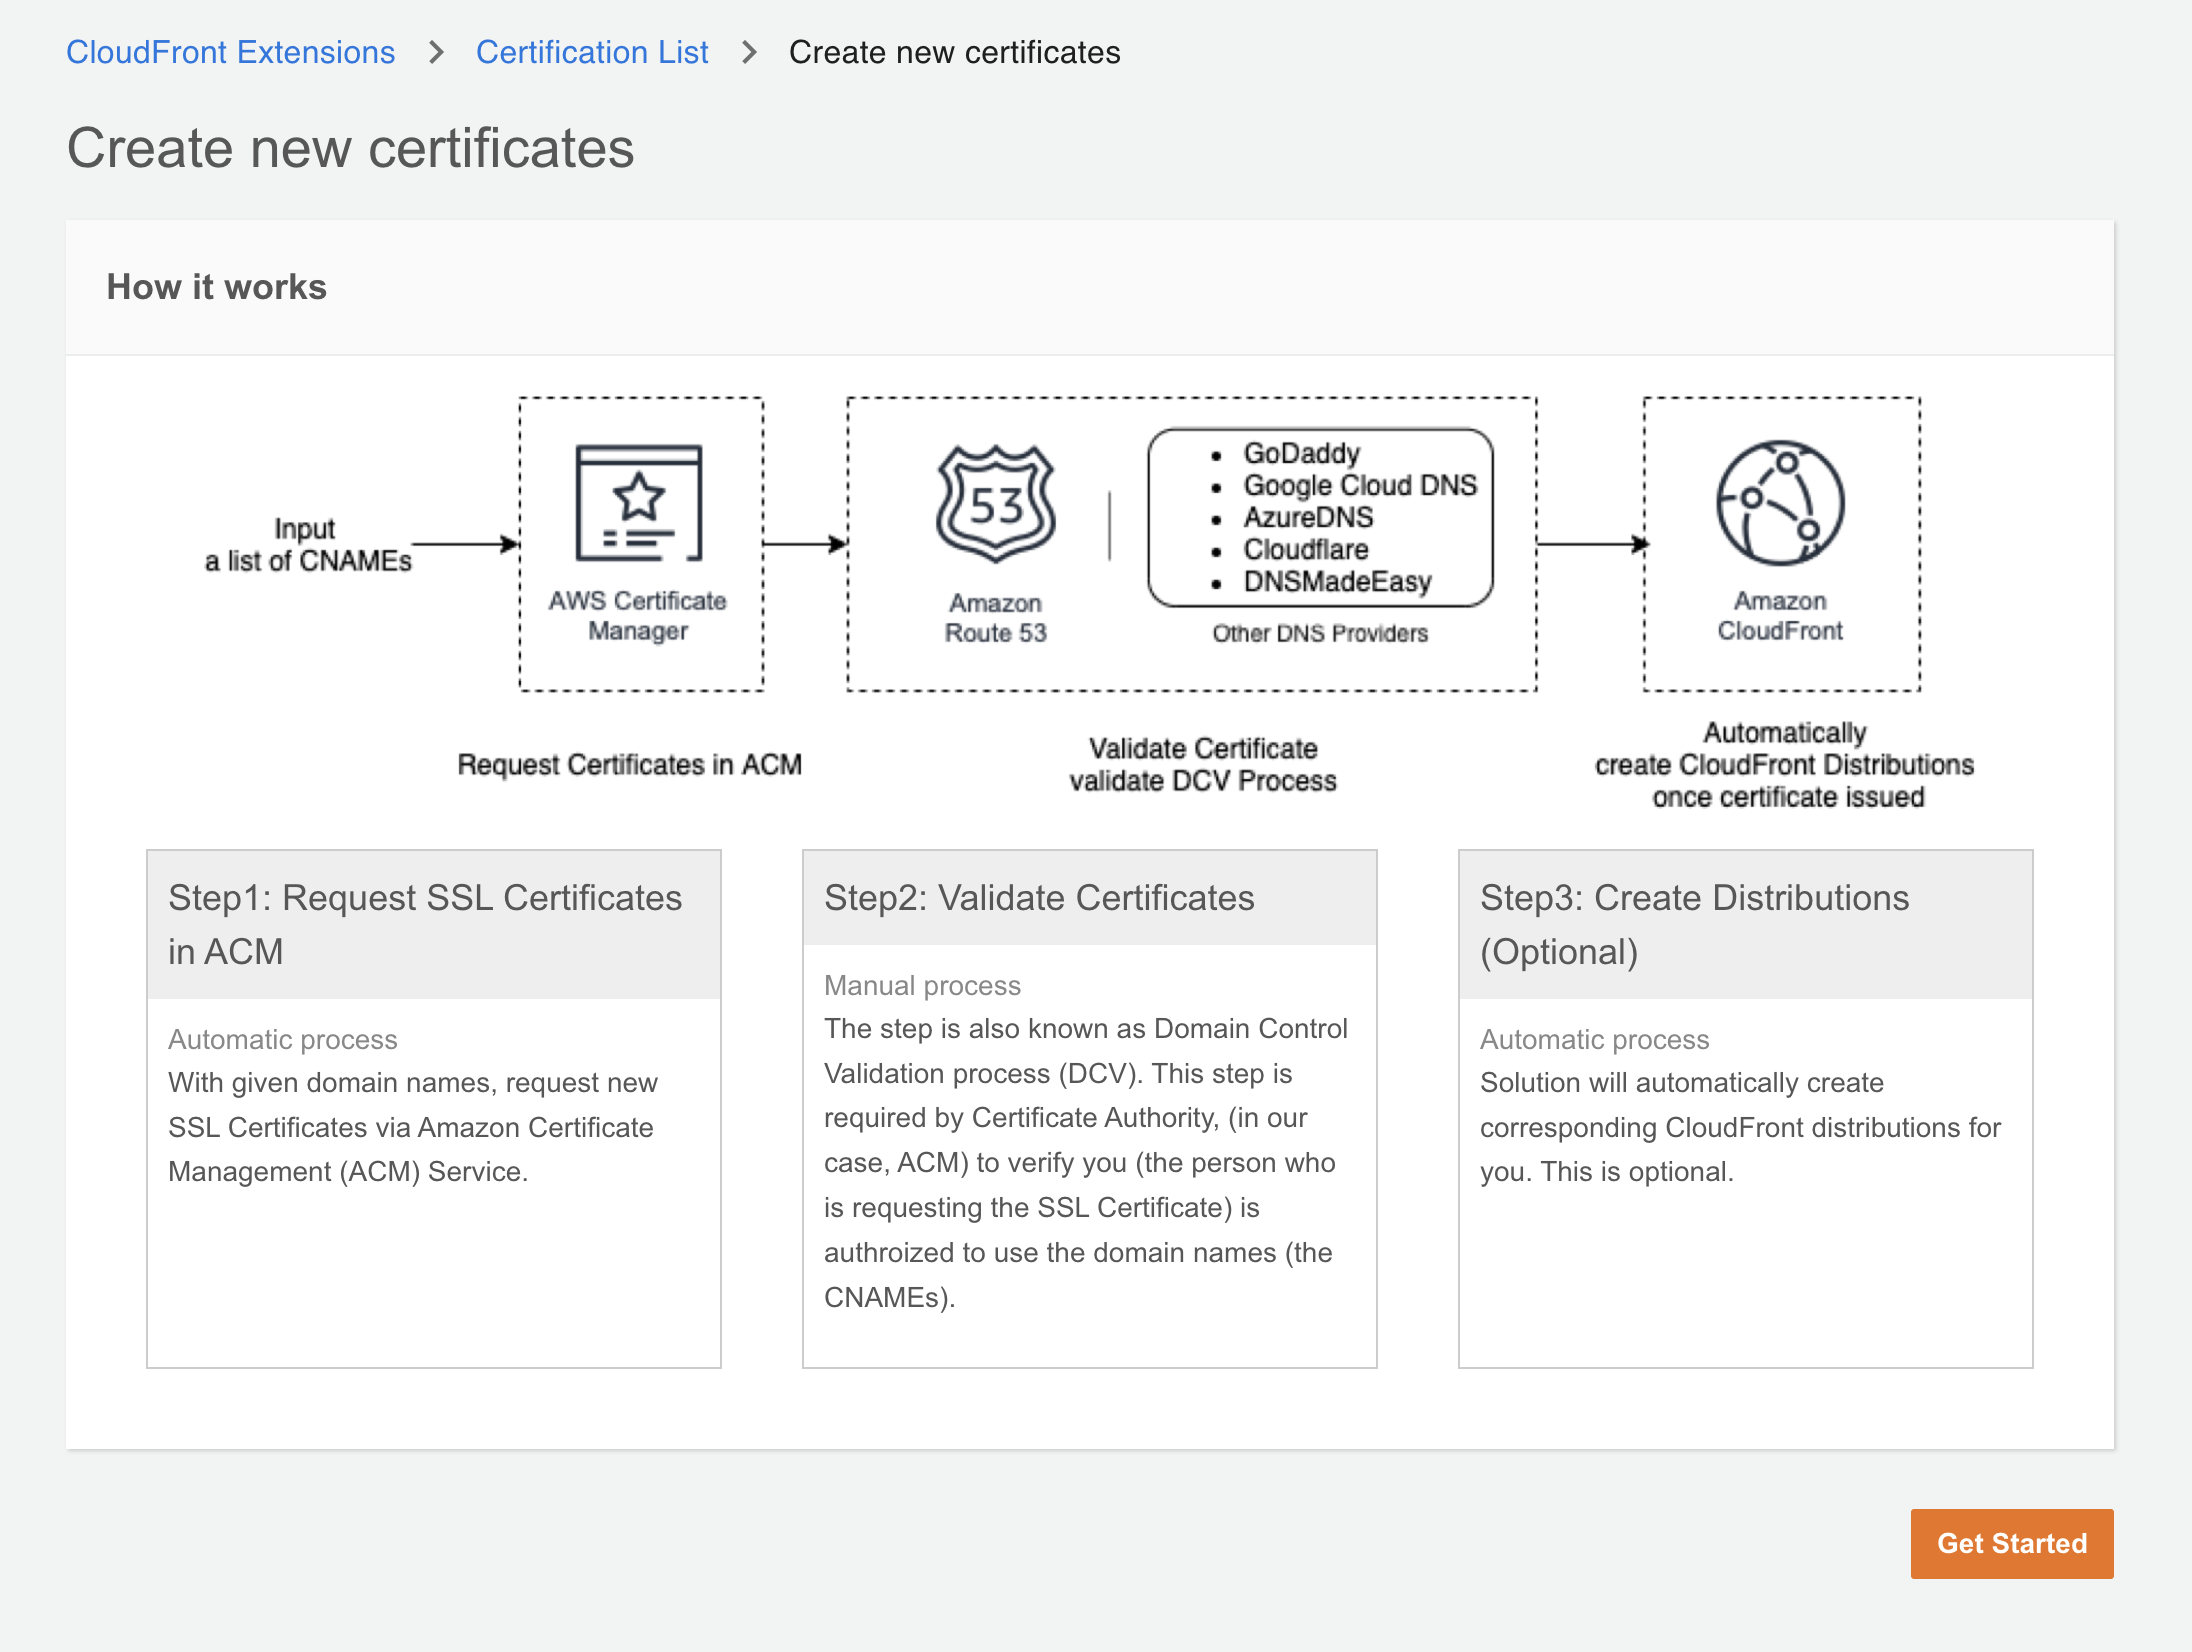
Choose Get Started.
Enter a domain name (CName such as www.amazon.com) for the certificate.
Choose Do not create distributions since you already have a distribution for sample website.
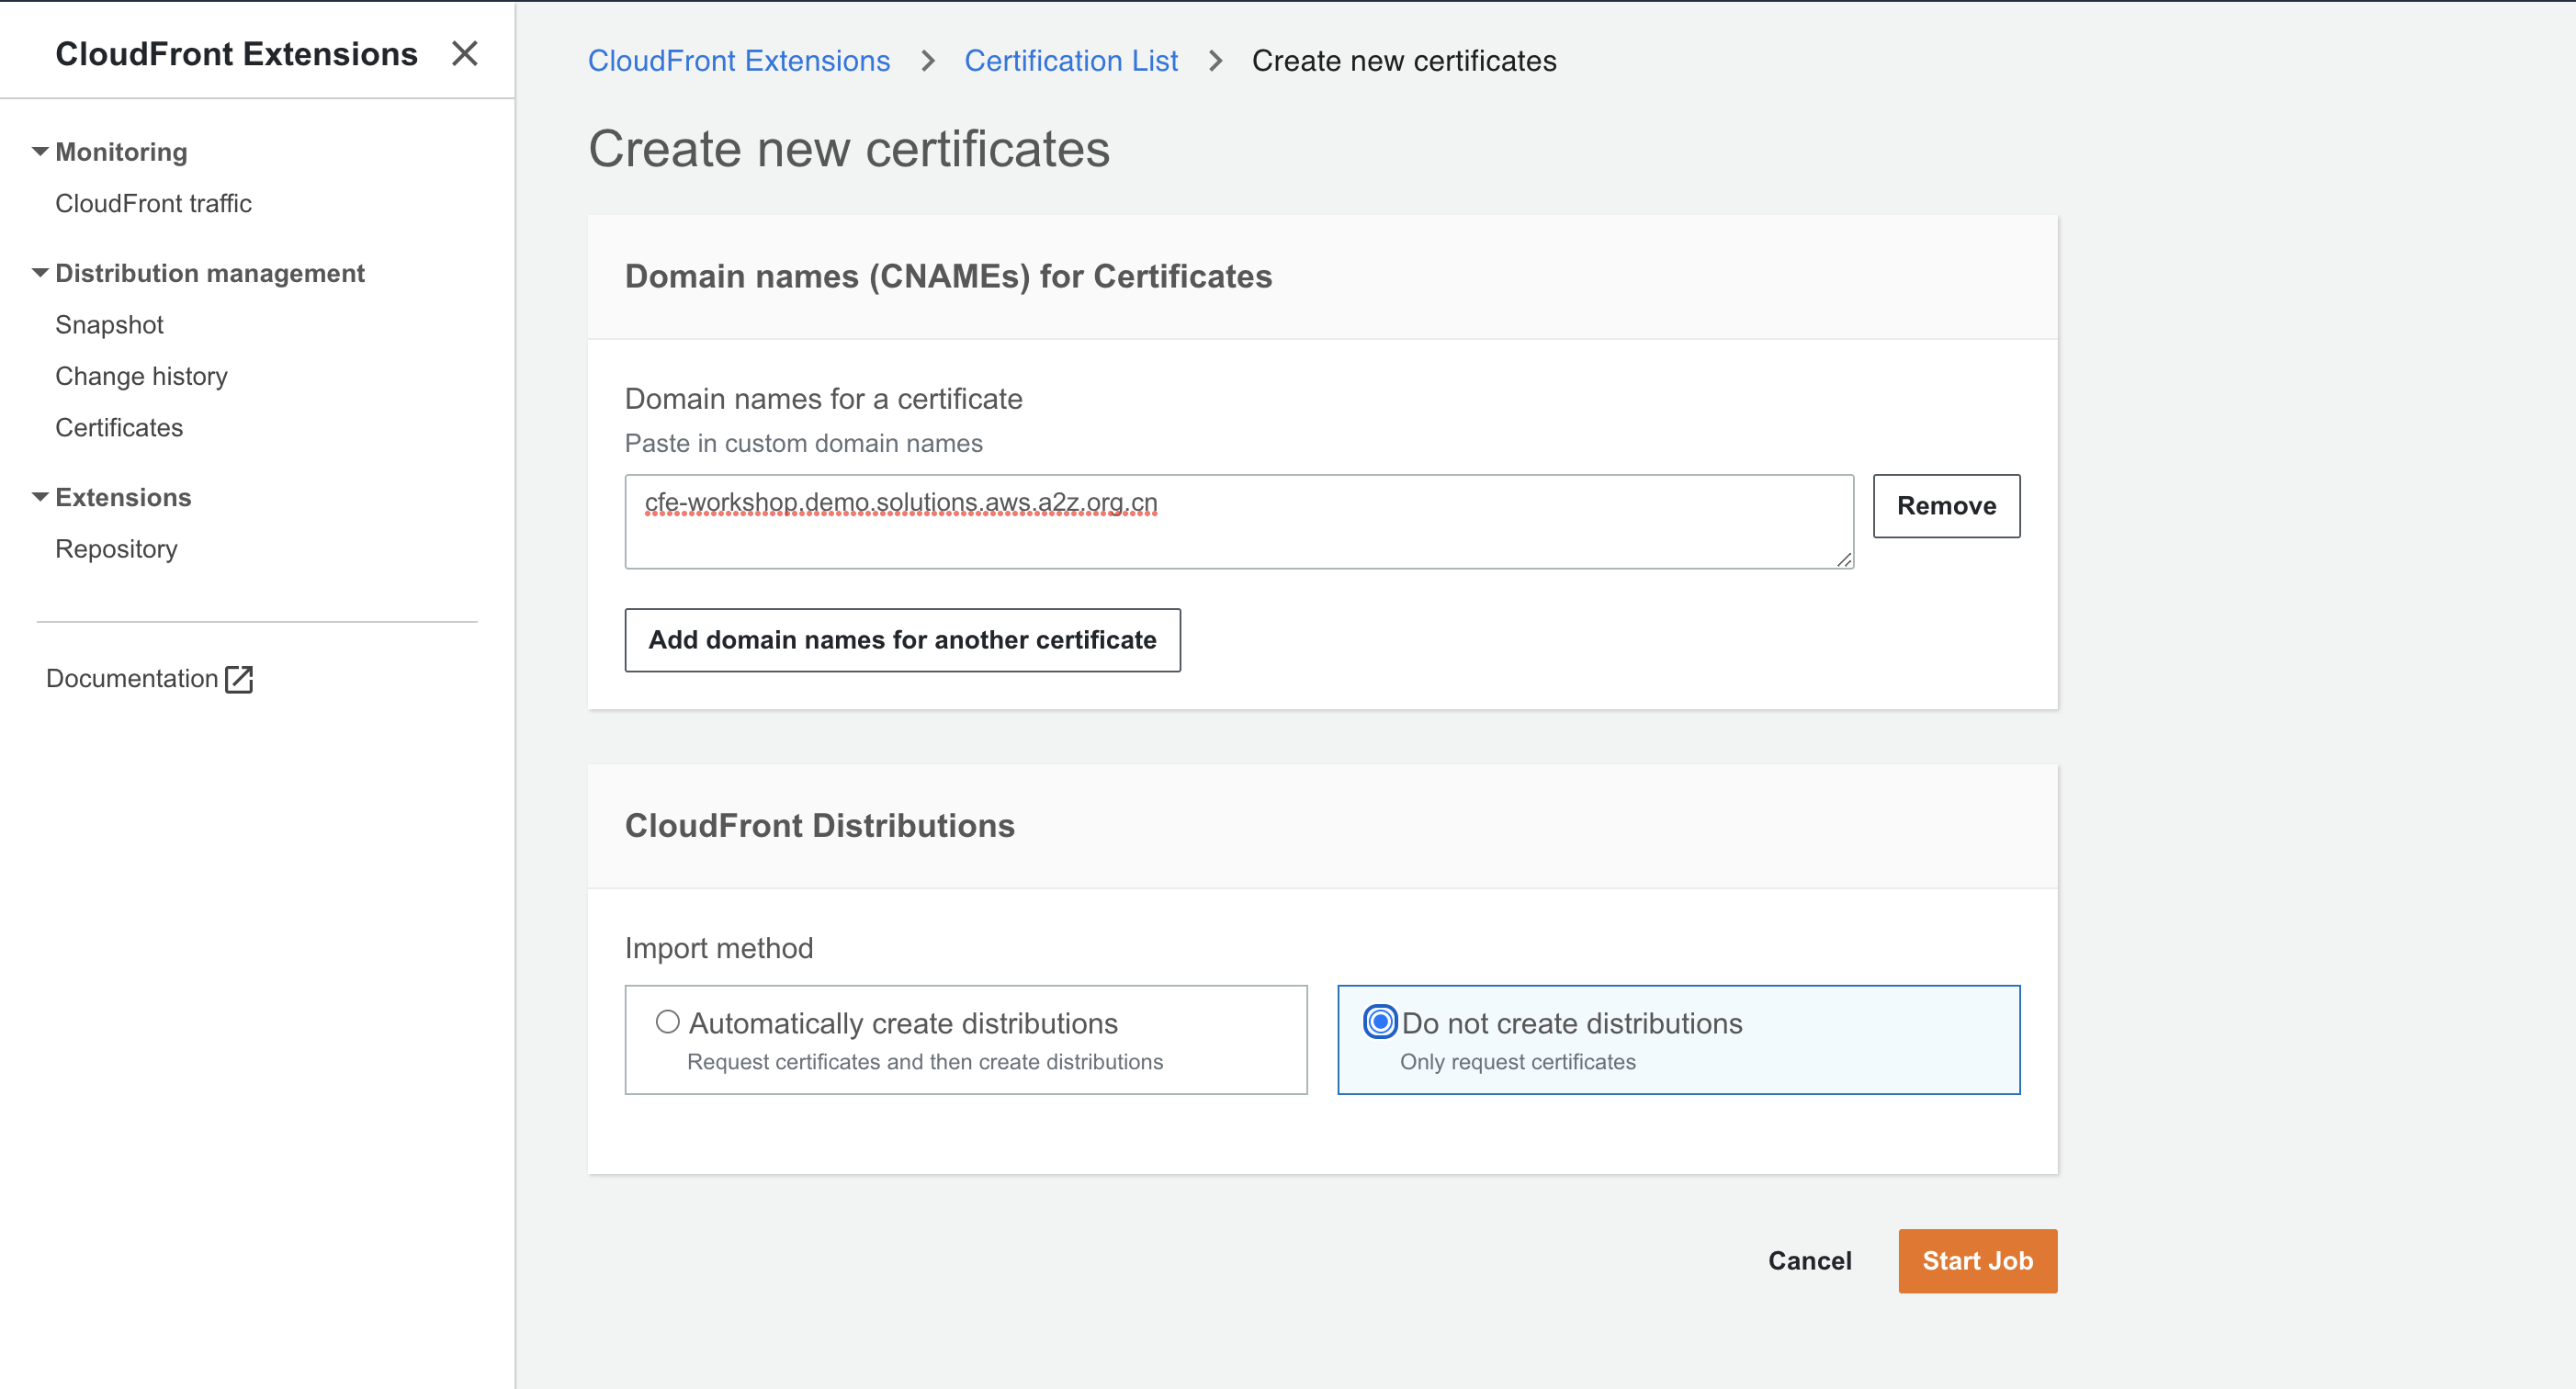
Click Start job.
Verify the generated input parameters, enter confirm in the input box and click Apply button.
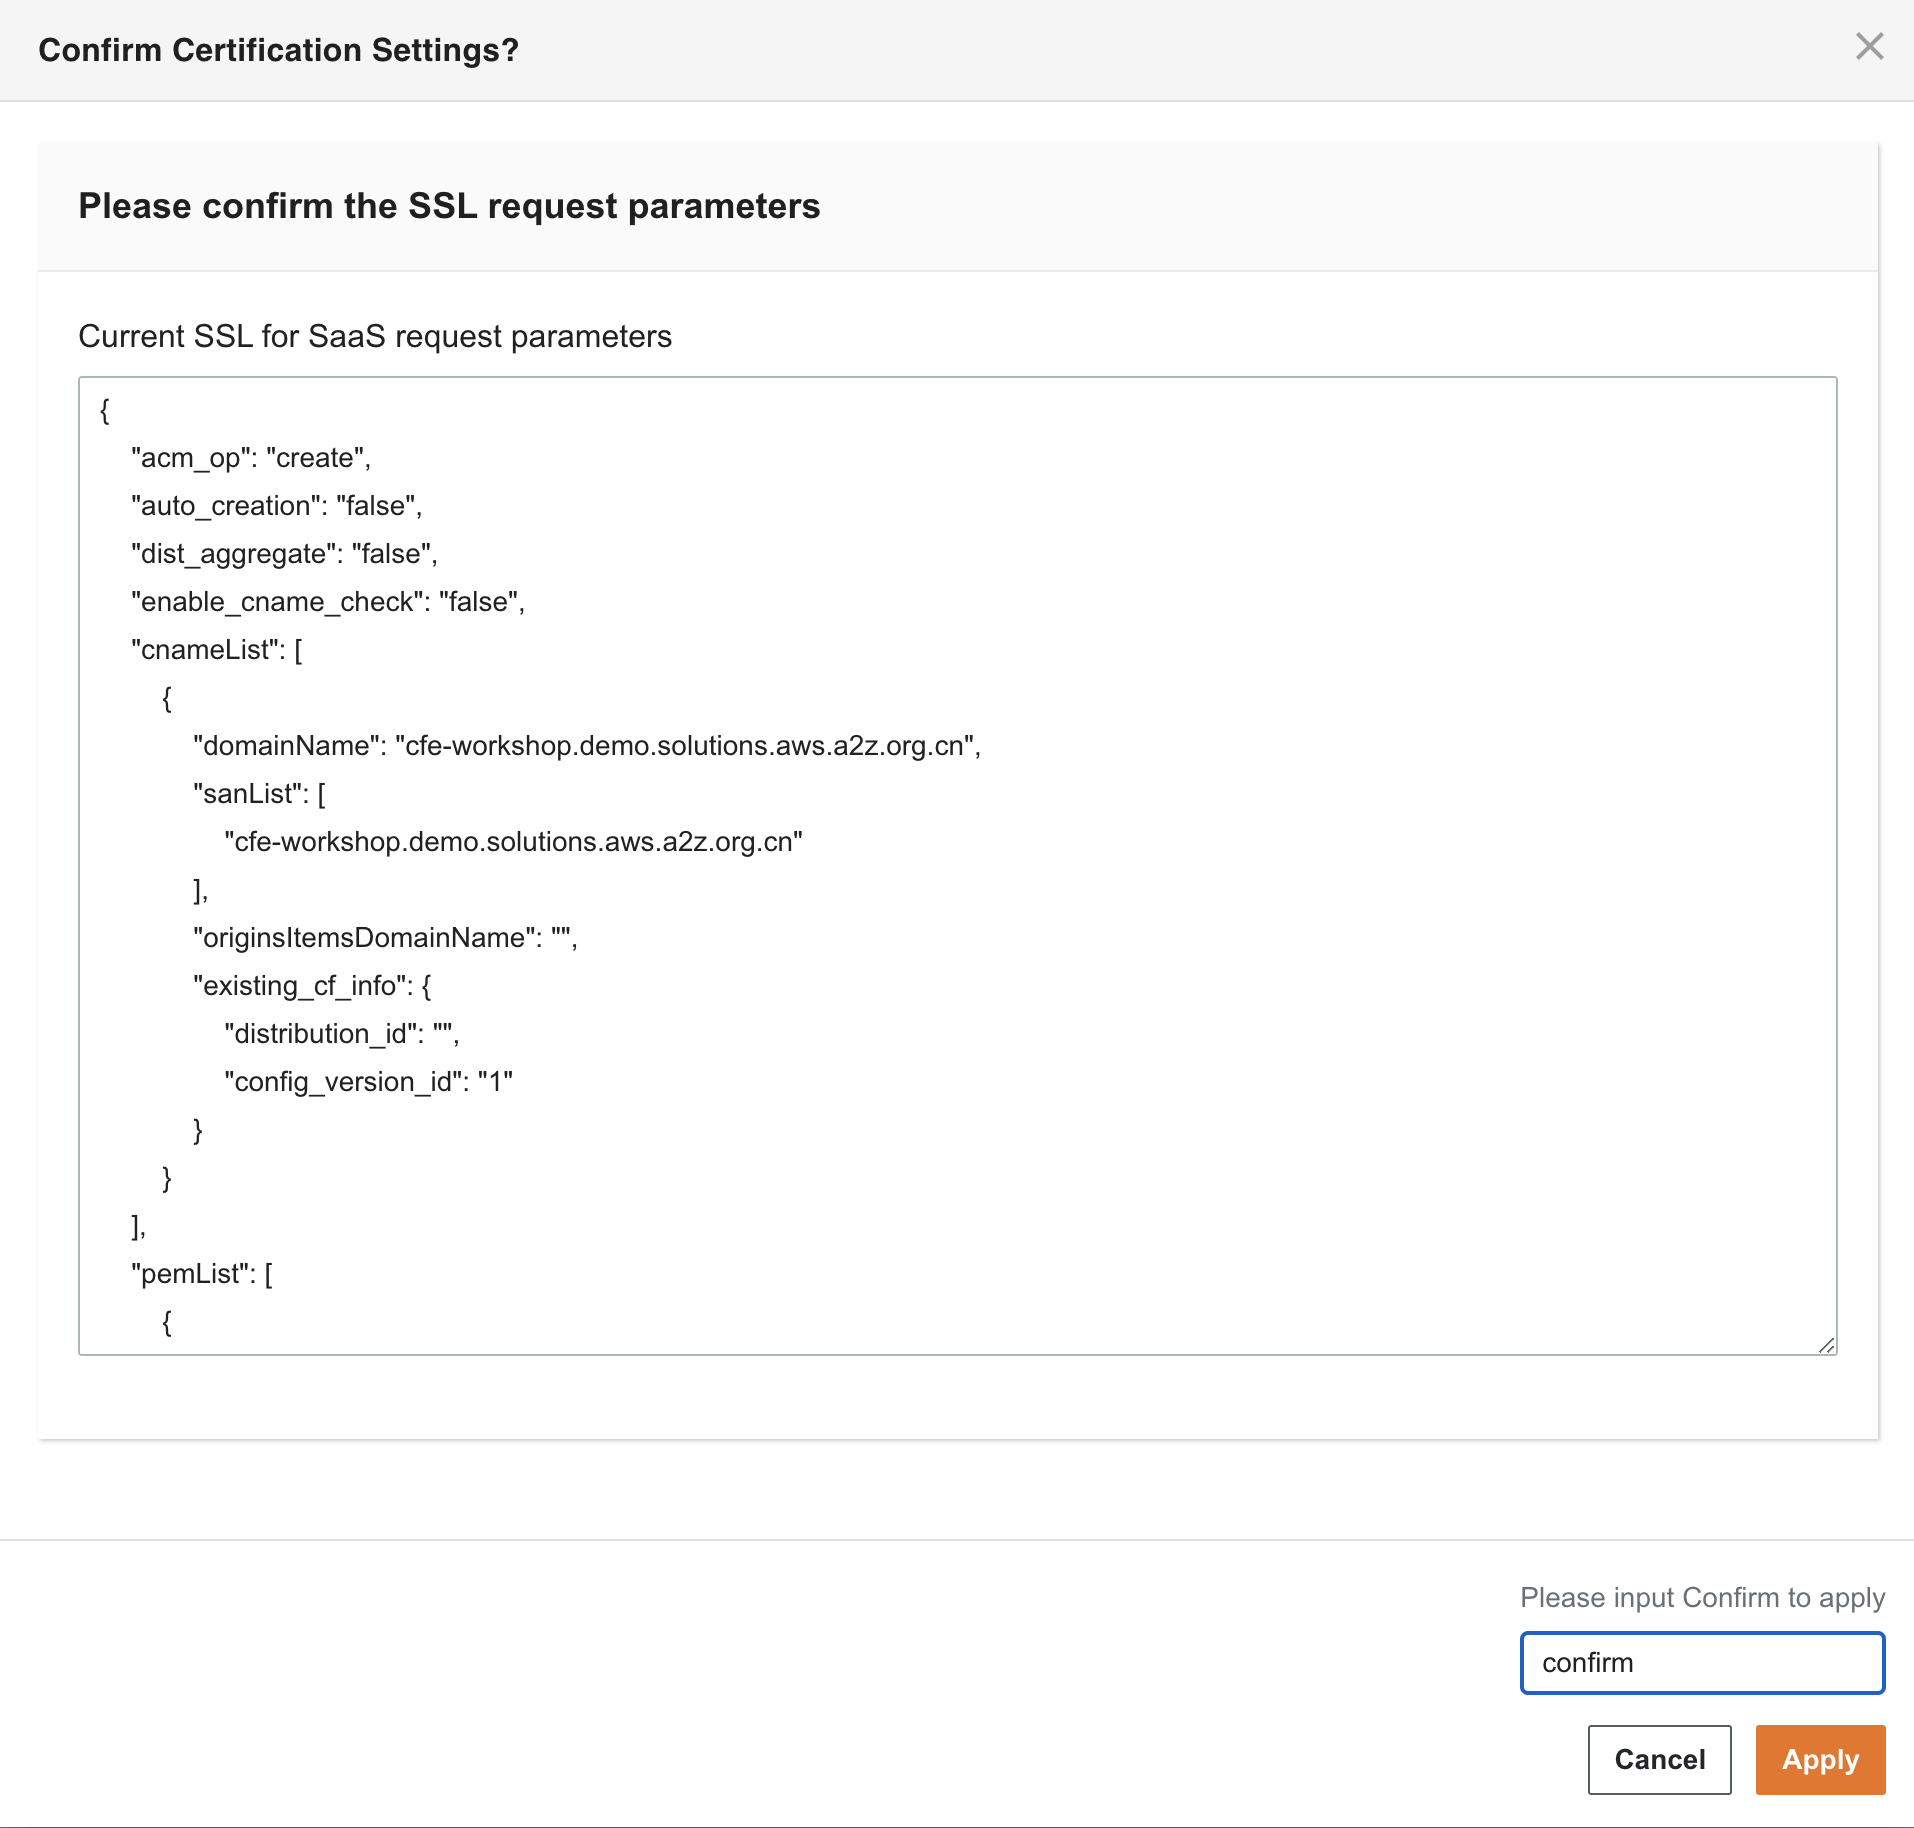
The certificate is in PENDING_VALIDATION status.
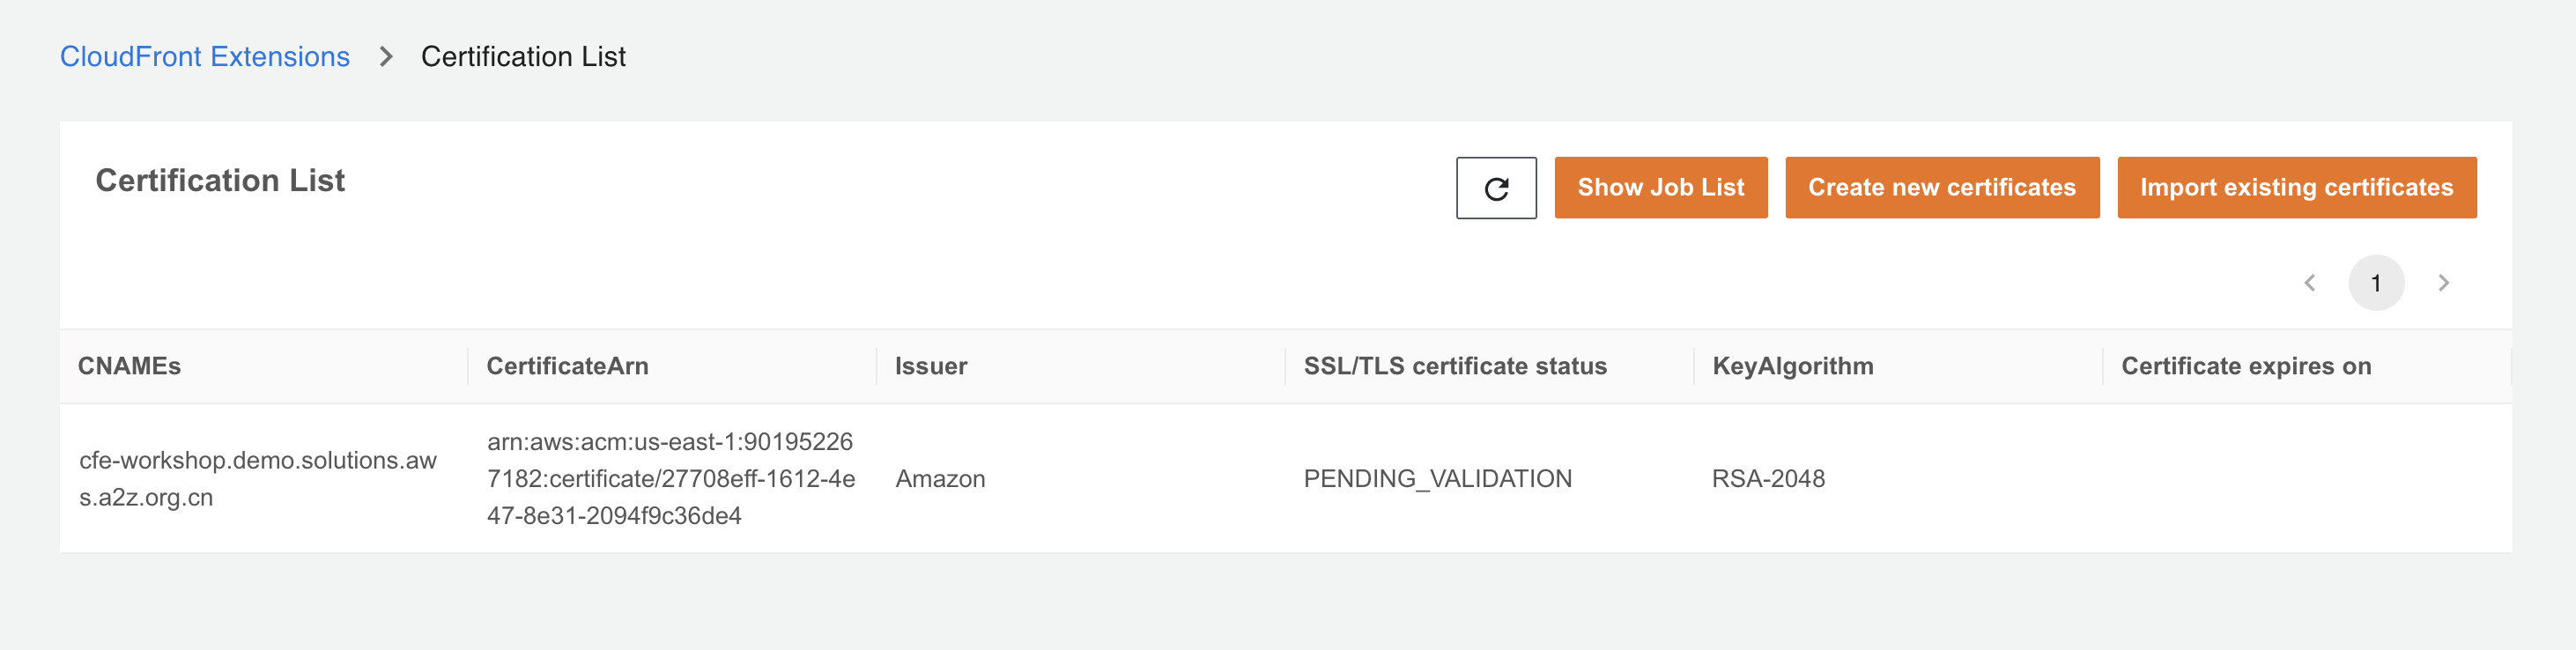
Wait about one minute, you will receive an email with CName value. (You can also check the status in Distribution management > Certificates on CloudFront Extensions console.)
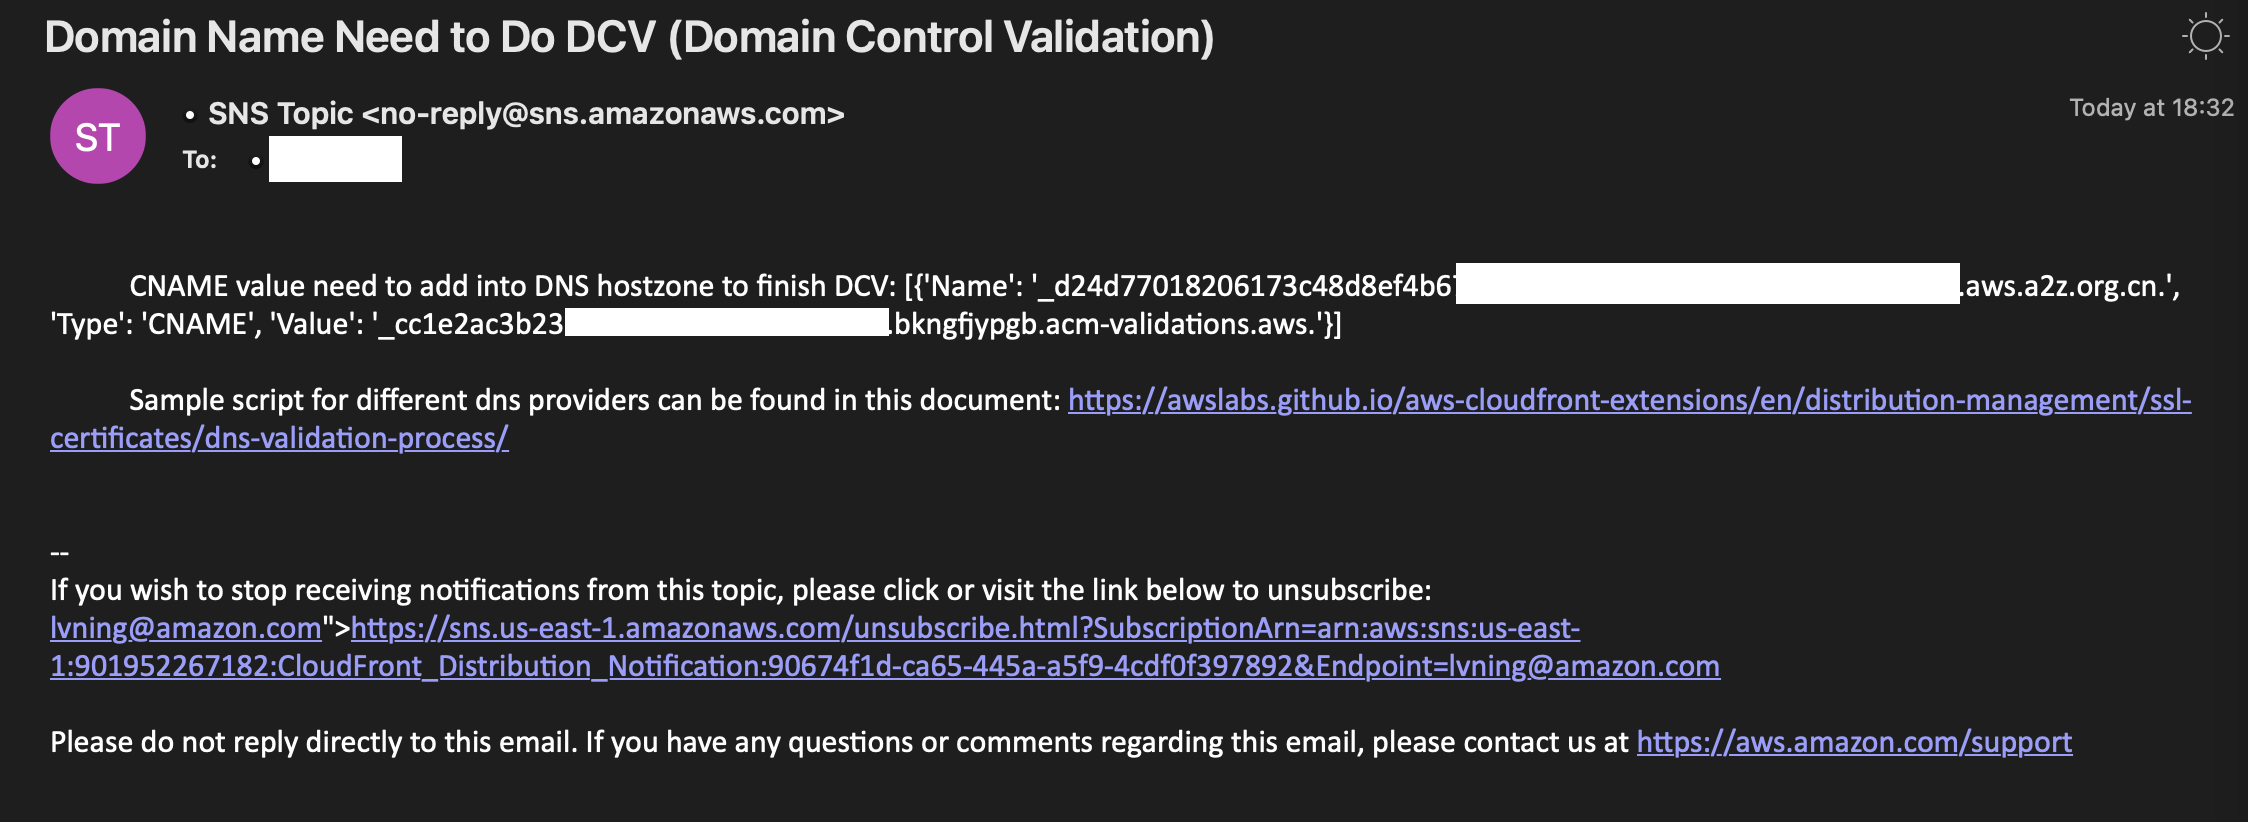
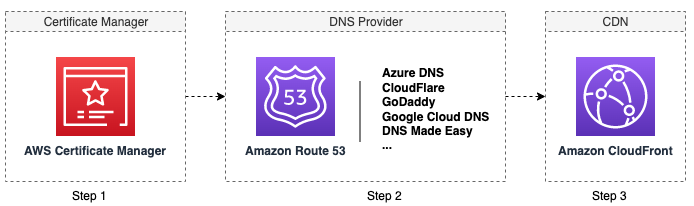
Go to your DNS service and add a new record with the value in the email, eg. if your domain name in step 5 is registered in Route 53, then go to Route 53 console, if your domain name is registered in GoDaddy, then go to GoDaddy console. In this example, the domain name is created in Route 53.
(Skip step 12~17 if your domain name is not created in Route 53) Sign in to the AWS Management Console and access the Route 53 console.
In the navigation pane, choose Hosted zones.
On the Hosted zones page, choose the name of the hosted zone that you want to create records in.
Choose Create record.
Choose type as CNAME, enter the name and value in the email.
Choose Create record.
Wait about 3 minutes, go to CloudFront Extensions console and click refresh button in Certificate List page. You will the certificate status update to ISSUED.
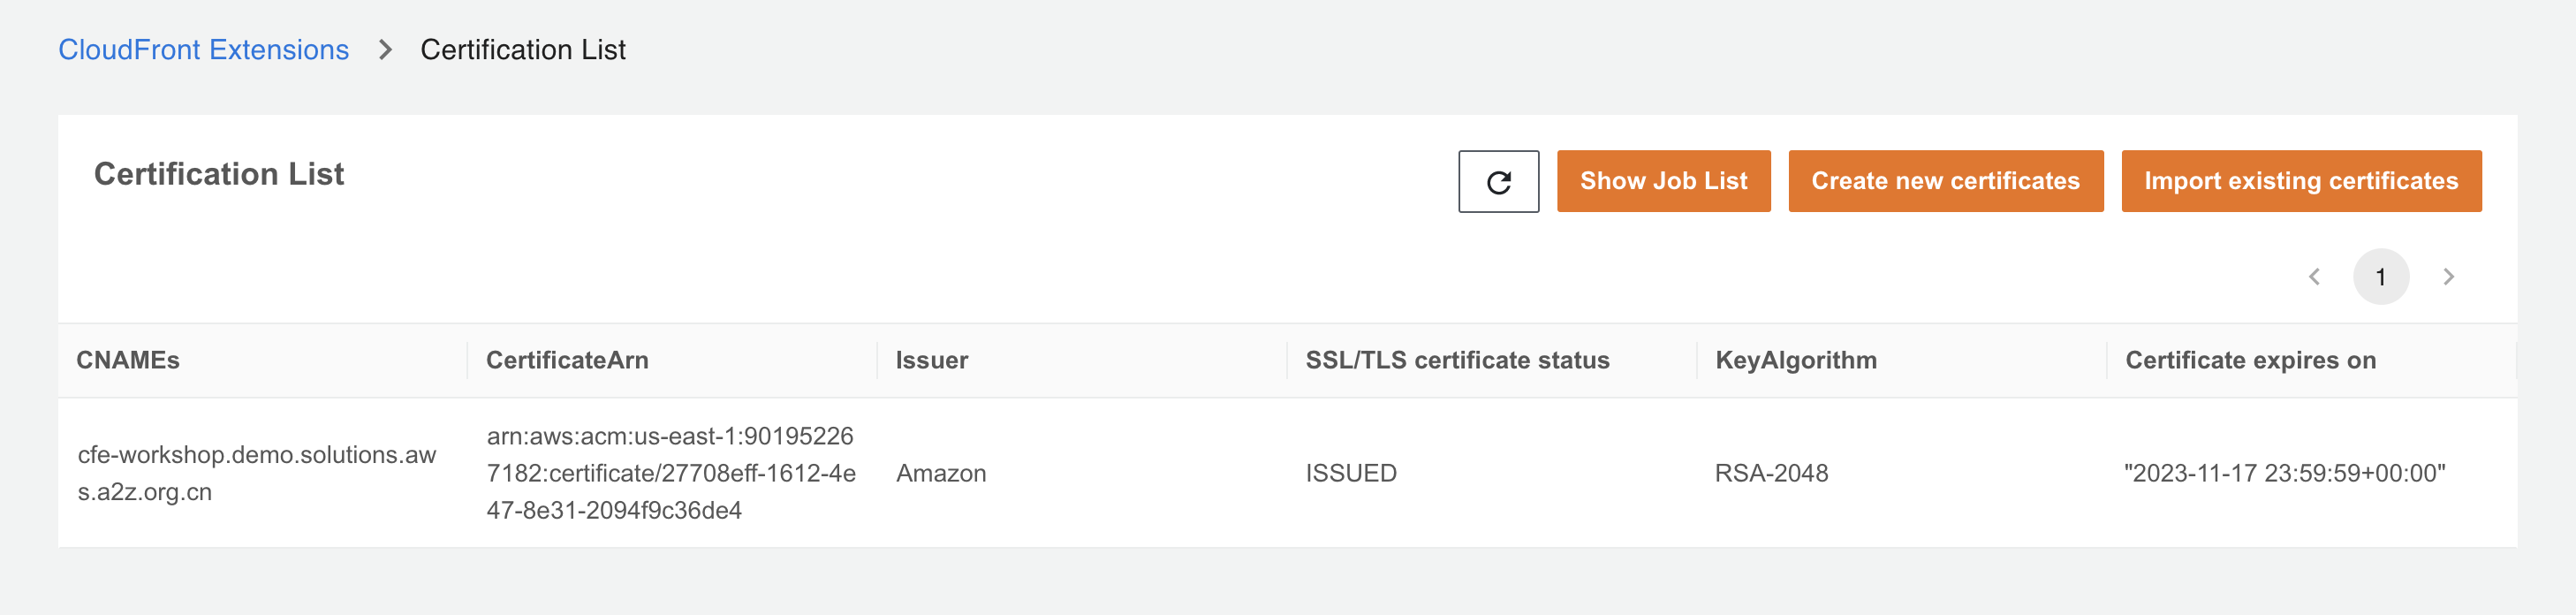
Now the SSL certicate is created and issued, we will associate the SSL certificate to sample website.
Associate SSL certificate to CloudFront
Go to CloudFront console.
Choose the distribution created in CFExtSampleWorkshop stack (refer to DistributionID in the Outputs tab).
In General tab, under Settings, click Edit button.

Under Alternate domain name (CNAME), click Add item and type in your domain name.
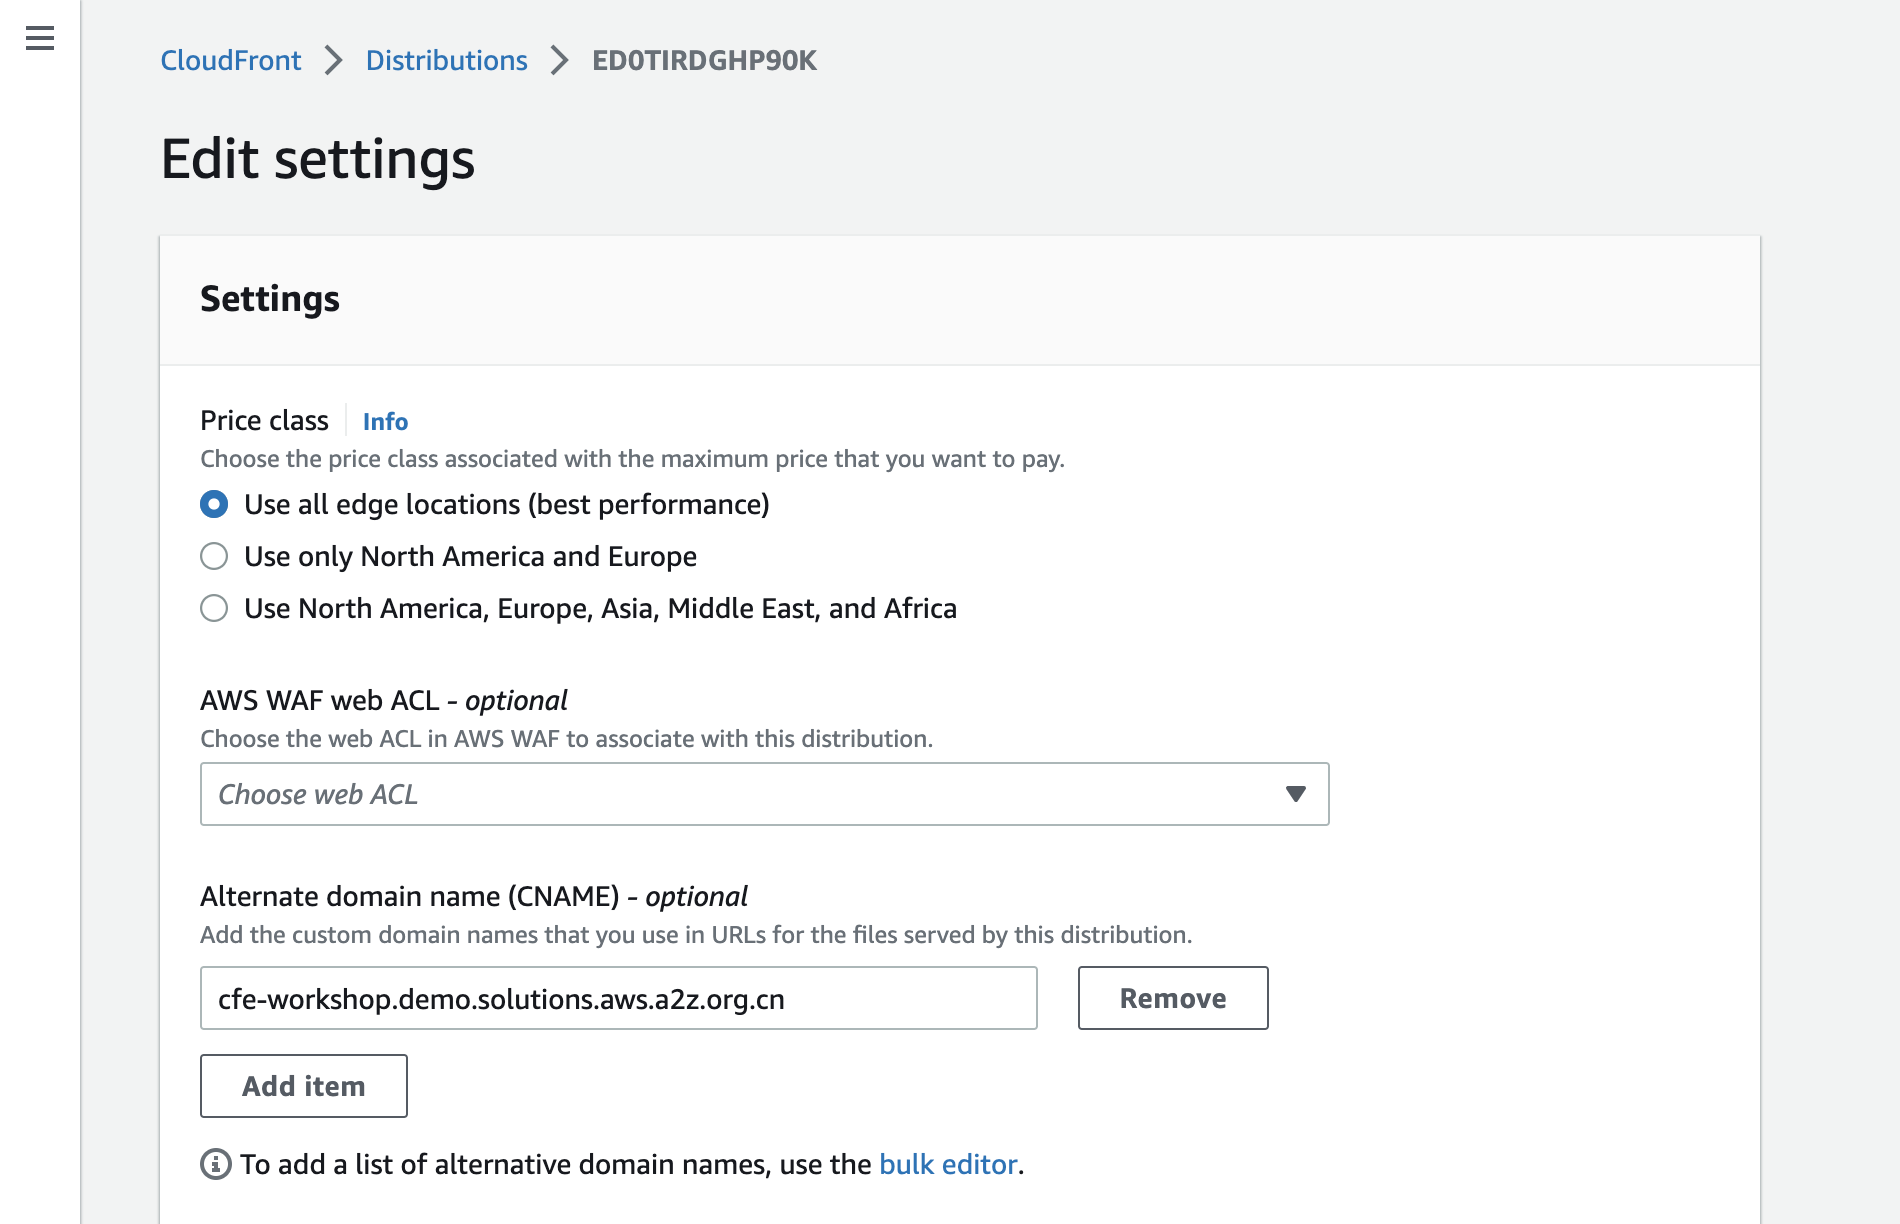
Under Custom SSL certificate, choose the ACM certificate created by CloudFront Extensions.

Choose Save changes.
Wait until the distribution Last modified field changed from Deploying to a specific date time.

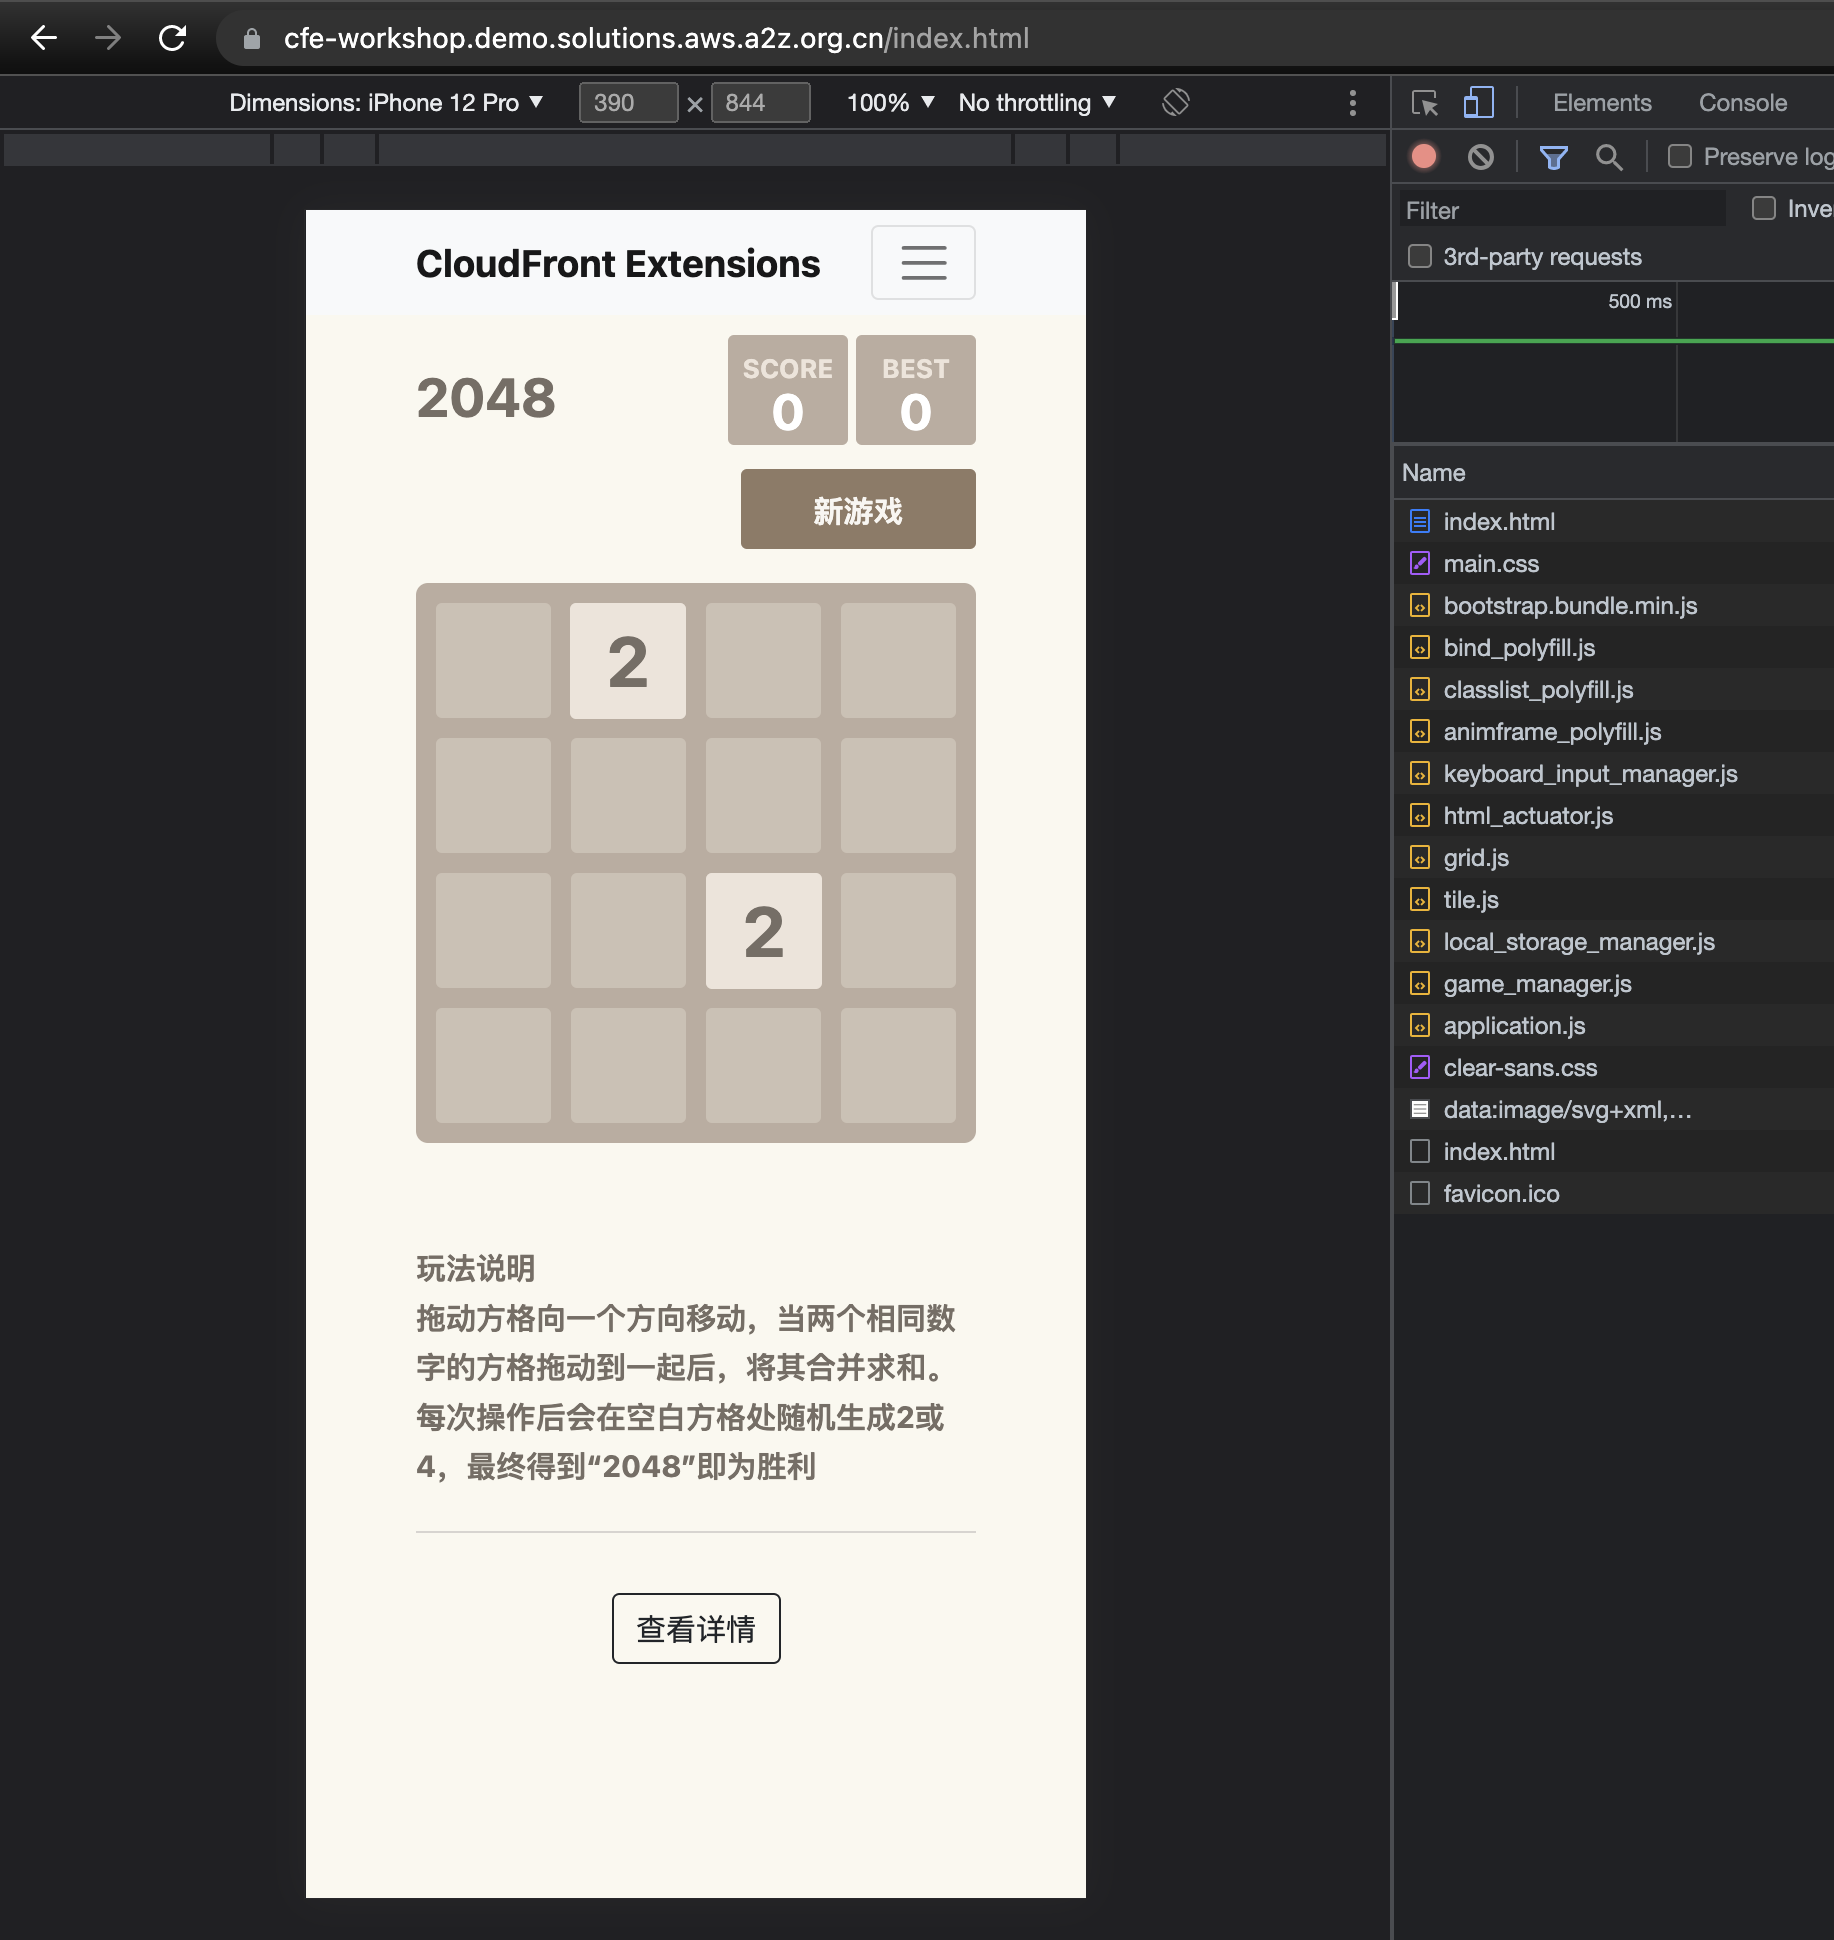
The domain name is associated with the sample website, access the sample website by the domain name. eg. https://cfe-workshop.demo.solutions.aws.a2z.org.cn/index.html. Users can access your website by the domain name other than CloudFront domain name (xxx.cloudfront.net).
Workflow
When you start a Create Certificates Job, the solution starts a workflow in AWS Step Functions that does the following:
Create certificates in ACM: The solution will automatically create all ACM based on input. After all SSL Certificates were created, the solution will automatically sent SNS message to the designated email address (depending on subscription). After this step, the domain owners are expected to complete DNS validation process.
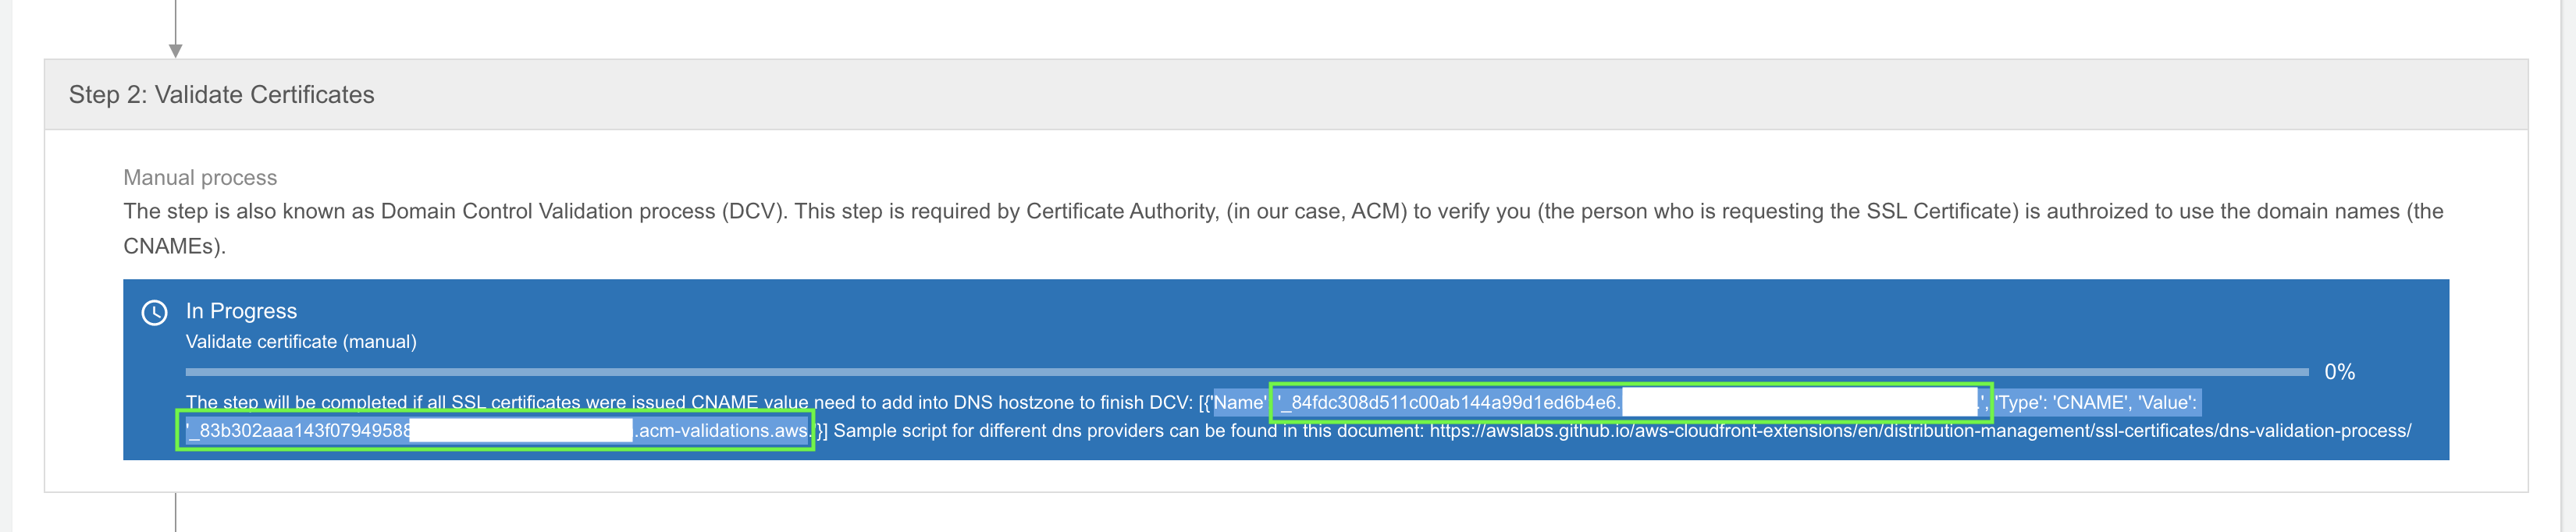
Check certificates status in ACM: The solution checks the progress of DNS validation status every 5 minutes. The DNS validation is a manual process, also known as Domain Control Validation. Domain owner needs to manually add a CNAME record for your domain name on the website of your DNS providers. ACM will check the DNS validation status every few minutes. Once done, ACM will issue certificates.
Create new CloudFront distributions: Once all certificates were issued by ACM, the solution will automatically create CloudFront distributions. After all distributions were created, the solution will send an SNS message to the designated email address. After this step, the domain owners are expected to add new CloudFront distribution to map to CNAME.
Summary
In this section, you created a SSL certificate on CloudFront Extensions console and associate it with the sample workshop, to implement the third requirement (R3 in below table).
| ID | Description | Category | Status |
|---|---|---|---|
| R1 | It shows different web pages according to the user’s browser type, for example, it redirects to page A when the user access it in PC browser, it redirects to page B when the user access it in Android browser, it redirects to page C when the user access it in iPhone browser. | Functional requirement | Completed |
| R2 | The configuration of CloudFront distribution need to be saved, so that it can rollback if it has issues in production environment. | Non-functional requirement | Completed |
| R3 | The website needs to have a CName (alternative domain name such as www.amazon.com) instead of xxx.cloudfront.net. | Functional requirement | Completed |
| R4 | After the website is launched, you need to monitor the metrics such as request number, back-to-origin bandwidth, top url. | Non-functional requirement |