Usage of Hu
By using Mahjong, we can combine with multiple tiles to build up a solution infrastructure on cloud. We call it as “Hu”. We could use a tile developed by our own and combined with existing tiles from community for our own purpose. It gives you not only flexibility but also best practices on cloud.
Thinking of your microservices combination
Know existing resources in community
“Hu”
Belows are existing tiles in the community
| Hu | Version | Description |
|---|---|---|
| Simple EKS | v0.1.0 | Quick launch with few lines of yaml. |
| EKS with Spot instance | v0.1.0 | Quick launch EKS cluster with mixed spot and on-demand instances, as well as handling spot termination, cluster auto scaler and HPA. |
| Simple ArgoCD | v0.1.0 | Setup ArgoCD on EKS with simple configuration. |
| Basic CD with ArgoCD | v0.1.0 | Building a modern CD with example applicaiton on GitHub, all you need is a GitHub token. |
| Perfect Microservice on EKS | v0.1.0 | Implement a handy containerized Microsercices architecture on EKS with all major componnets and demo applications. |
Tile
| Tiles | Version | Description |
|---|---|---|
| Basic Network | v0.0.1 | The classic network pattern cross multiple availibilty zone with public and private subnets, NAT, etc. |
| Simple EKS | v0.0.1 | The basic EKS cluster, which uses EKS 1.15 as default version and depends on Network0. |
| v0.0.5 | Update EKS default version to 1.16 and expose more options. | |
| EKS on Spot | v0.5.0 | Provison EKS 1.16 as default and using auto scaling group with mixed spot and normal (4:1) instances. Also has Cluster Autoscaler, Horizontal Pod Autoscaler and Spot Instance Handler setup. |
| EFS | v0.1.0 | The basic EFS conpoment and based on Network0. EFS is a perfect choice as storage option for Kubernetes. |
| ArgoCD | v1.5.2 | The Argocd0 is basic component to help build up GitOps based CI/CD capability, which depends on Tile - Eks0 & Network0. |
| Go-Bumblebee-ONLY | v0.0.1 | This is demo application, which can be deploy to Kubernetes cluster to demostrate rich capabilities. |
| Istio | v1.5.4 | Setup Istio 1.6 on EKS with all necessary features. Managed by Istio operator and Egress Gateway was off by default. |
| AWS KMS | v0.1.0 | Generate both symmetric key and asymmetric key for down stream applications or services |
| AWS ElastiCache Redis | v5.0.6 | Setup a redis cluster with replcation group with flexiable options. |
| AWS Aurora Mtsql | v2.07.2 | Provision a Aurora MySQL cluster and integrated with Secret Manager to automate secret ratation. |
| Go-BumbleBee-Jazz | v0.7.1 | Modern cloud native application with tipycal features to try out how great your Kubernetes cluster are. |
Design your microservices combination
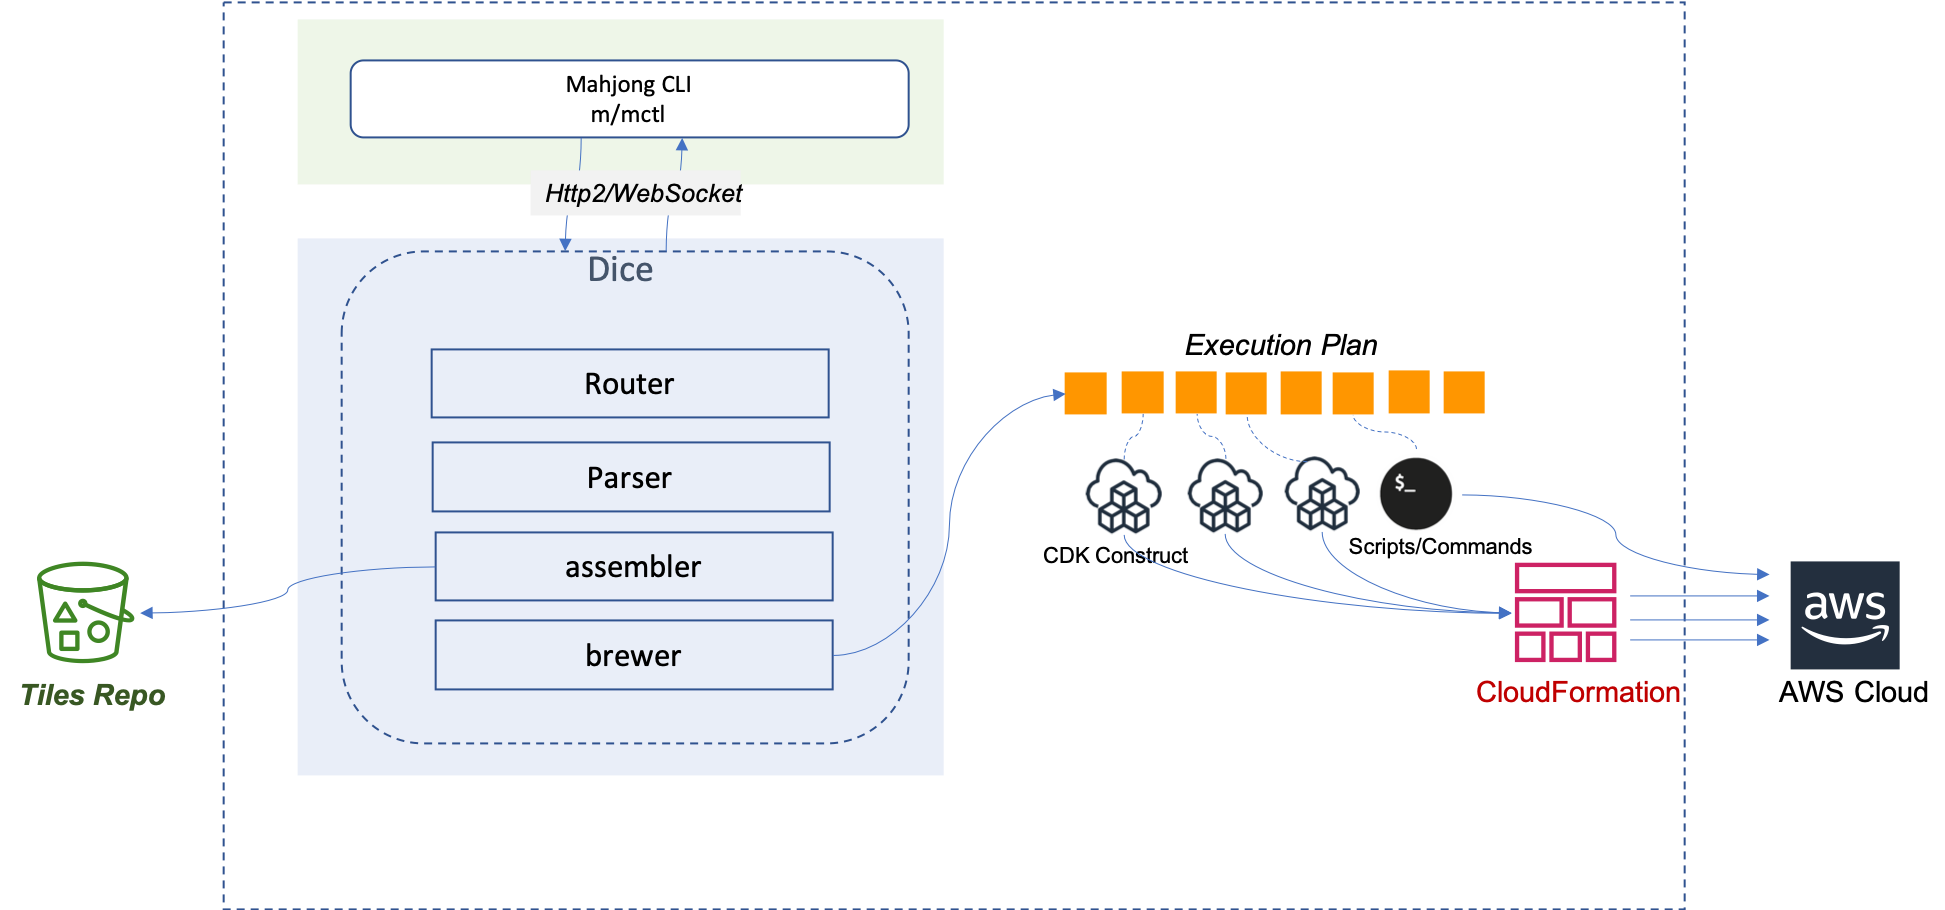
At the beginning, we can combine the nginx tile in the previous section with two existing tiles: AWS Redis, AWS Aurora to setup a 3 tiers web environment. Below is a diagram of how Mahjong works

Below is the nginx + redis + mysql architecture
Create a repo of “Hu”
$ cd $HOME/ws/local-hu-repo
$ mkdir nginx+redis+mysql/0.1.0
Create a deployment file
Create a yaml file named as nginx-redis-mysql.yaml
apiVersion: mahjong.io/v1alpha1
kind: Deployment
metadata:
  name: nginx-redis-mysql
  version: 0.1.0
spec:
  template:
    tiles:
      tileNginx:
        tileReference: nginx
        tileVersion: 0.0.1
        inputs:
          - name: clusterName
            inputValue: nginx-redis-mysql
          - name: capacity
            inputValue: 3
          - name: capacityInstance
            inputValue: m5.large
          - name: version
            inputValue: 1.16
      tileAWS-ElastiCache-Redis:
        tileReference: AWS-ElastiCache-Redis
        tileVersion: 5.0.6
        dependsOn:
          - tileNginx
        inputs:
          - name: vpc
            # tileInstance.tileName.field
            inputValue: $cdk(tileNginx.Network0.baseVpc)
          - name: subnetIds
            inputValues:
              - $cdk(tileNginx.Network0.privateSubnetId1)
              - $cdk(tileNginx.Network0.privateSubnetId2)
          - name: redisClusterName
            inputValue: mahjong-redis
      tileAWS-Aurora-Mysql:
        tileReference: AWS-Aurora-Mysql
        tileVersion: 2.07.2
        dependsOn:
          - tileNginx
        inputs:
          - name: vpc
            # tileInstance.tileName.field
            inputValue: $cdk(tileNginx.Network0.baseVpc)
          - name: clusterIdentifier
            inputValue: mahjong-mysql
          - name: masterUser
            inputValue: admin
          - name: defaultDatabaseName
            inputValue: testDb

  summary:
    description:
    outputs:
      - name: Nginx Endpoint
        value: $(tileNginx.outputs.nginxEndpoint)
      - name: Redis Endpoint
        value: $(tileAWS-ElastiCache-Redis.outputs.redisEndpoint)
      - name: RDS DatabaseName
        value: $(tileAWS-Aurora-Mysql.outputs.defaultDatabaseName)
      - name: RDS Endpoint
        value: $(tileAWS-Aurora-Mysql.outputs.clusterEndpoint)
    notes: []
Use the “Hu”
Deploy it
Run mctl deploy -f ./nginx-redis-mysql.yaml. If everything works fine, you will see
$ mctl deploy -f ./nginx-on-eks.yaml

...

[ℹ]  + export KUBECONFIG=/workspace/nginx/lib/nginx/kube.config
[ℹ]  + KUBECONFIG=/workspace/nginx/lib/nginx/kube.config
[ℹ]  + export WORK_HOME=/workspace/nginx
[ℹ]  + WORK_HOME=/workspace/nginx
[ℹ]  + export TILE_HOME=/workspace/nginx/lib/nginx
[ℹ]  + TILE_HOME=/workspace/nginx/lib/nginx
[ℹ]  + export NAMESPACE=default
[ℹ]  + NAMESPACE=default
[ℹ]  + cd /workspace/nginx
[ℹ]  + kubectl apply -f /workspace/nginx/lib/nginx/lib/nginx-on-k8s.yml -n default
[ℹ]  deployment.apps/mahjong-nginx-deployment unchanged
[ℹ]  service/nginx-service unchanged
[ℹ]  + sleep 10
[ℹ]  ++ kubectl get svc nginx-service -o 'jsonpath={.status..hostname}'
[ℹ]  + echo '{"nginxEndpoint=a3d984b0d065e46feafcc5d9b944b0e7-1722932499.us-east-2.elb.amazonaws.com"}'
[ℹ]  Extract outputs: [nginxEndpoint] = [a3d984b0d065e46feafcc5d9b944b0e7-1722932499.us-east-2.elb.amazonaws.com]
[ℹ]
[ℹ]
[ℹ]
[ℹ]  Nginx Endpoint = a3d984b0d065e46feafcc5d9b944b0e7-1722932499.us-east-2.elb.amazonaws.com
[ℹ]
[ℹ]
Check Nginx result
$ curl a3d984b0d065e46feafcc5d9b944b0e7-1722932499.us-east-2.elb.amazonaws.com
<!DOCTYPE html>
<html>
<head>
<title>Welcome to nginx!</title>
<style>
    body {
        width: 35em;
        margin: 0 auto;
        font-family: Tahoma, Verdana, Arial, sans-serif;
    }
</style>
</head>
<body>
<h1>Welcome to nginx!</h1>
<p>If you see this page, the nginx web server is successfully installed and
working. Further configuration is required.</p>

<p>For online documentation and support please refer to
<a href="http://nginx.org/">nginx.org</a>.<br/>
Commercial support is available at
<a href="http://nginx.com/">nginx.com</a>.</p>

<p><em>Thank you for using nginx.</em></p>
</body>
</html>
Check Redis results
TODO
Check Aurora results
TODO
For more complex cases, you can check this microservice-all-in-one
