Data Generation for Running Spark Benchmark Tests on Amazon EKS
The following guide provides instructions on how to generate the data set for running the TPCDS benchmark tests for Spark.
Deploying the data generation toolkit
In this example, you will provision the following resources required to run Spark Jobs with open source Spark Operator.
This example deploys an EKS Cluster running the Spark K8s Operator into a new VPC.
- Creates a new sample VPC, 2 Private Subnets, 2 Public Subnets, and 2 subnets in the RFC6598 space (100.64.0.0/10) for EKS Pods.
- Creates Internet gateway for Public Subnets and NAT Gateway for Private Subnets
- Creates EKS Cluster Control plane with public endpoint (for demo reasons only) with Managed Node Groups for benchmarking and core services, and Karpenter NodePools for Spark workloads.
- Deploys Metrics server, Spark-operator, Apache Yunikorn, Karpenter, Cluster Autoscaler, Grafana, AMP and Prometheus server.
Prerequisites
Ensure that you have installed the following tools on your machine.
Deploy
Clone the repository.
git clone https://github.com/awslabs/data-on-eks.git
cd data-on-eks
export DOEKS_HOME=$(pwd)
If DOEKS_HOME is ever unset, you can always set it manually using export DATA_ON_EKS=$(pwd) from your data-on-eks directory.
Export the following environment variables to set the minimum and desired number of ssd enabled c5d12xlarge instances. In our tests, we've set both of these to 6 based on the size of the dataset. Please adjust the number of instances as per your requirement and the size of the dataset you plan to run.
export TF_VAR_spark_benchmark_ssd_min_size=6
export TF_VAR_spark_benchmark_ssd_desired_size=6
Note : If you don't have access to c5d instances, feel free to use other EC2 instances that are equipped with local NVMe-based SSD block level storage. NVMe-based SSD instance storage enabled EC2 instances are a great fit for running the Spark benchmark data generation toolkit.
Navigate into the following directory and run install.sh script.
cd ${DOEKS_HOME}/analytics/terraform/spark-k8s-operator
chmod +x install.sh
./install.sh
Now create an S3_BUCKET variable that holds the name of the bucket created during the install. This bucket will be used in later examples to store output data. If S3_BUCKET is ever unset, you can run the following commands again.
export S3_BUCKET=$(terraform output -raw s3_bucket_id_spark_history_server)
echo $S3_BUCKET
Generating Test Dataset for Running the TPCDS Benchmark
In order to generate the dataset for TPCDS benchmark tests, you will need to configure the S3 bucket name in the data generation manifest.
You will need to replace the <S3_BUCKET> placeholders in the benchmark file with the name of the bucket
created earlier. You can get that value by running echo $S3_BUCKET.
To do this automatically you can run the following, which will create a .old backup file and do the replacement for you.
cd ${DOEKS_HOME}/analytics/terraform/spark-k8s-operator/examples/benchmark
sed -i.old s/\<S3_BUCKET\>/${S3_BUCKET}/g ./tpcds-benchmark-data-generation-1t.yaml
Then to begin the data generation execute the command below
kubectl apply -f tpcds-benchmark-data-generation-1t.yaml
Once you apply the tpcds-benchmark-data-generation-1t.yaml manifest, you should see the the driver and executor Pods coming up. It takes about an hour to finish the execution of the test data generation script. Once the execution is completed, you can see go into the AWS S3 console and validate the bucket size.
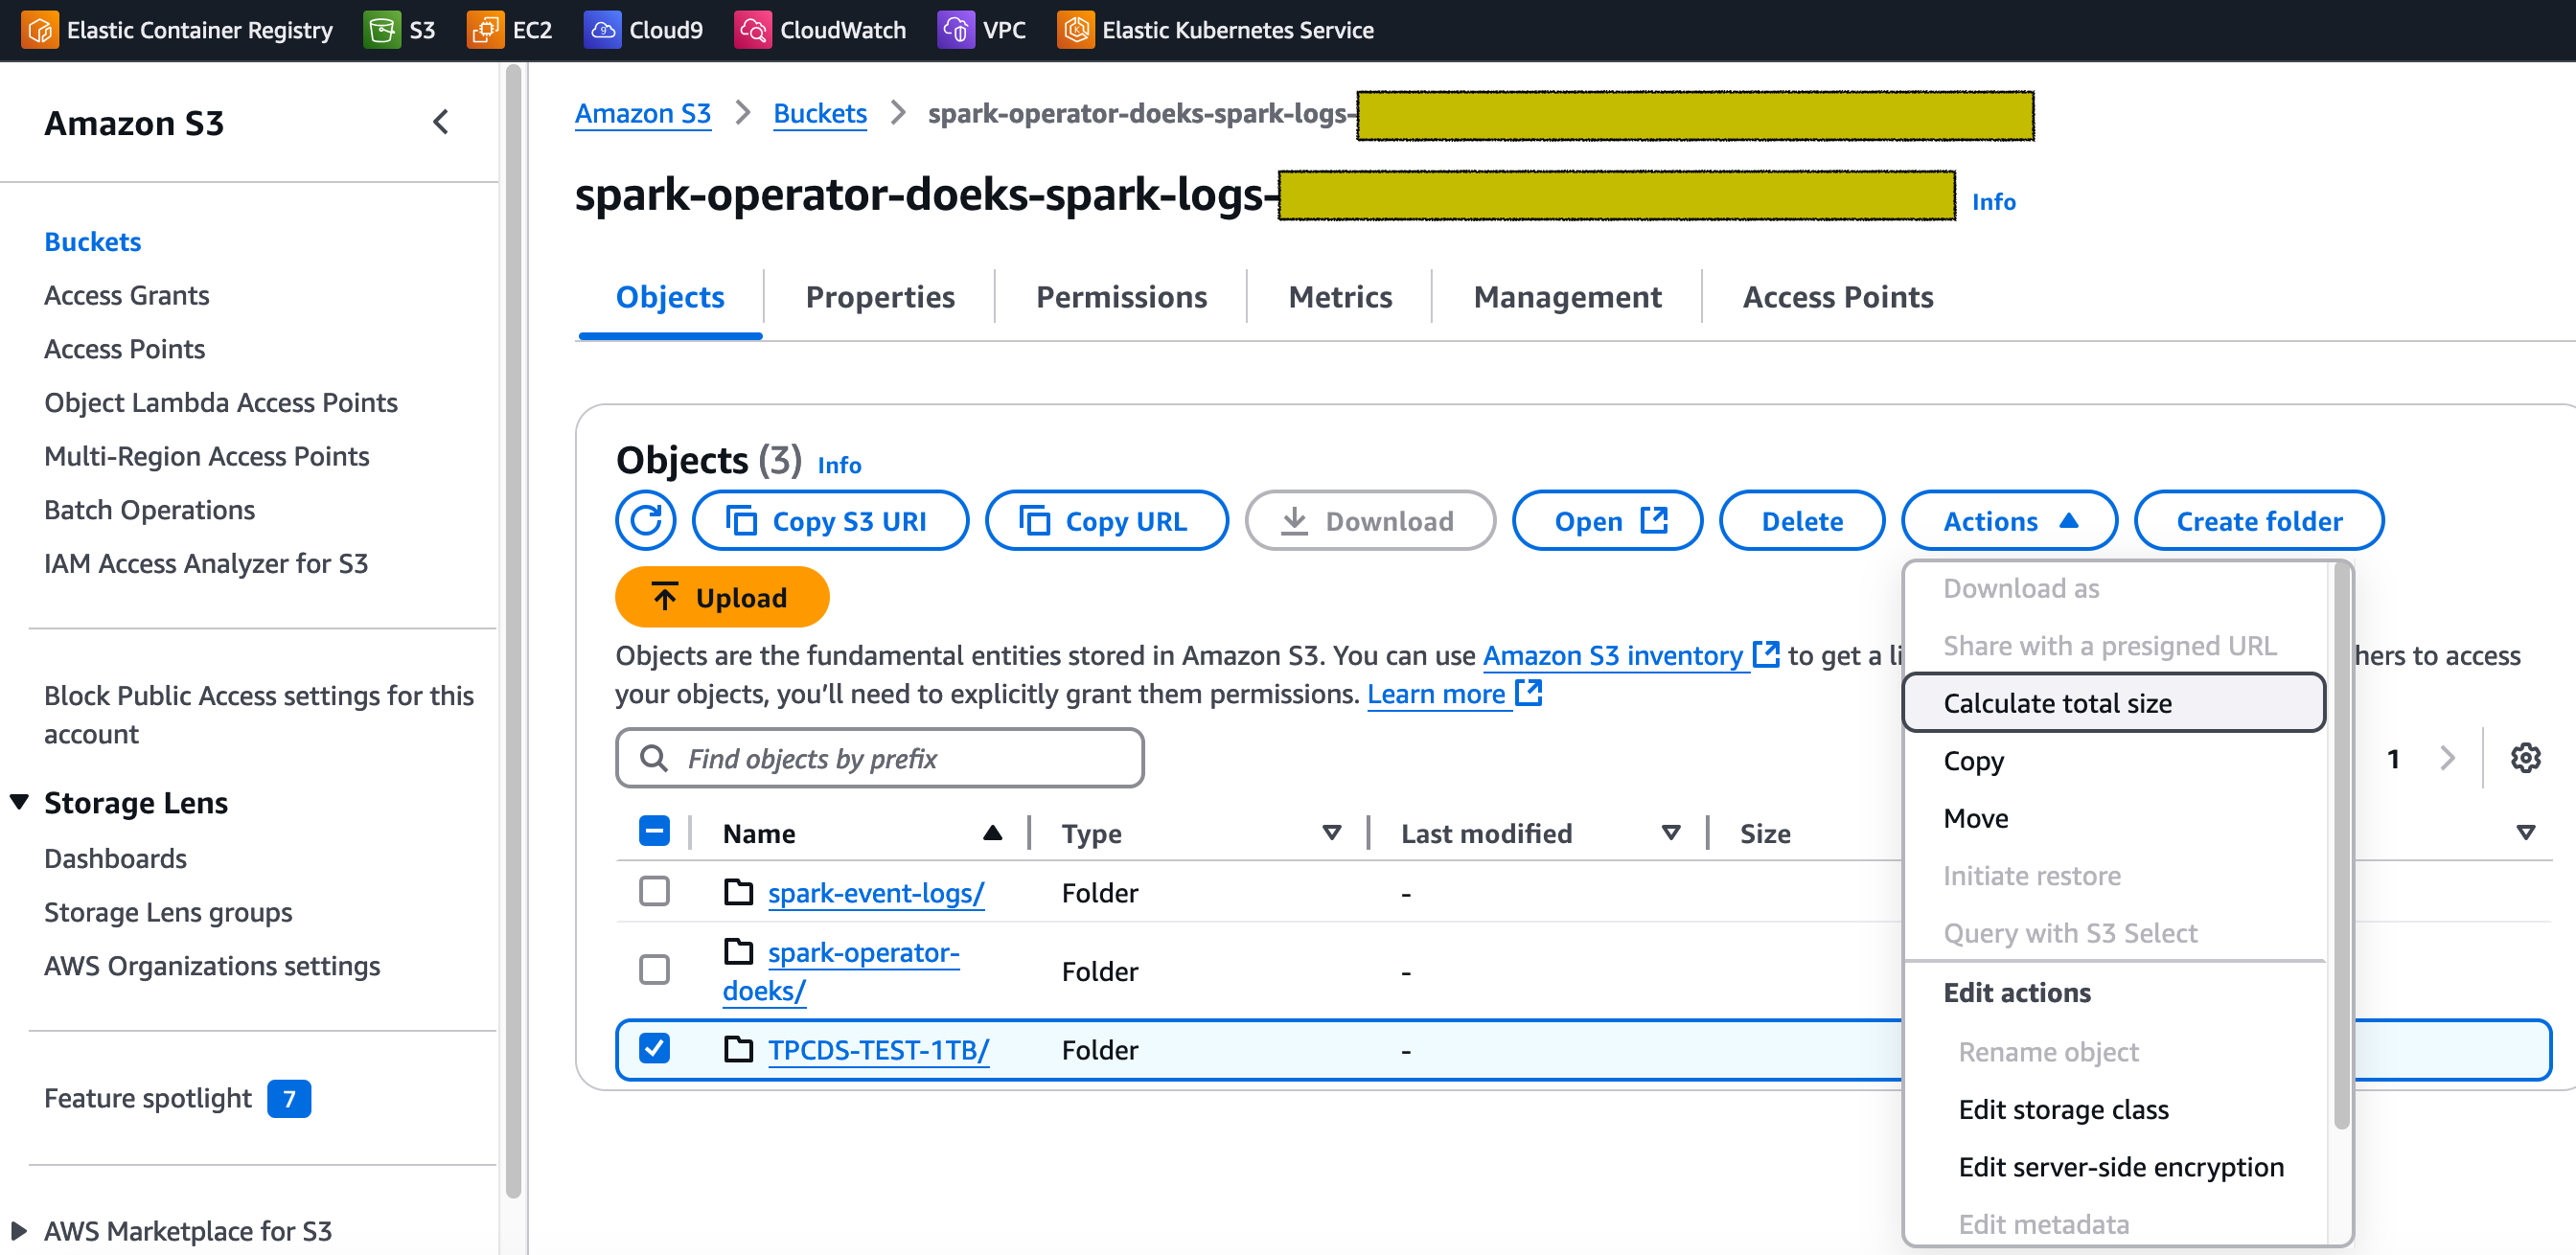
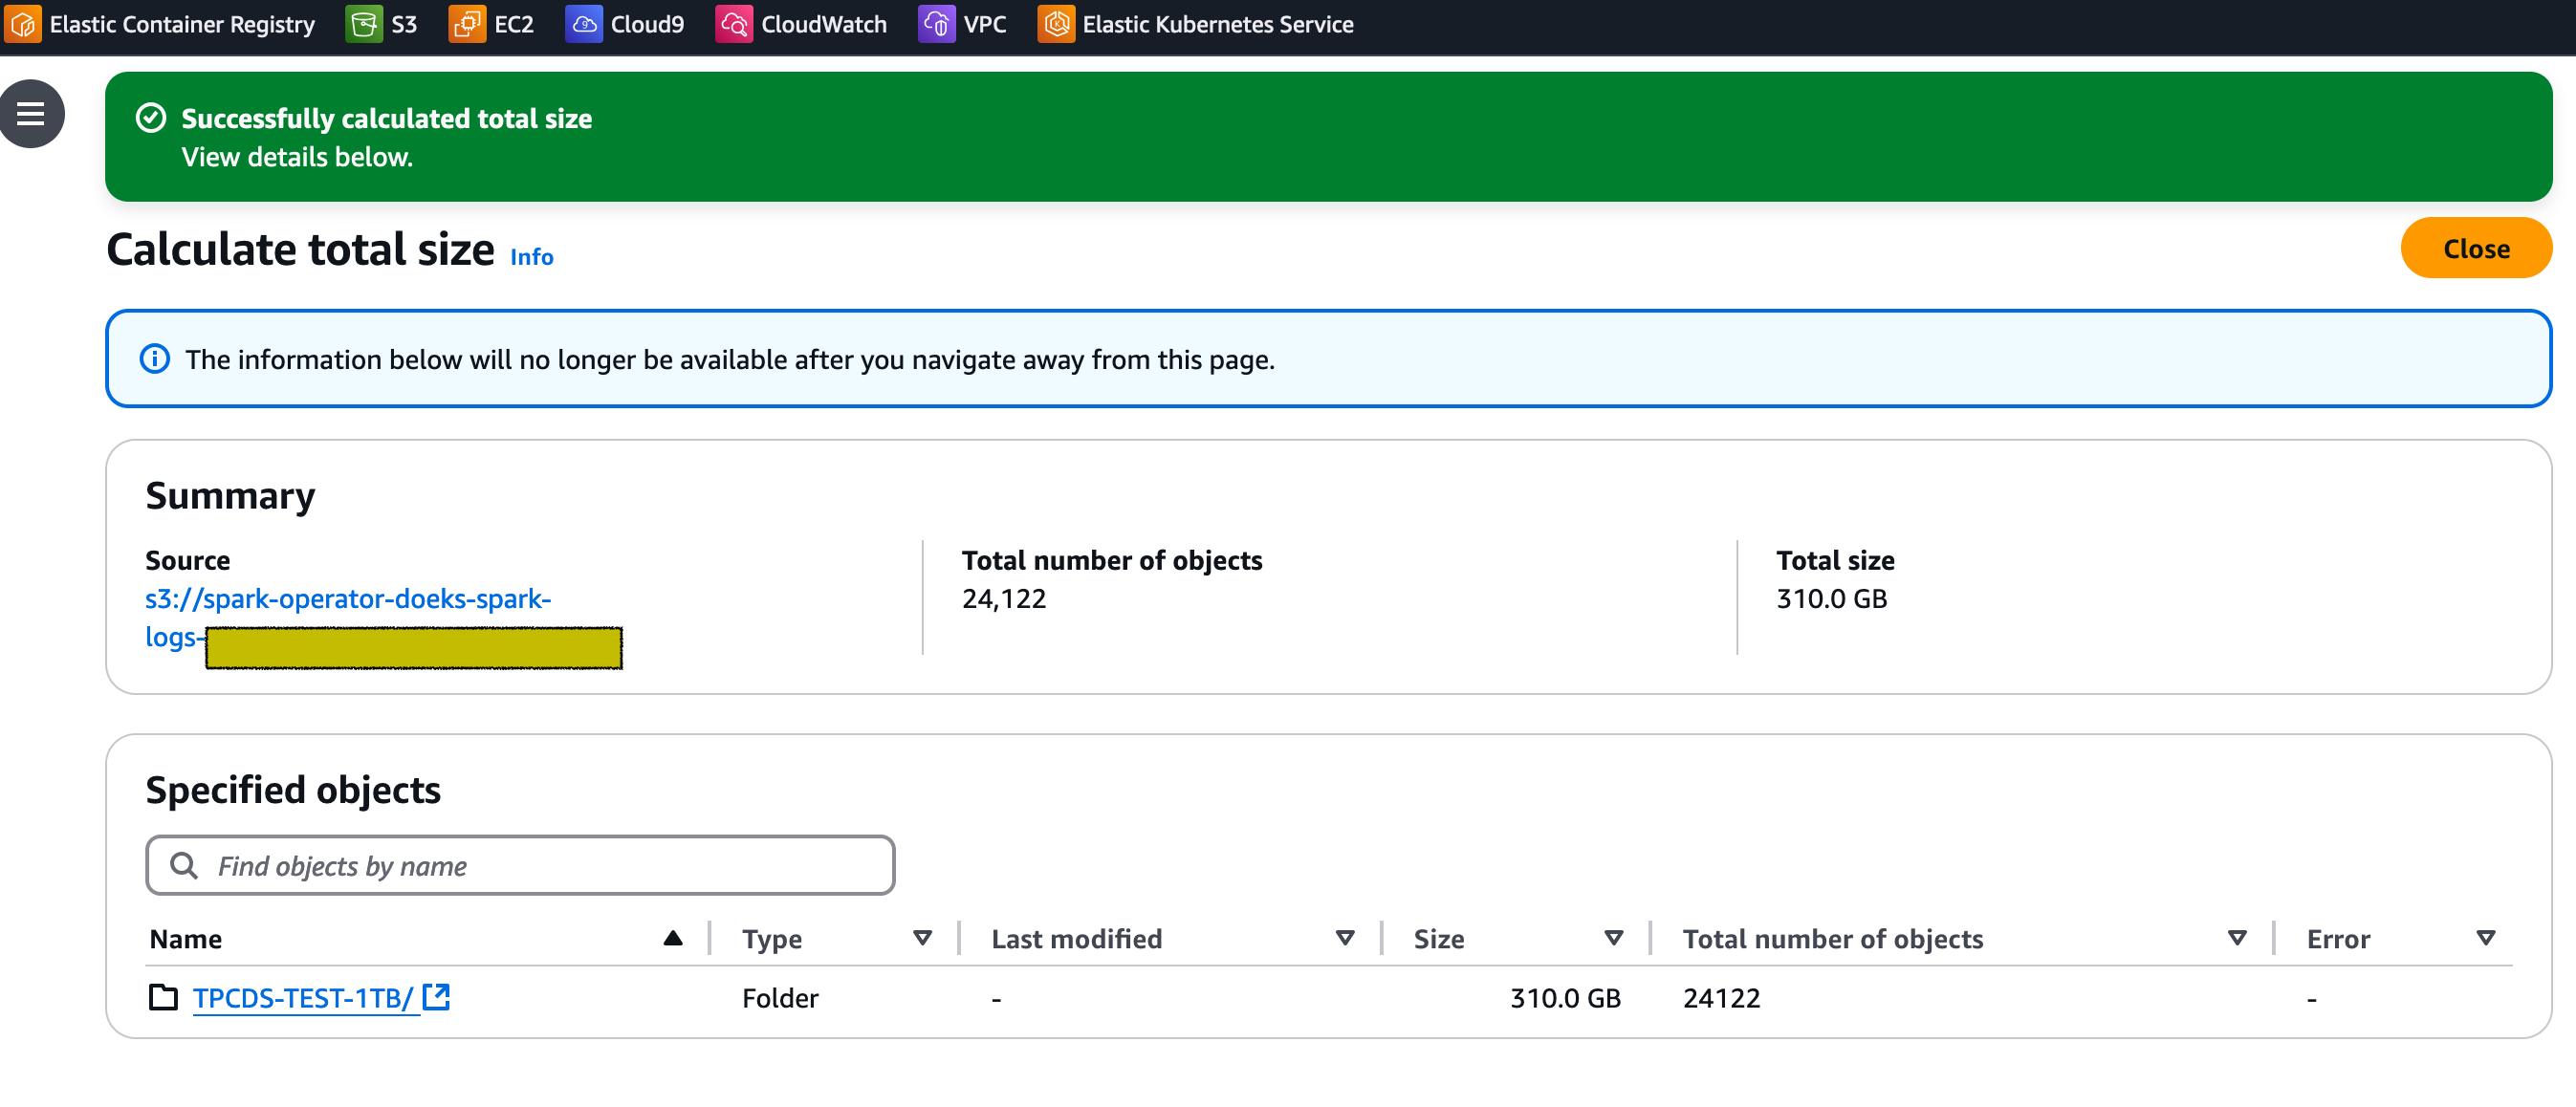
Navigate to the S3 bucket that got created as part of running the blueprint. Tick the checkbox besides the folder named TPCDS-TEST-1TB and click on Actions dropdown and then click on Calculate total size option as shown below.

For our dataset, the total size is 310 GB.

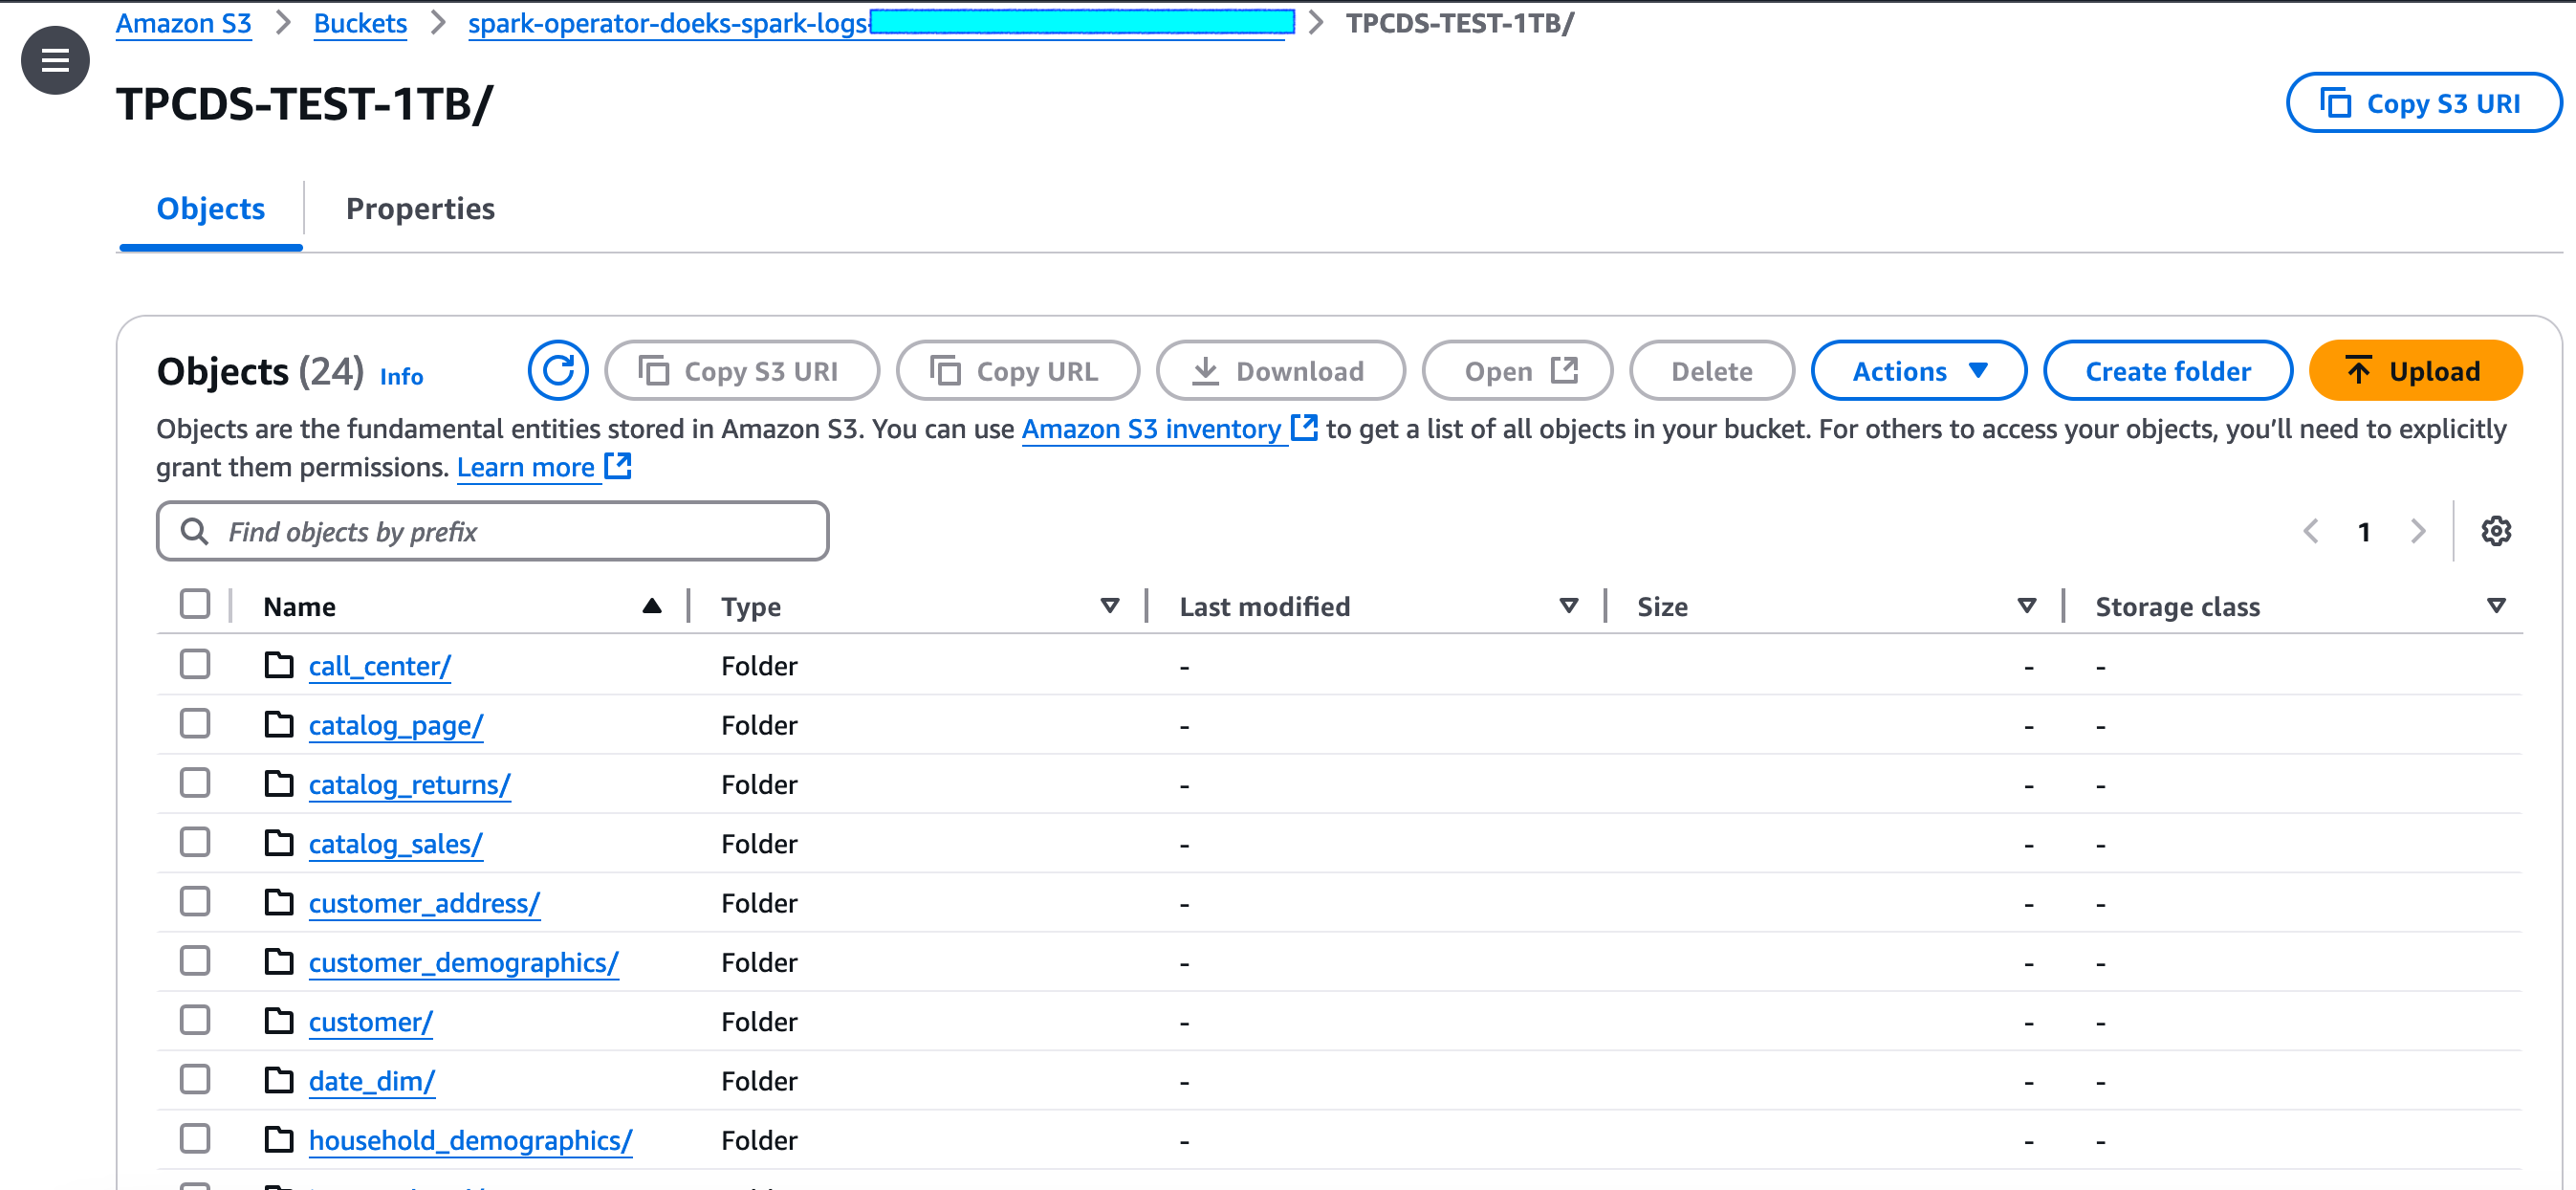
Once you go inside the TPCDS-TEST-1TB folder, you should see lot of subfolders that got generated (as shown below).

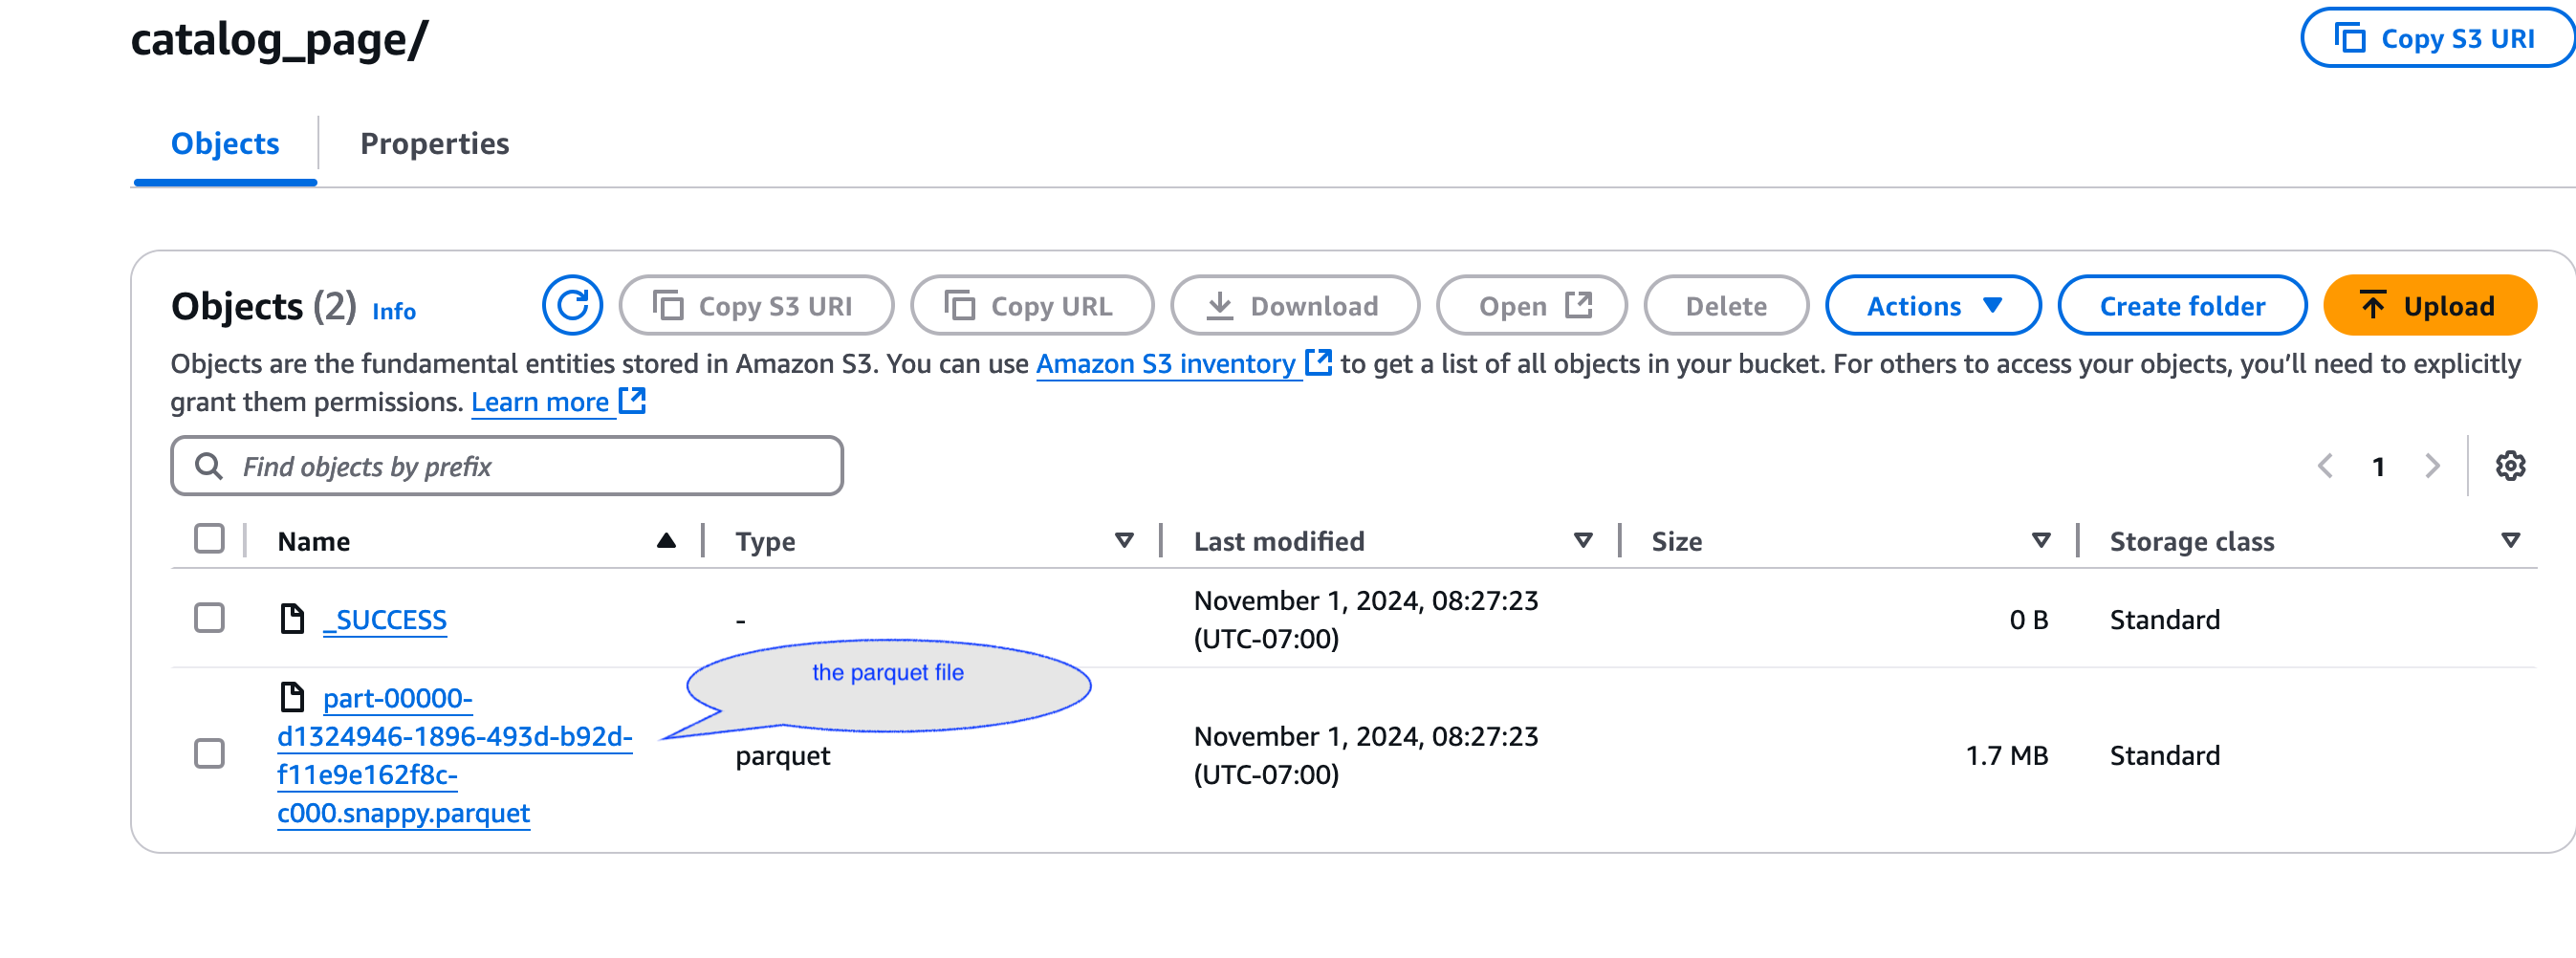
Each subfolder should have a .parquet file inside it that contains the generated data.

Also, check the Spark driver Pod execution status and logs to see if there are any errors.
kubectl get pod -n spark-team-a
Output:
NAME                               READY   STATUS      RESTARTS   AGE
tpcds-data-generation-1tb-driver   0/1     Completed   0          59m
The log snippet of the tpcds-data-generation-1tb-driver pod should look like below
Driver Pod Log Snippet
👈Cost Considerations
When utilizing c5d instances for data generation, it's important to keep cost implications in mind. These compute-optimized instances with local NVMe storage offer high performance but can be more expensive than standard c5 instances. To optimize costs, it's crucial to carefully monitor usage and scale resources appropriately. The local NVMe storage provides fast I/O, but data persistence is not guaranteed, so you should factor in the cost of data transfer and backup solutions. Spot instances can offer significant savings for interruptible workloads. Additionally, reserving instances for long-term, predictable usage can lead to substantial discounts. Also, it's essential to terminate these instances when they're no longer needed by adjusting the nodegroup's minimum and desired size to 0. This practice helps avoid unnecessary costs from idle resources.
To avoid unwanted charges to your AWS account, delete all the AWS resources created during this deployment
This script will cleanup the environment using -target option to ensure all the resources are deleted in correct order.
cd ${DOEKS_HOME}/analytics/terraform/spark-k8s-operator && chmod +x cleanup.sh
./cleanup.sh