cli-ingestion
What is Metadata Ingestion?
In DataHub, ingestion is the process of collecting metadata from your various data sources and loading it into DataHub. This process is the foundation of a useful data catalog, as it populates DataHub with the information needed for data discovery, observability, and governance.
By ingesting metadata, you can:
- Discover datasets, dashboards, pipelines, and more.
- Visualize data lineage to understand dependencies between your data assets.
- Monitor the health and quality of your data platforms.
- Add ownership and documentation to your data assets.
The DataHub CLI is a powerful command-line tool that allows you to perform this ingestion. It uses simple YAML-based configuration files, called "recipes," to connect to your data sources and ingest their metadata. This guide will walk you through ingesting sample data using the CLI.
Prerequisites
- DataHub on EKS: You must have the DataHub infrastructure deployed by following the Infrastructure Setup Guide.
- Local Tools: The following command-line tools must be installed on your local machine:
kubectl: To interact with your EKS cluster.aws-cli: To configure AWS credentials.wget: Used for downloading files.uv: A fast Python package installer.
Step 1: Generate a Personal Access Token
To ingest metadata, the DataHub CLI needs to authenticate with your DataHub instance. You'll do this using a personal access token.
-
Access the DataHub UI
First, you need to connect to the DataHub frontend service. Use
kubectlto port-forward the service to your local machine.kubectl port-forward svc/datahub-datahub-frontend -n datahub 9002:9002 -
Log In
Open your web browser and navigate to
http://localhost:9002. Log in with the default credentials:- Username:
datahub - Password:
datahub
- Username:
-
Generate a Token
- In the top-right corner, click the gear icon (⚙️) to open the settings menu.
- From the dropdown, select Access Tokens.
- Click Generate New Token.
- Give your token a name (e.g.,
cli-ingestion-token) and click Generate. - Copy the generated token and save it somewhere secure. You will not be able to see it again.
Access tokens grant full privileges to your DataHub instance. Treat them like passwords and store them securely.
Run the Ingestion Command
You are right, the DataHub CLI automatically substitutes environment variables in the format ${VAR_NAME}. However, to simplify the process for this non-production deployment, we will directly replace the token in the recipe file. The 401 Unauthorized error occurs if the token is not correctly passed or if the server endpoint is wrong. The CLI needs to connect to the DataHub GMS (General Metadata Service) on port 8080, not the frontend UI on 9002.
-
Port-Forward the GMS Service
In a new terminal window, run the following command to forward the GMS service to your local port
8080. Keep this terminal running.kubectl port-forward svc/datahub-datahub-gms -n datahub 8080:8080 -
Update the Recipe File with Your Token
Open the
data-stacks/datahub-on-eks/examples/demo-data-recipes.yamlfile in your editor and replace${TOKEN}with the personal access token you generated in Step 1.# Example of how the updated sink section should look:
sink:
type: "datahub-rest"
config:
server: "http://localhost:8080"
token: "your-copied-token-goes-here" # Replace with your actual tokenRemember to save the file after making this change.
Do Not Commit Your TokenBe careful not to commit the
demo-data-recipes.yamlfile to your Git repository with the hardcoded token. -
Run the Ingestion CLI
Now, run the ingestion command.
uvx --from acryl-datahub datahub ingest run -c data-stacks/datahub-on-eks/examples/demo-data-recipes.yamlYou should see output in your terminal indicating that the ingestion was successful, ending with a "CLI Ingestion finished" message.
Step 3: Inspect Ingested Data in the DataHub UI
After successful ingestion, you can verify the new metadata in the DataHub UI.
-
Re-establish Frontend Port-Forward (if necessary)
If you closed the terminal that was port-forwarding the DataHub frontend service (on port
9002), re-run the command from Step 1 in a new terminal:kubectl port-forward svc/datahub-datahub-frontend -n datahub 9002:9002 -
Access the DataHub UI
Open your web browser and navigate to
http://localhost:9002. -
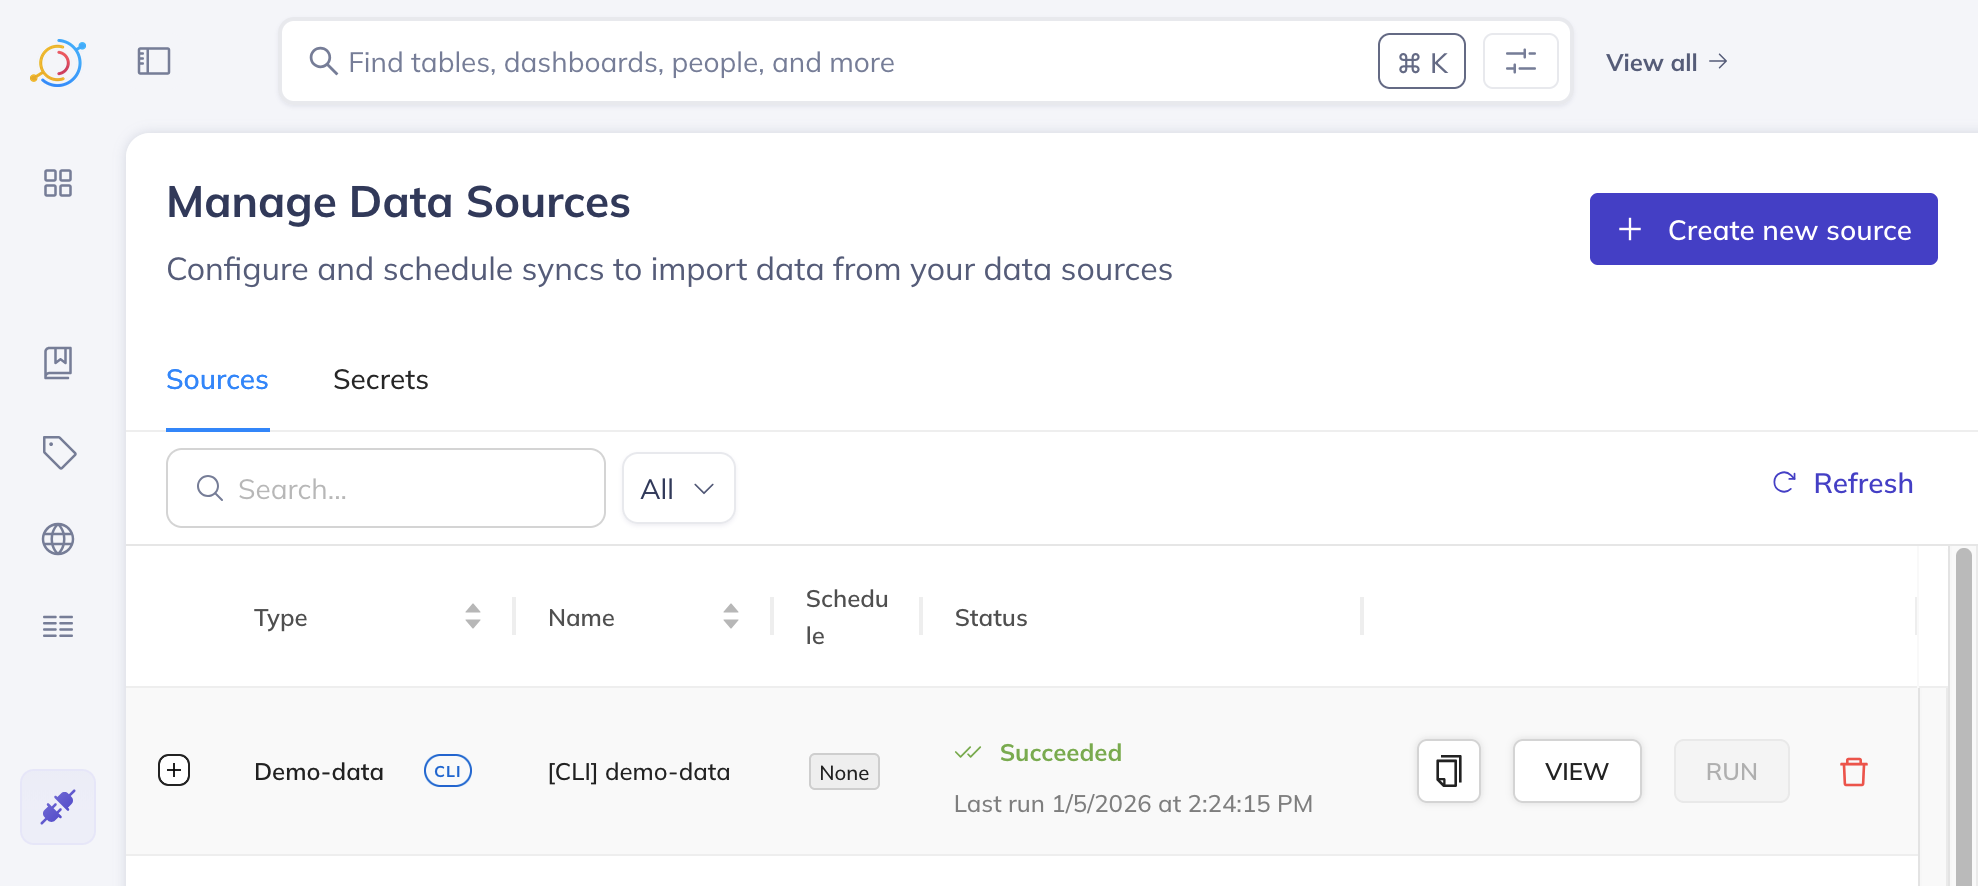
Verify the Data Source
- In the left-hand navigation bar, click on the "Data Sources" icon (represented by a purple plug 🔌).
- You should see a single entry named
[CLI] demo-data. This confirms that the demo data source has been successfully registered.
-
Inspect Ingested Assets
- In the left-hand navigation bar, click on the "Home" icon (the grid-like icon with four squares, located just below the DataHub logo) to return to the main dashboard.
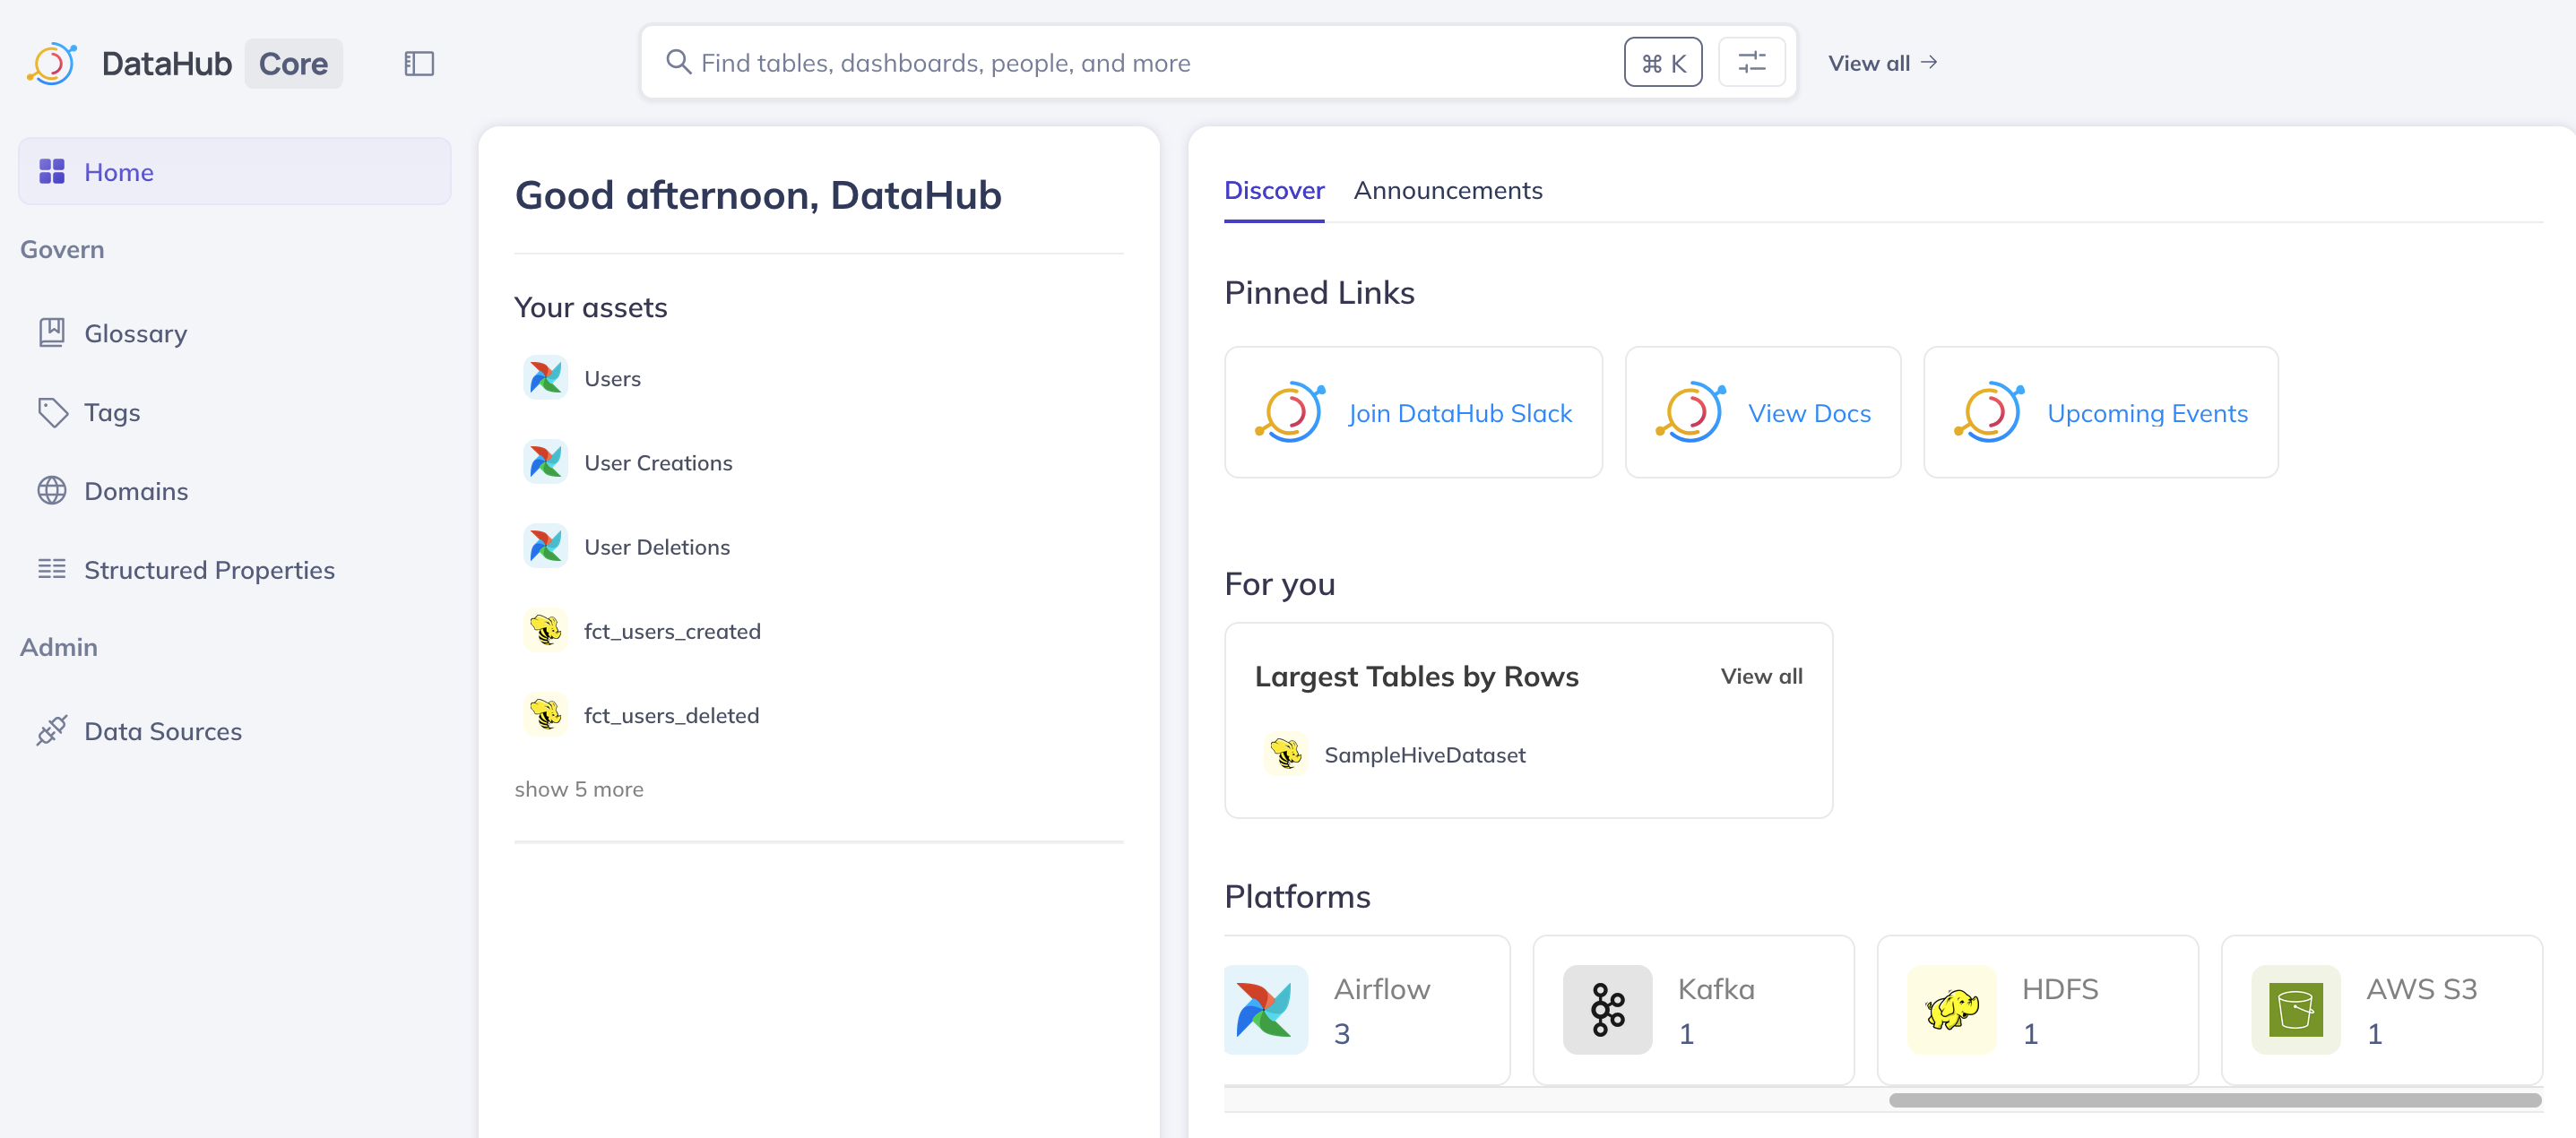
- You will notice that there are now more assets listed, categorized by different platforms such as
hadoop,Airflow,Kafka, andAWS S3. This indicates that metadata from these various simulated sources has been ingested. - Click on the "AWS S3" platform in the asset list.
- You should see one entry under this platform, representing an S3 data asset.
- On the right-hand side of the screen, within the "Documentation" section, it should say
s3 backup of logging events. - You should also see the columns available for this entry listed, providing details about the schema of the S3 data asset.
- Click on the "Lineage" tab. Here, you will see a visual representation showing that this S3 data asset originates from a
hadooptable, illustrating the data flow.
Cleanup
This guide did not create any new infrastructure. To clean up, you can simply stop the kubectl port-forward processes by pressing Ctrl+C in the terminal windows where they are running.
If you are completely finished with DataHub, you can destroy all the infrastructure by following the Cleanup Guide.
Next Steps
Congratulations on successfully ingesting your first metadata into DataHub! From here, you can:
- Explore the different ingested assets in the UI.
- Try writing your own ingestion recipe for a different source.
- Learn more about DataHub's features like Glossary Terms, Tags, and Domains.