Flink Autoscaler
Prerequisites
Autoscaler Example
Set the env variables for the job execution role and s3 bucket name :
source set-env.sh
Navigate to example directory and submit the Flink job.
cd data-on-eks/data-stacks/emr-on-eks/examples/flink/karpenter
Modify the autoscaler-example.yaml by replacing the placeholders with values from the two env variables above.
envsubst < autoscaler-example.yaml > autoscaler-example1.yaml
The job example contains Autoscaler configuration:
...
flinkConfiguration:

    taskmanager.numberOfTaskSlots: "4"
    # Autotuning parameters
    kubernetes.operator.job.autoscaler.enabled: "true"
    kubernetes.operator.job.autoscaler.stabilization.interval: 1m
    kubernetes.operator.job.autoscaler.metrics.window: 1m
    kubernetes.operator.job.autoscaler.target.utilization: "0.5"
    kubernetes.operator.job.autoscaler.target.utilization.boundary: "0.2"
    kubernetes.operator.job.autoscaler.restart.time: 1m
    kubernetes.operator.job.autoscaler.catch-up.duration: 5m
    kubernetes.operator.job.autoscaler.vertex.exclude.ids: ""

...
It starts a LoadSimulationPipeline job that simulates flucating loads from zero to the max (1,2,4, and 8) loads:
job:
    # if you have your job jar in S3 bucket you can use that path as well
    jarURI: local:///opt/flink/examples/streaming/AutoscalingExample.jar
    entryClass: org.apache.flink.streaming.examples.autoscaling.LoadSimulationPipeline
    args:
      - "--maxLoadPerTask"
      - "1;2;4;8;16;"
      - "--repeatsAfterMinutes"
      - "60"
Deploy the job with the kubectl deploy command.
kubectl apply -f autoscaler-example1.yaml
Monitor the job status using the below command. You should see the new nodes triggered by the karpenter and the YuniKorn will schedule Job manager pods and two Taskmanager pods. As the load increases, autoscaler changes the parallelism of the tasks and more task manager pods are added as needed:
NAME                                             READY   STATUS    RESTARTS   AGE
autoscaler-example-5cbd4c9864-bt2qj              2/2     Running   0          81m
autoscaler-example-5cbd4c9864-r4gbg              2/2     Running   0          81m
autoscaler-example-taskmanager-1-1               2/2     Running   0          80m
autoscaler-example-taskmanager-1-2               2/2     Running   0          80m
autoscaler-example-taskmanager-1-4               2/2     Running   0          78m
autoscaler-example-taskmanager-1-5               2/2     Running   0          78m
autoscaler-example-taskmanager-1-6               2/2     Running   0          38m
autoscaler-example-taskmanager-1-7               2/2     Running   0          38m
autoscaler-example-taskmanager-1-8               2/2     Running   0          38m
Access the Flink WebUI for the job by running this command:
kubectl port-forward svc/autoscaler-example-rest 8081 -n emr-data-team-a
Then browse to http://localhost:8081:
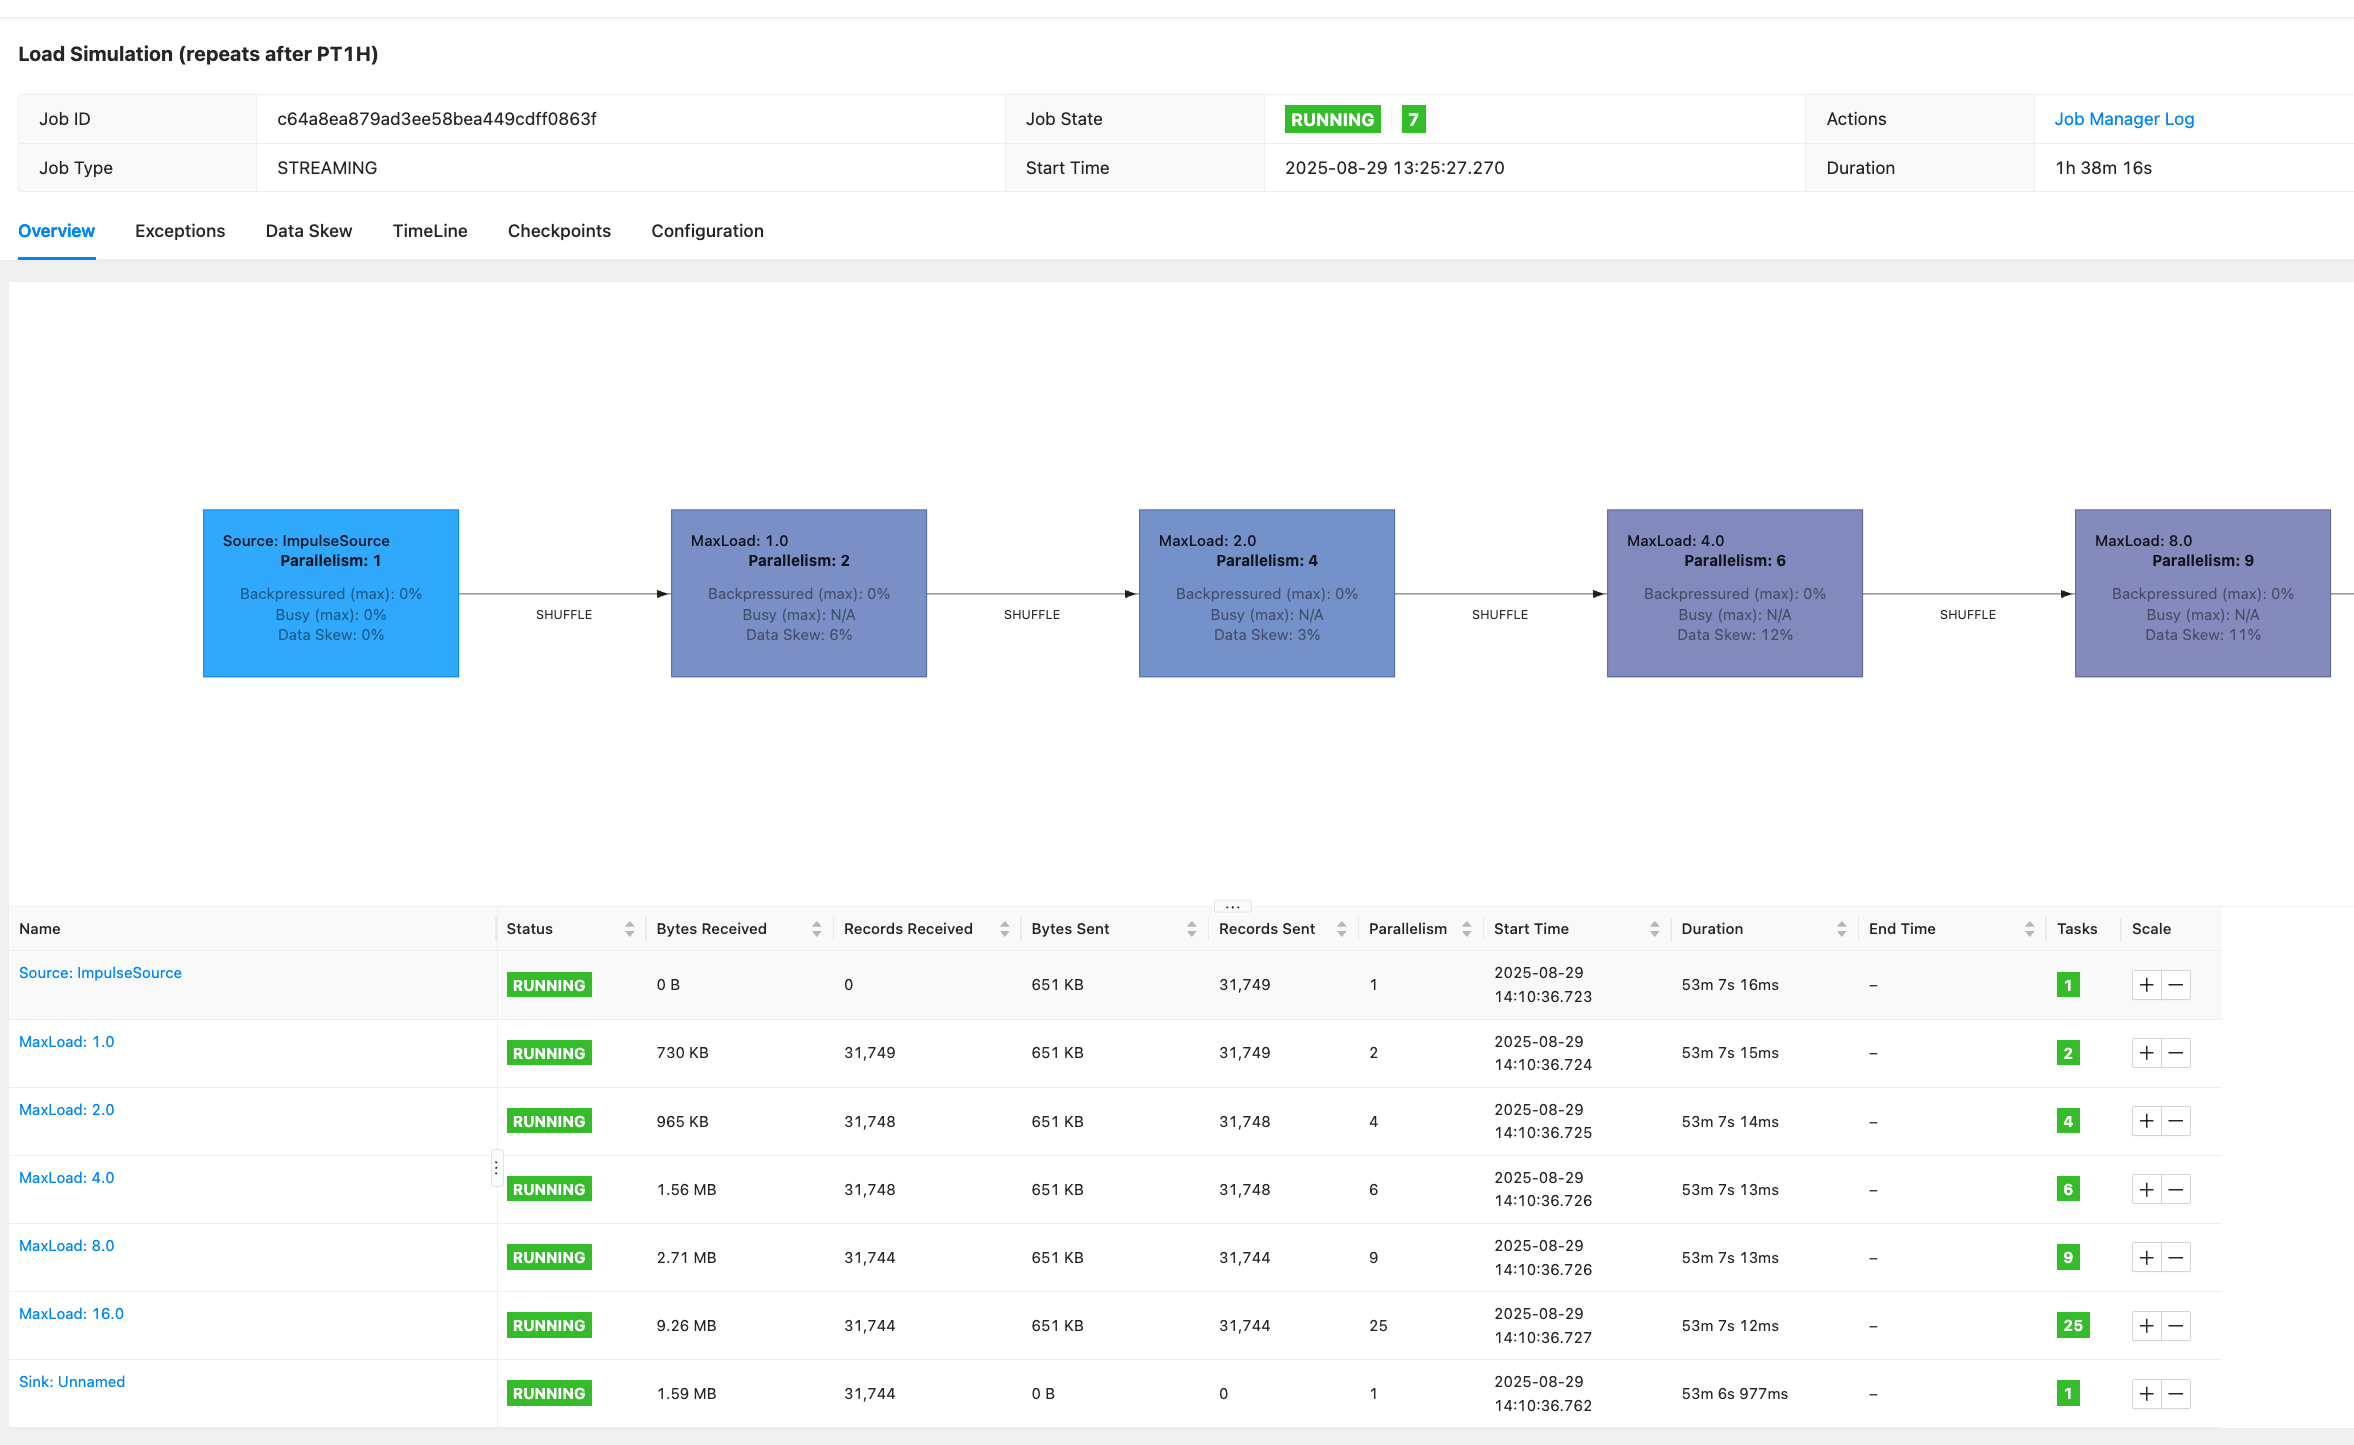
Examine the max_load and parallelism of each task.