NVIDIA Megatron-LM
MegatronLM is a framework from Nvidia that can be used to train LLMs. We recommend that you read papers on the framework to know the different knobs you can tune and in particular these articles:
- Megatron-LM: Training Multi-Billion Parameter Language Models Using Model Parallelism
- Efficient Large-Scale Language Model Training on GPU Clusters Using Megatron-LM
To run a test case you will go through a series of steps described below:
- Build the data preprocessing container.
- Pre-process the data using a tokenizer and the preprocessing container.
- Build the container for distributed training
- Train!
We describe the steps below for Slurm users running on a Nvidia GPU.
Preparation
This guide assumes that you've built a SageMaker HyperPod Slurm cluster with GPU instances i.e. g5/p4d/p5 instance types. Please make sure you have the following before getting started:
- A Slurm cluster on AWS using Nvidia GPU's i.e.
g5,p4dorp5. - Docker, Pyxis and Enroot installed. This is installed by default in the lifecycle scripts
- An FSx for Lustre filesystem mounted on
/fsx.
If you completed Cluster Setup using a Nvidia GPU config these steps are complete.
Data Preprocessing
Before running training jobs you need to retrieve input data and pre-process it. This section of the guide you will retrieve a container then you convert it into a squash file via Enroot, you will then retrieve input data and tokenize it using the GPT2 vocabulary.
Steps
-
First SSH into one of the compute nodes. Note: you can build containers on the head node but you're limited to only 100GB of storage so we recommend building them on a compute node.
# ssh into a compute node
salloc -N 1
ssh $(srun hostname)
All next steps will be executed on the compute node.
-
Next we'll clone the Github repo and cd into the right directory:
cd ~
git clone https://github.com/aws-samples/awsome-distributed-training.git
cd awsome-distributed-training/3.test_cases/megatron/megatron-lm -
Next we'll set an environment variable to point to our shared
/fsx/ubuntufilesystem. This is used in the submission scripts later.export DATA_PATH=/fsx/ubuntu # FSx for Lustre shared file-system -
Build the container image with the command below
DOCKER_BUILDKIT=1 docker build -t megatron-training -f aws-megatron-lm.Dockerfile .ImportantIf you see the following error
ERROR: permission denied while trying to connect to the Docker daemon socket at...when trying to rundocker, you'll need to add the user to thedockergroup by running:sudo usermod -aG docker ${USER}Then log out with
exitand log back in. -
Once the image is built, you can check if it is present with
docker images. You should see an output similar to this one:[ubuntu@ip-10-0-10-78 ~]$ docker images
REPOSITORY TAG IMAGE ID CREATED SIZE
megatron-training latest de38623b2f85 2 minutes ago 20.7GB -
Create the squash file with the command below.
enroot import -o megatron-training.sqsh dockerd://megatron-training:latestThe file will be stored in the current directory (if left as default). The output should look as below.
[ec2-user@ip-10-0-10-78 ~]$ enroot import -o megatron-training.sqsh  dockerd://megatron-training:latest
[INFO] Fetching image

e19aa13505c1710876982dc440226dc479da5177dc4770452cc79bedc8b5b41d

[INFO] Extracting image content...
[INFO] Creating squashfs filesystem...

Parallel mksquashfs: Using 32 processors
Creating 4.0 filesystem on /fsx/.../megatron-training.sqsh, block size 131072.
[==========================================================/] 299550/299550 100%

Exportable Squashfs 4.0 filesystem, gzip compressed, data block size 131072
   uncompressed data, uncompressed metadata, uncompressed fragments, uncompressed xattrs
   duplicates are not removed
... -
Create a script with the code below to retrieve the input datasets and vocabulary. Let's call it retrieve_vocab.sh.
cat <<EOF> retrieve_vocab.sh
#!/bin/bash
mkdir -p gpt2
cd gpt2

wget https://huggingface.co/bigscience/misc-test-data/resolve/main/stas/oscar-1GB.jsonl.xz
wget https://s3.amazonaws.com/models.huggingface.co/bert/gpt2-vocab.json
wget https://s3.amazonaws.com/models.huggingface.co/bert/gpt2-merges.txt
xz -d oscar-1GB.jsonl.xz

cd ..
EOF
Run chmod to make the script executable, then execute it. Remember this has to be executed within the directory that holds the data processing and training code.
chmod a+x retrieve_vocab.sh
./retrieve_vocab.sh -
Now submit the file
1.data-preprocessing.sbatchusing the command below:sbatch slurm/gpt3/1.data-preprocessing.sbatchImportantIf you see an error
[ERROR] Command not found: nvidia-container-cli, see https://github.com/NVIDIA/libnvidia-container, you need to installnvidia-container-cli. To do that run the following on each compute node:curl -fsSL https://nvidia.github.io/libnvidia-container/gpgkey | sudo gpg --dearmor -o /usr/share/keyrings/nvidia-container-toolkit-keyring.gpg && curl -s -L https://nvidia.github.io/libnvidia-container/stable/deb/nvidia-container-toolkit.list | \
sed 's#deb https://#deb [signed-by=/usr/share/keyrings/nvidia-container-toolkit-keyring.gpg] https://#g' | sudo tee /etc/apt/sources.list.d/nvidia-container-toolkit.list
sudo apt-get install -y nvidia-container-toolkit -
You will see a new file in your current working directory called
slurm-XY.outwhereXYis a number. This is your output file and will capture theSTDOUTandSTDERRfrom your job. You can check how it progresses via the commandtail -f slurm-XY.outbut with the relevant filename. The file content will be similar to the below:0: Opening /fsx/ubuntu/oscar-1GB.jsonl
0: Time to startup: 0.9956498146057129
0: Processed 1000 documents (101.28050670002645 docs/s, 1.258563987556778 MB/s).
0: Processed 2000 documents (188.07992853480727 docs/s, 2.3571624257619614 MB/s).
...
0: Processed 78000 documents (1293.9967304914383 docs/s, 16.67556064420713 MB/s).
0: Processed 79000 documents (1298.6715286585202 docs/s, 16.763634765830606 MB/s). -
When you confirmed successful run of the preprocessing job, you can go back to the head node.
exit
Voilà! You have executed the preprocessing job. You will go through the steps to run your training job.
Training
Now that the data is preprocessed, we will pre-train a GPT-3 model Megatron-LM.
Steps
-
First let's adjust the number of GPU's requested to fit the size of our cluster. Edit the file
2.distributed-training.sbatchand adjust the line#SBATCH --nodes=24to the number of instances in your cluster. For example if I had8 x p5.48xlargeinstances, I would put:#!/bin/bash
# Copyright Amazon.com, Inc. or its affiliates. All Rights Reserved.
# SPDX-License-Identifier: Apache-2.0
#SBATCH --nodes=8 # number of nodes to use, 8 p4d(e) = 64 A100 GPUs
#SBATCH --job-name=megatron_gpt # name of your job
#SBATCH --exclusive # job has exclusive use of the resource, no sharing
#SBATCH --wait-all-nodes=1 -
Next submit a training job:
sbatch 2.distributed-training.sbatch -
The training starts running and should produce an output similar to below if successful.
1:  iteration       25/73242187 | consumed samples:           50 | elapsed time per iteration (ms): 87.0 | learning rate: 1.638E-08 | global batch size:     2 | lm loss: 1.086954E+01 | loss scale: 4294967296.0 | grad norm: 0.000 | number of skipped iterations:   0 | number of nan iterations:   0 |
1:  iteration       26/73242187 | consumed samples:           52 | elapsed time per iteration (ms): 86.5 | learning rate: 1.704E-08 | global batch size:     2 | lm loss: 1.086217E+01 | loss scale: 4294967296.0 | grad norm: 0.000 | number of skipped iterations:   0 | number of nan iterations:   0 |
1:  iteration       27/73242187 | consumed samples:           54 | elapsed time per iteration (ms): 88.4 | learning rate: 1.769E-08 | global batch size:     2 | lm loss: 1.087129E+01 | loss scale: 4294967296.0 | grad norm: 0.000 | number of skipped iterations:   0 | number of nan iterations:   0 |
Monitoring
Now that the job is running, we can monitor it in two ways, we can tail the log file to see how the training is progressing:
# Control-C to stop tailing
tail -f slurm-2.log
We can also ensure it's utilizing the GPU's appropriately by SSH-ing into the compute node.
Grab the hostname by running sinfo and seeing which node it's running on:
sinfo
PARTITION AVAIL  TIMELIMIT  NODES  STATE NODELIST
dev*         up   infinite      1  alloc ip-10-1-90-87
Then ssh into that instance using the hostname from sinfo:
ssh ip-10-1-90-87
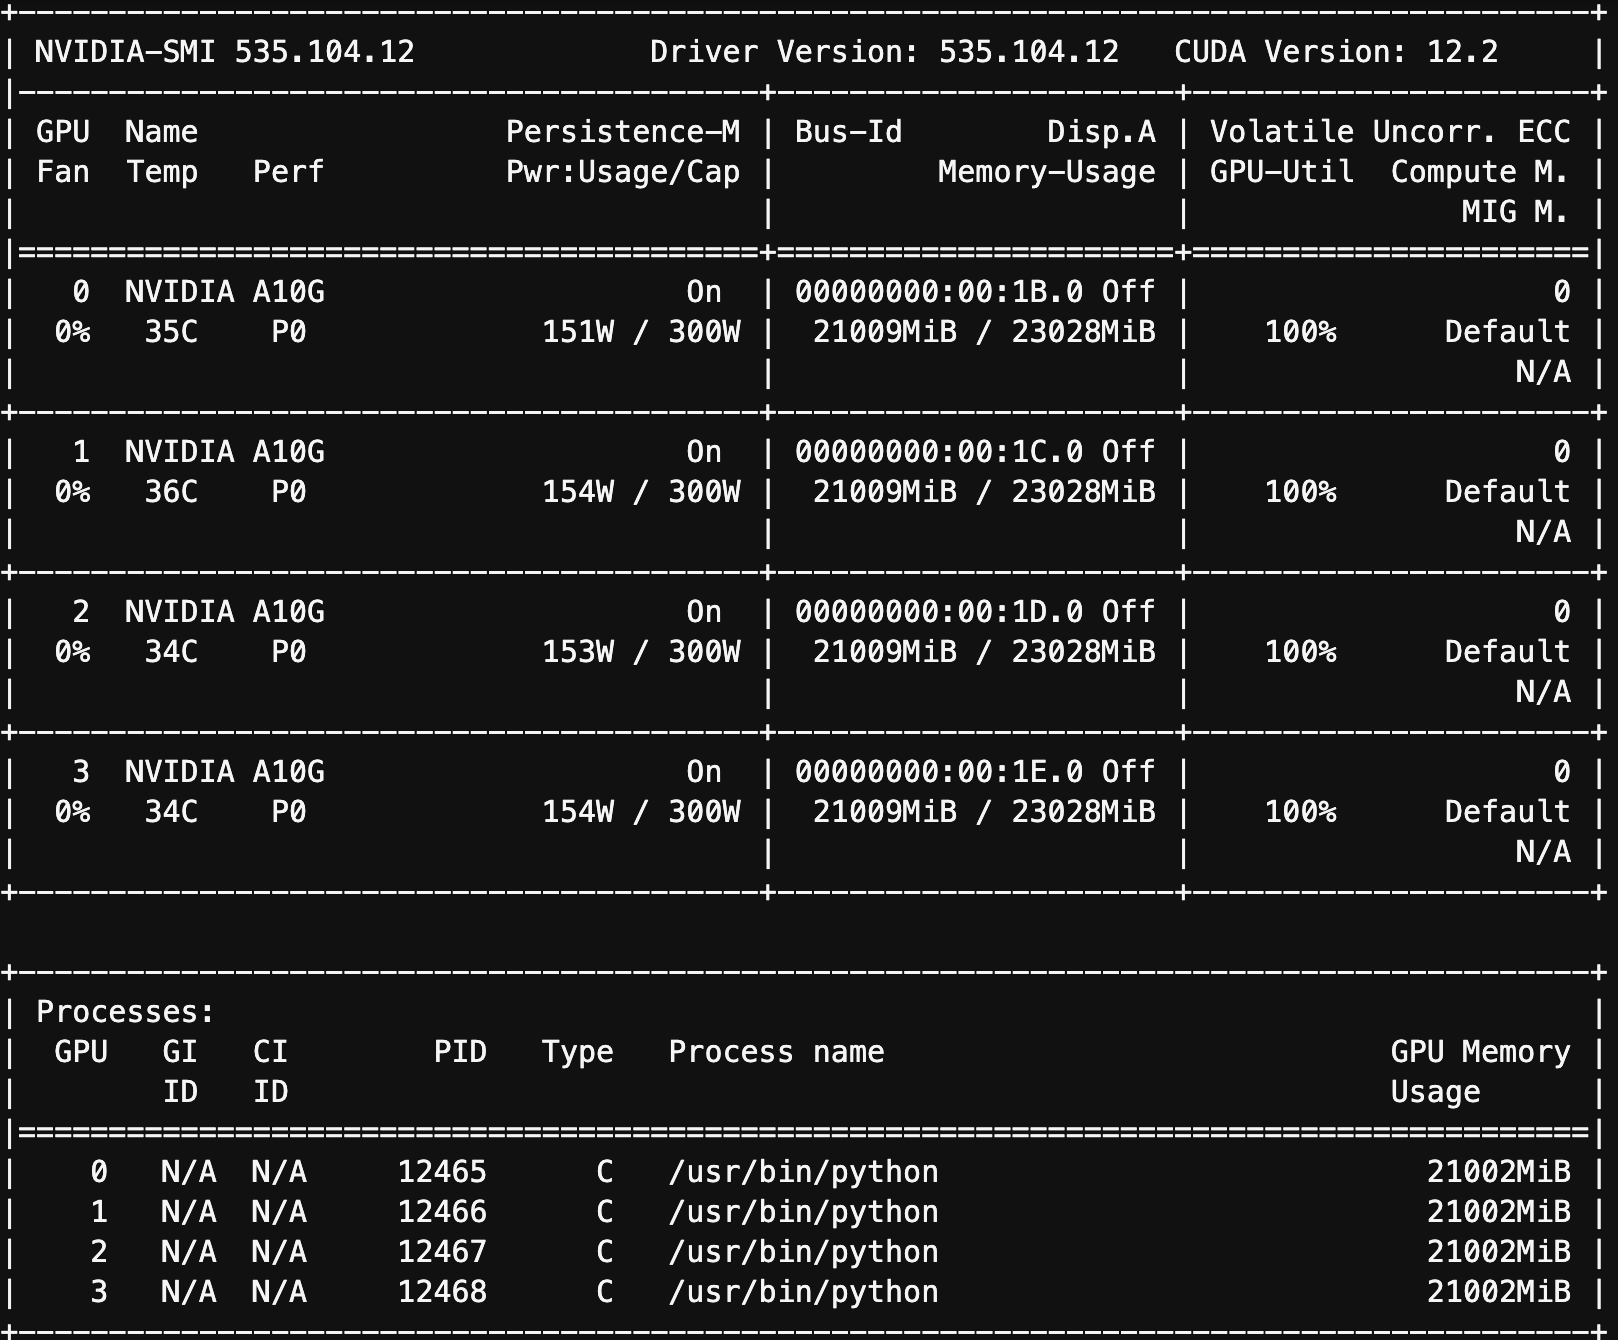
Once there we can monitor the accelerator usage by running nvidia-smi:
nvidia-smi
You'll see very little usage of the GPU's for the first few minutes as it sets up the case, then you'll see constant usage after that: