Manual Deployment Guide
Note: Helm installation option is still in preview.
This guide describes how to deploy Kubeflow on Amazon EKS using Cognito as your identity provider. Kubeflow uses Istio to manage internal traffic. In this guide, we will:
- create an Ingress to manage external traffic to the Kubernetes services
- create an Application Load Balancer (ALB) to provide public DNS
- enable TLS authentication for the Load Balancer
- create a custom domain to host Kubeflow (because the certificates needed for TLS are not supported for ALB’s public DNS names)
Prerequisites
Check to make sure that you have the necessary prerequisites.
Background
Read the background section in the Load Balancer guide for information on the requirements for exposing Kubeflow over a Load Balancer.
Read the create domain and certificate section for information on why we use a subdomain for hosting Kubeflow.
(Optional) Automated setup
The rest of the sections in this guide walk you through each step for setting up domain, certificates, and a Cognito userpool using the AWS Console. This guide is intended for a new user to understand the design and details of these setup steps. If you prefer to use automated scripts and avoid human error for setting up the resources for deploying Kubeflow with Cognito, follow the automated setup guide.
1.0 Create a custom domain and certificates
- Follow the Create a subdomain section of the Load Balancer guide to create a subdomain(e.g.
platform.example.com) for hosting Kubeflow. - Follow the Create certificates for domain section of the Load Balancer guide to create certificates required for TLS.
From this point onwards, we will be creating/updating the DNS records in the subdomain only. All the screenshots of the hosted zone in the following sections/steps of this guide are for the subdomain.
2.0 Create a Cognito User Pool
-
Create a user pool in Cognito in the same region as your EKS cluster. Type a pool name and choose
Review defaults. -
The email is a required user attribute since Kubeflow uses email address as the user identifier for multi-user isolation. See Kubeflow documentation for more information. On the review page, make sure email is selected as a required attribute. If it is not by default, edit the
Required attributesand selectemail.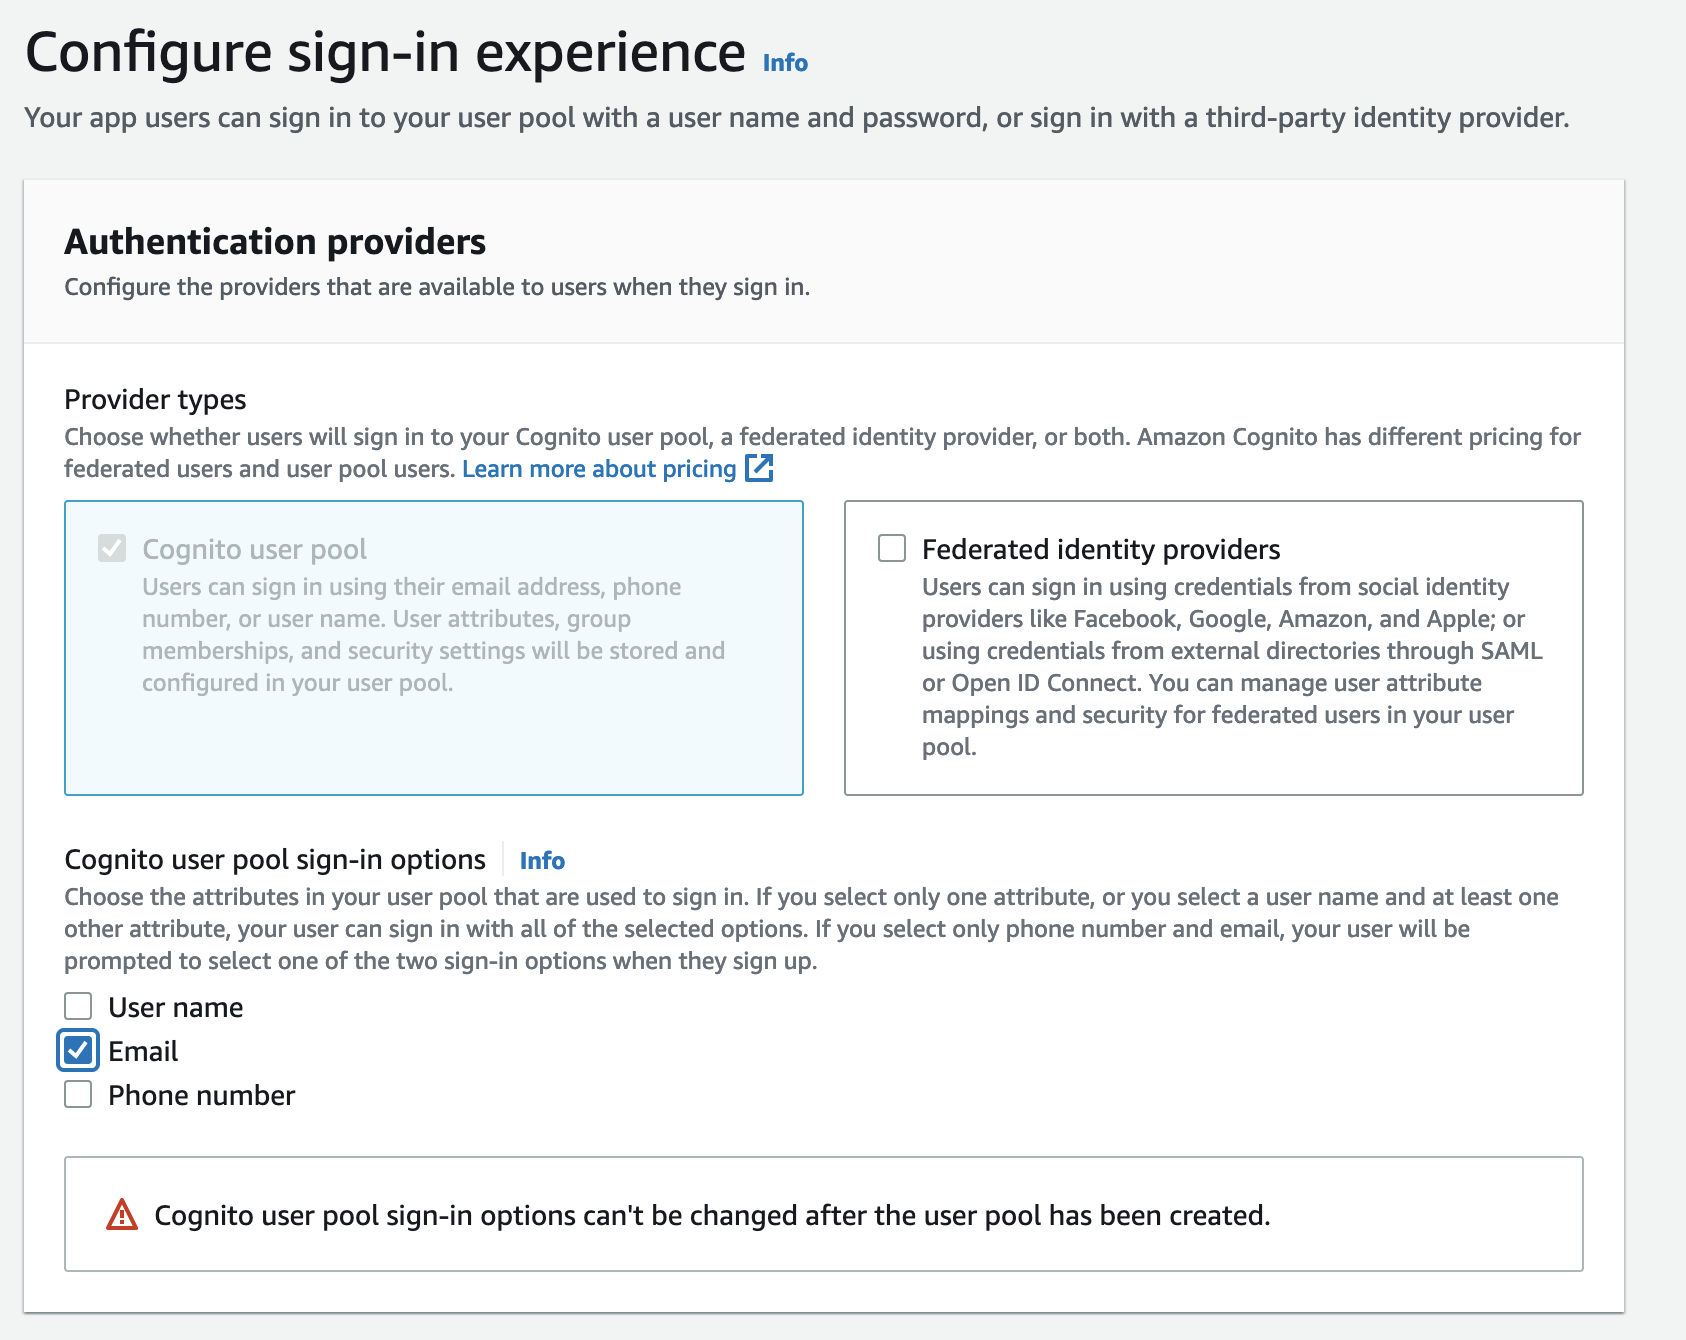
-
On the Policies page, select
Only allow administrators to create usersunderDo you want to allow users to sign themselves up?and save changes. This step is optional but is recommended to have strict control over the users. -
Click on
Create poolto create the user pool. -
Add an
App clientwith any name and the default options.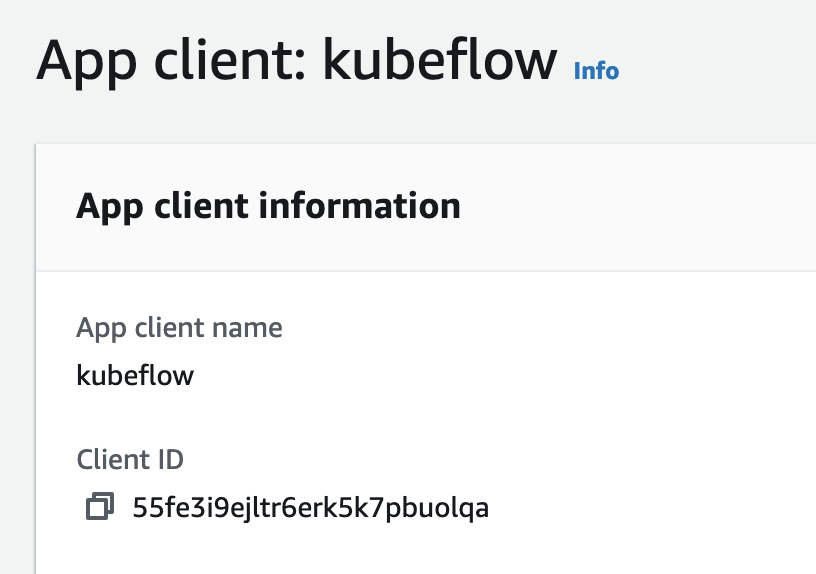
-
In the
App client settings, selectAuthorization code grantflow under OAuth-2.0 and checkemail,openid,aws.cognito.signin.user.adminandprofilescopes. Check alsoEnabled Identity Providers.-
Substitute
example.comin this URL -https://kubeflow.platform.example.com/oauth2/idpresponsewith your domain and use it as the Callback URL(s). -
Substitute
example.comin this URL -https://kubeflow.platform.example.comwith your domain and use it as the Sign out URL(s).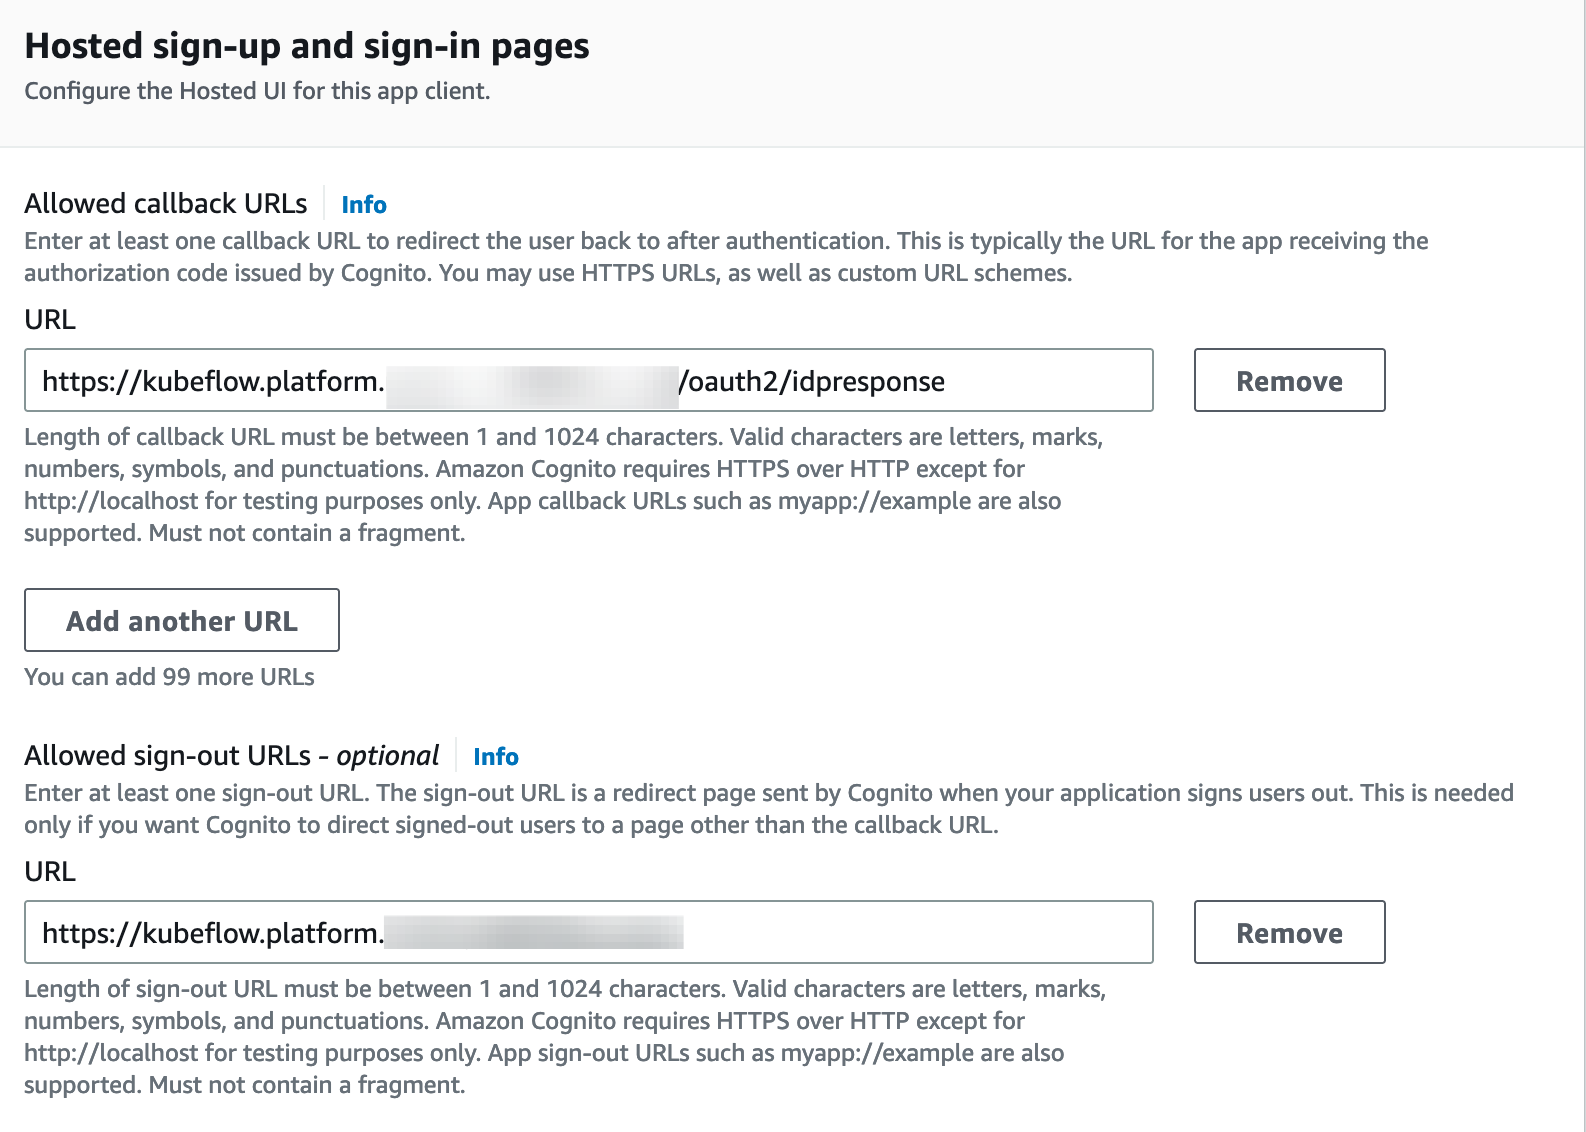
-
-
Add a custom domain to the user pool. In order to add a custom domain to your user pool, you need to specify a domain name, and provide a certificate managed with AWS Certificate Manager (ACM).
-
In order to use a custom domain, its root(i.e.
platform.example.com) must have an valid A type record. Create a new record of typeAin theplatform.example.comhosted zone with an arbitrary IP for now. Once the ALB created, we will update this value.Following is a screenshot of a
platform.example.comhosted zone showing a record.
-
If your cluster is not in N.Virginia (us-east-1), create an ACM certificate in us-east-1 for
*.platform.example.com. That is because Cognito requires a certificate in N.Virginia in order to have a custom domain for a user pool. -
In the
Domain name:-
Choose
Use your domain, typeauth.platform.example.comand select the*.platform.example.comAWS managed certificate you’ve created in N.Virginia. Creating domain takes up to 15 mins.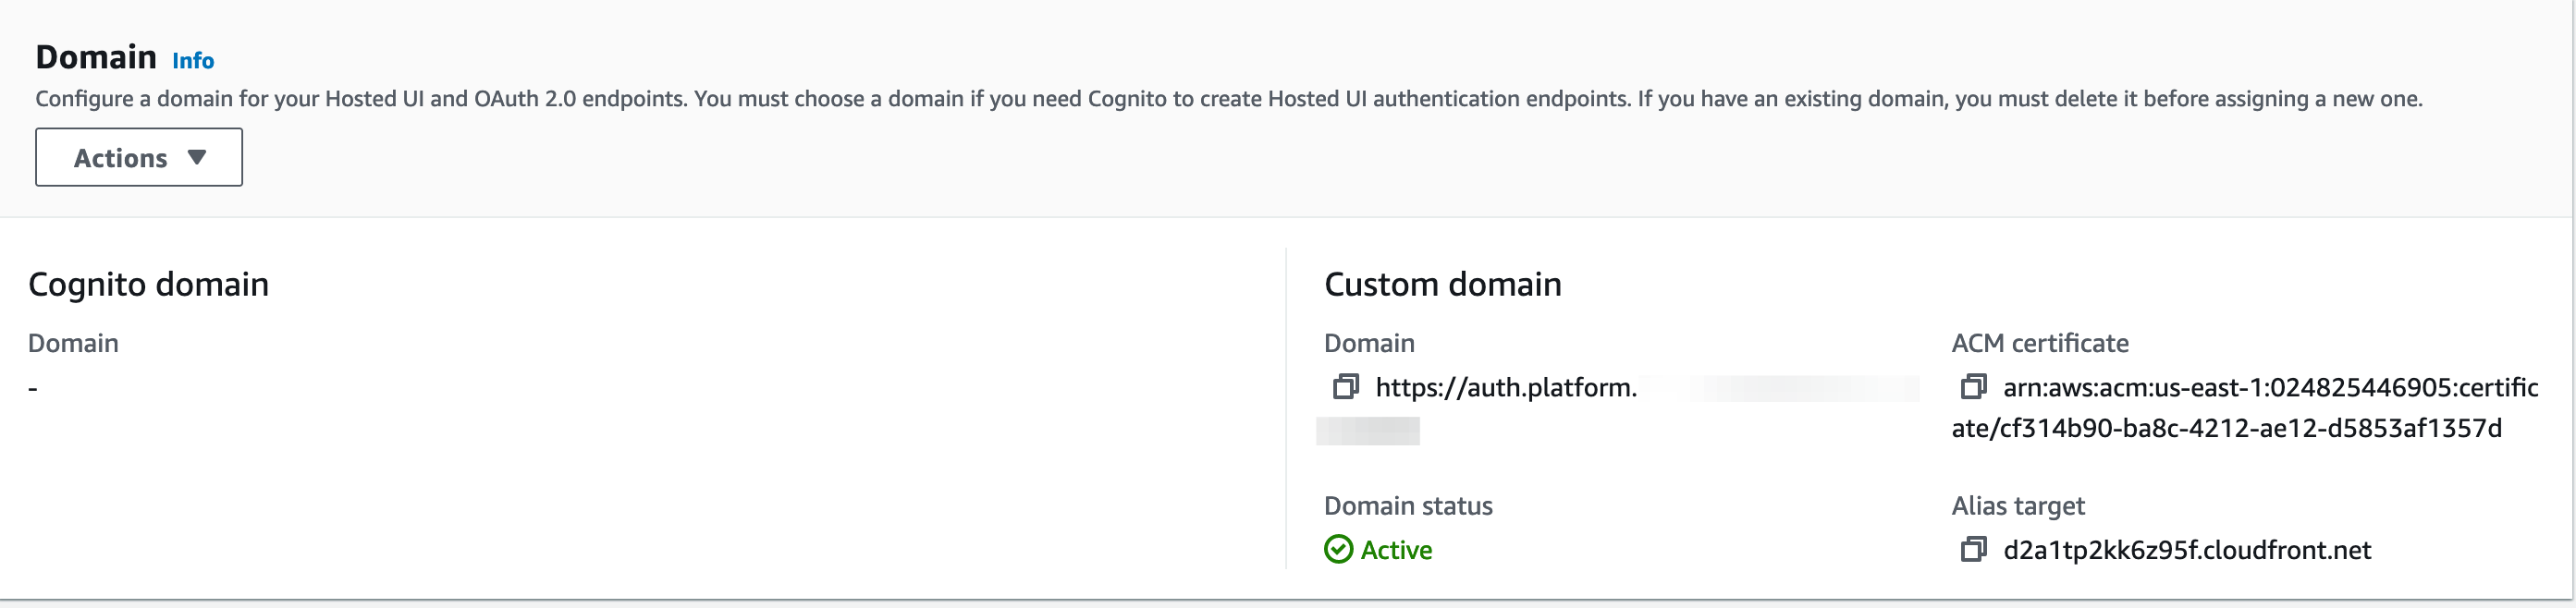
-
When it’s created, it will return the
Alias targetCloudFront address.
-
Create a new record of type
Aforauth.platform.example.comwith the value of the CloudFront URL. -
Select the
aliastoggle and selectAlias to Cloudfront distributionfor creating the record: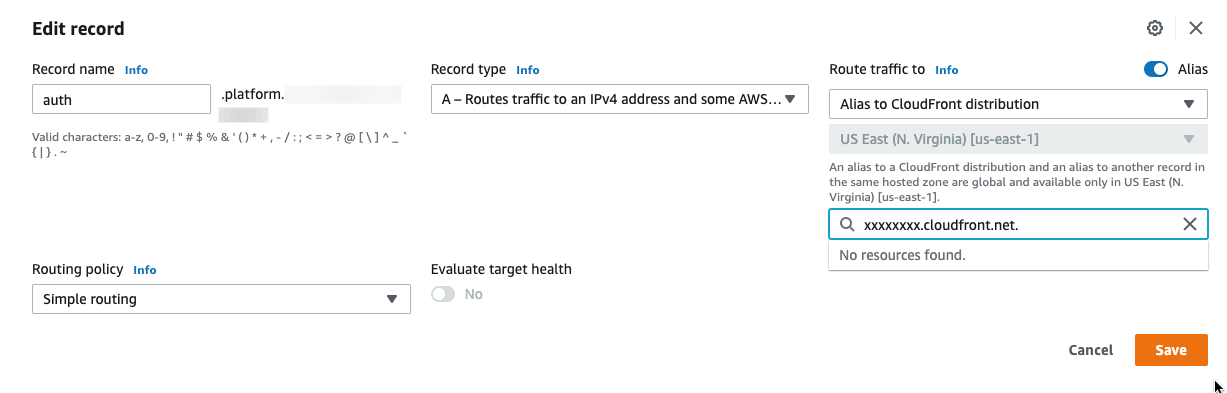
-
Following is a screenshot of a A record for
auth.platform.example.comin theplatform.example.comhosted zone:
-
-
3.0 Configure Ingress
-
Take note of the following values from the previous steps:
-
The Pool ARN of the user pool found in Cognito general settings.
-
The App client id, found in Cognito App clients.
-
The Custom user pool domain (e.g.
auth.platform.example.com), found in the Cognito domain name. -
The ARN of the certificate from the Certificate Manager in the region where your platform (for the subdomain) is running.
-
SignOutURL is the domain that you provided as the Sign out URL(s).
-
CognitoLogoutURL is comprised of your CognitoUserPoolDomain, CognitoAppClientId, and the domain that you provided as the Sign out URL(s).
-
The load balancer scheme (e.g.
internet-facingorinternal). Default is set tointernet-facing. Useinternalas the load balancer scheme if you want the load balancer to be accessible only within your VPC. See Load balancer scheme in the AWS documentation for more details.
-
-
Export those values:
export CognitoUserPoolArn="<YOUR_USER_POOL_ARN>" export CognitoAppClientId="<YOUR_APP_CLIENT_ID>" export CognitoUserPoolDomain="<YOUR_USER_POOL_DOMAIN>" export certArn="<YOUR_ACM_CERTIFICATE_ARN>" export signOutURL="<YOUR_SIGN_OUT_URL>" export CognitoLogoutURL="https://$CognitoUserPoolDomain/logout?client_id=$CognitoAppClientId&logout_uri=$signOutURL" export loadBalancerScheme=internet-facing -
The following commands will inject those values in a configuration file for setting up Ingress:
Select the package manager of your choice.
printf '
CognitoUserPoolArn='$CognitoUserPoolArn'
CognitoAppClientId='$CognitoAppClientId'
CognitoUserPoolDomain='$CognitoUserPoolDomain'
certArn='$certArn'
' > awsconfigs/common/istio-ingress/overlays/cognito/params.env
printf '
loadBalancerScheme='$loadBalancerScheme'
' > awsconfigs/common/istio-ingress/base/params.env
yq e '.alb.certArn = env(certArn)' -i charts/common/ingress/cognito/values.yaml yq e '.alb.cognito.UserPoolArn = env(CognitoUserPoolArn)' -i charts/common/ingress/cognito/values.yaml yq e '.alb.cognito.UserPoolDomain = env(CognitoUserPoolDomain)' -i charts/common/ingress/cognito/values.yaml yq e '.alb.cognito.appClientId = env(CognitoAppClientId)' -i charts/common/ingress/cognito/values.yaml yq e '.alb.scheme = env(loadBalancerScheme)' -i charts/common/ingress/cognito/values.yaml -
The following commands will inject those values in a configuration file for setting up AWS authservice:
Select the package manager of your choice.
printf '
LOGOUT_URL='$CognitoLogoutURL'
' > awsconfigs/common/aws-authservice/base/params.env
yq e '.LOGOUT_URL = env(CognitoLogoutURL)' -i charts/common/aws-authservice/values.yaml -
Follow the Configure Load Balancer Controller section of the load balancer guide to setup the resources required by the load balancer controller.
(Optional) Configure Culling for Notebooks
Enable culling for notebooks by following the instructions in configure culling for notebooks guide.
4.0 Build the manifests and deploy Kubeflow
make deploy-kubeflow INSTALLATION_OPTION=kustomize DEPLOYMENT_OPTION=cognitomake deploy-kubeflow INSTALLATION_OPTION=helm DEPLOYMENT_OPTION=cognito5.0 Update the domain with the ALB address
-
Check if the ALB is provisioned. This may take a few minutes.
kubectl get ingress -n istio-system
Warning: extensions/v1beta1 Ingress is deprecated in v1.14+, unavailable in v1.22+; use networking.k8s.io/v1 Ingress
NAME            CLASS    HOSTS   ADDRESS                                                              PORTS   AGE
istio-ingress   <none>   *       k8s-istiosys-istioing-xxxxxx-110050202.us-west-2.elb.amazonaws.com   80      15d
If
ADDRESSis empty after a few minutes, see ALB fails to provision in the troubleshooting guide. -
When the ALB is ready, copy the DNS name of the load balancer and create a CNAME entry for it in Route53 under the subdomain (
platform.example.com) for*.platform.example.com
-
Update the type
Arecord created forplatform.example.comusing ALB DNS name. Change from127.0.0.1to the ALB DNS name. You have to use the alias form underAlias to application and classical load balancerthen select a region and your ALB address.
-
Here is a screenshot of all the record sets in the hosted zone for reference.

6.0 Connect to the central dashboard
-
The central dashboard should now be available at
https://kubeflow.platform.example.com.Before connecting to the dashboard:
-
Go to the Cognito console and create some users in
Users and groups. These are the users who will log in to the central dashboard.
-
Create a Profile for a user by following the steps in the Manual Profile Creation. The following is a Profile example for reference:
apiVersion: kubeflow.org/v1beta1
kind: Profile
metadata:
   # replace with the name of profile you want, this will be user's namespace name
   name: namespace-for-my-user
   namespace: kubeflow
spec:
   owner:
       kind: User
       # replace with the email of the user
       name: my_user_email@kubeflow.com
-
-
Open the central dashboard at
https://kubeflow.platform.example.com. It will redirect to Cognito for login. Use the credentials of a user you just created in the previous steps.
Note: It might take a few minutes for the DNS changes to propagate and for your URL to work. Check if the DNS entry propogated with the Google Admin Toolbox.
7.0 Uninstall Kubeflow
To delete the resources created in this guide, refer to the Uninstall section in Automated Cognito deployment guide.