Downsize existing FSx Volume
Instructions to downsize an existing FSxL Filesystem using DRA import/export
These steps detail how to migrate from an existing FSxL filesystem to a smaller FSx FileSystem. There are several steps involved in this process, which uses FSxL DRA Export Policies to backup existing FileSystem to s3, then create a new FSxL Filesystem with a DRA Import policies to move old data to new FileSystem, and mount it to an existing Cluster. For more information, see the FSx Lustre guide on linking your filesystem to S3 bucket .
You cannot downsize the storage size of an existing FSxL filesystem, hence the below method to migrate to a smaller FSxL filesystem is the alternative method
1. Link existing filesystem to an S3 bucket in your account
It is recommended to create a new S3 bucket in the desired region of your destination filesystem for this purpose:
To create a new bucket using the cli:
aws s3api create-bucket --bucket <YOUR_DRA_BUCKET> --region <AWS_REGION> --create-bucket-configuration LocationCons
traint=<AWS_REGION>
2. Create a Data Repository Association for your existing FSx
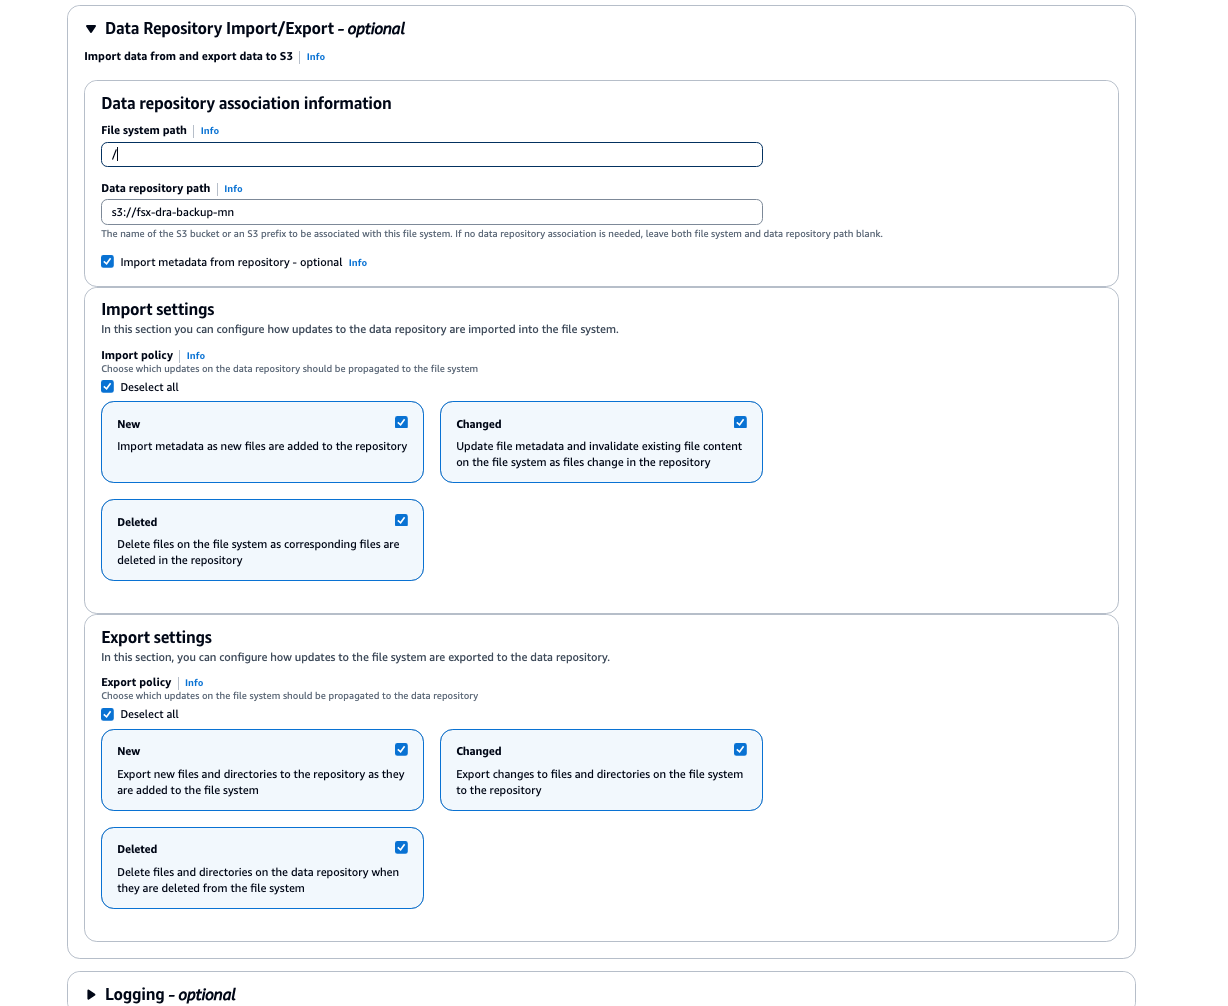
In the FSx Lustre Console, go to your existing Filesystem > Data Repository Assoications > Create. Follow the below sample configuration:
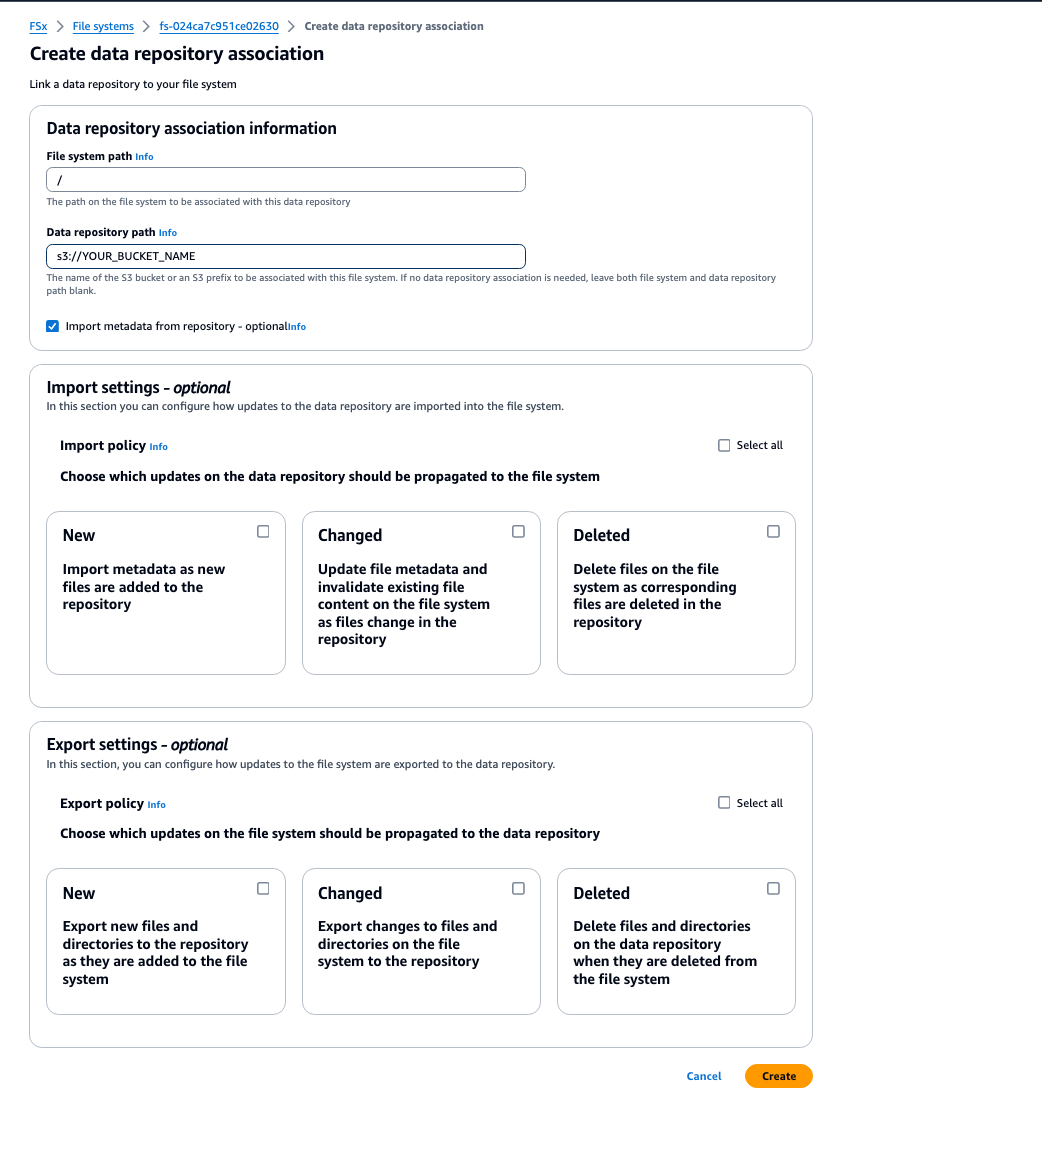
Note: for filesystem path, it is recommended to set the root filesystem path of / to ensure the entire filesystem is included in the DRA policy.
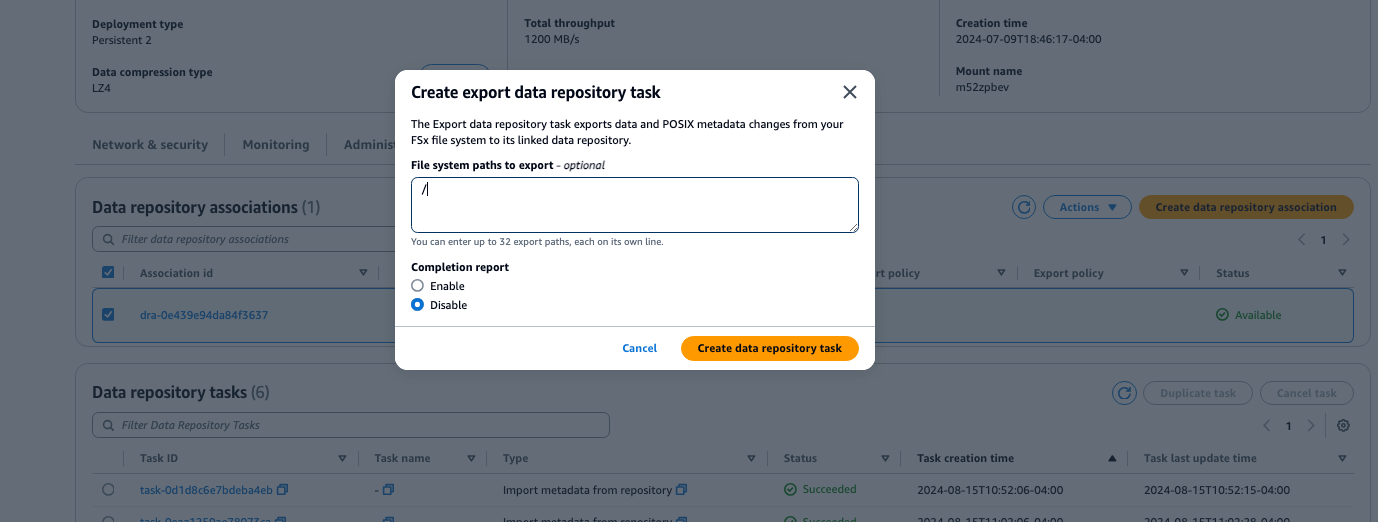
3. Create a Data Repository Export Task
Once your Data Repositary association is created, create a data repository task for that DRA. Follow the below sample configuration:
Once created, you can view the status of your export task and view the Task status and total number of files processed by the task.
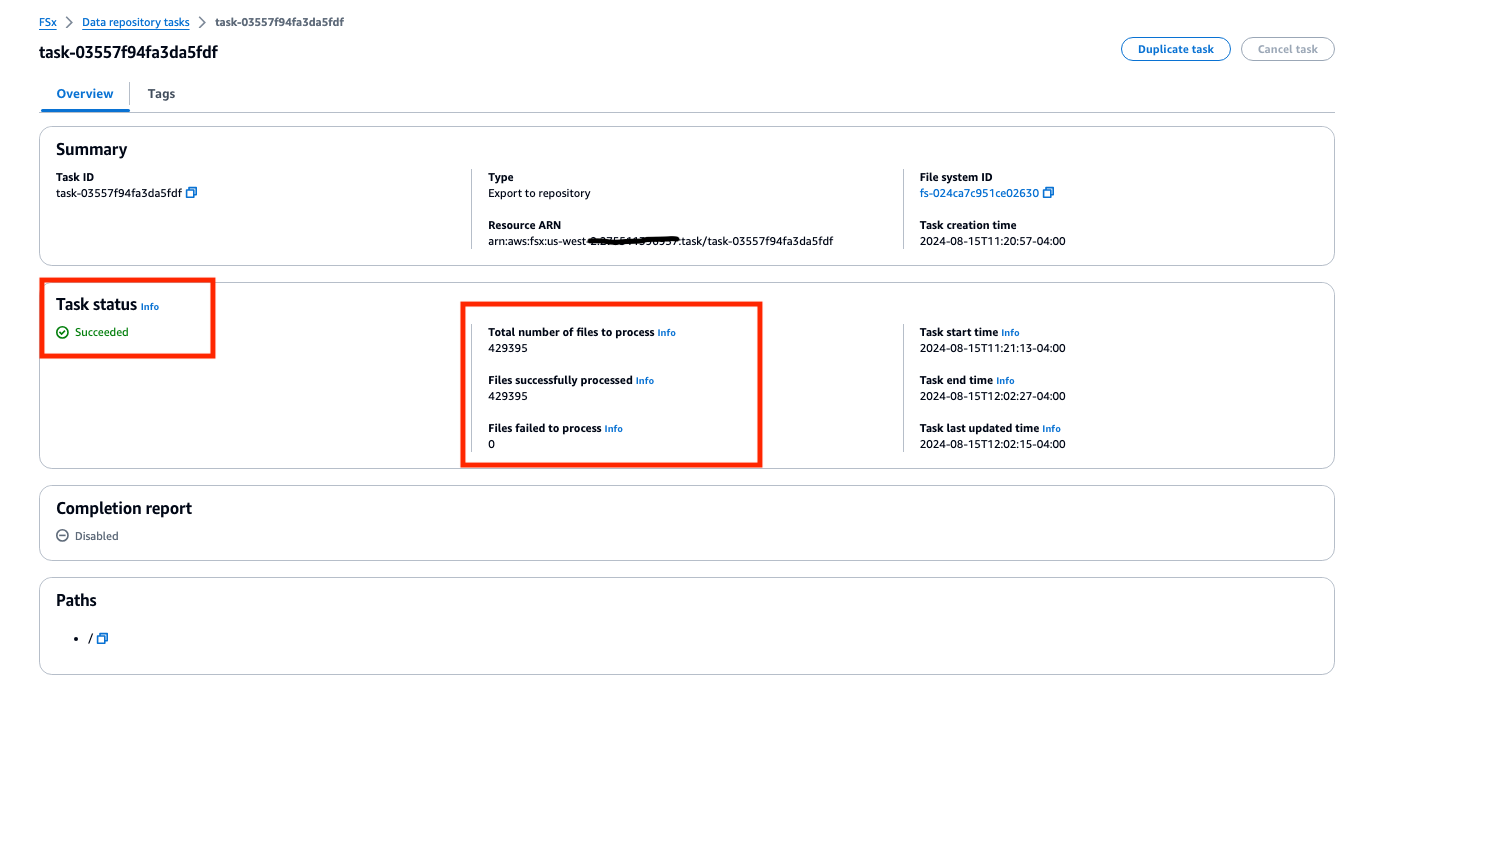
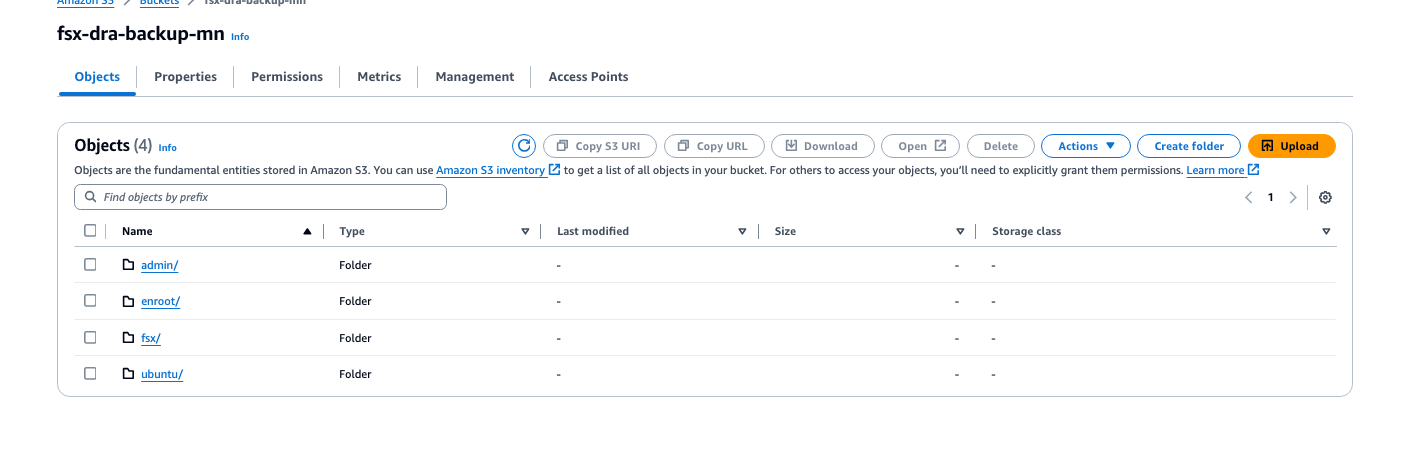
When the task has reached a status of "Succeeded", verify that the data has been successfully exported to your S3 bucket. You should see your root Filesystem directory stored in S3, similar to this example:
4. Create a new FSx FileSystem which is right-sized:
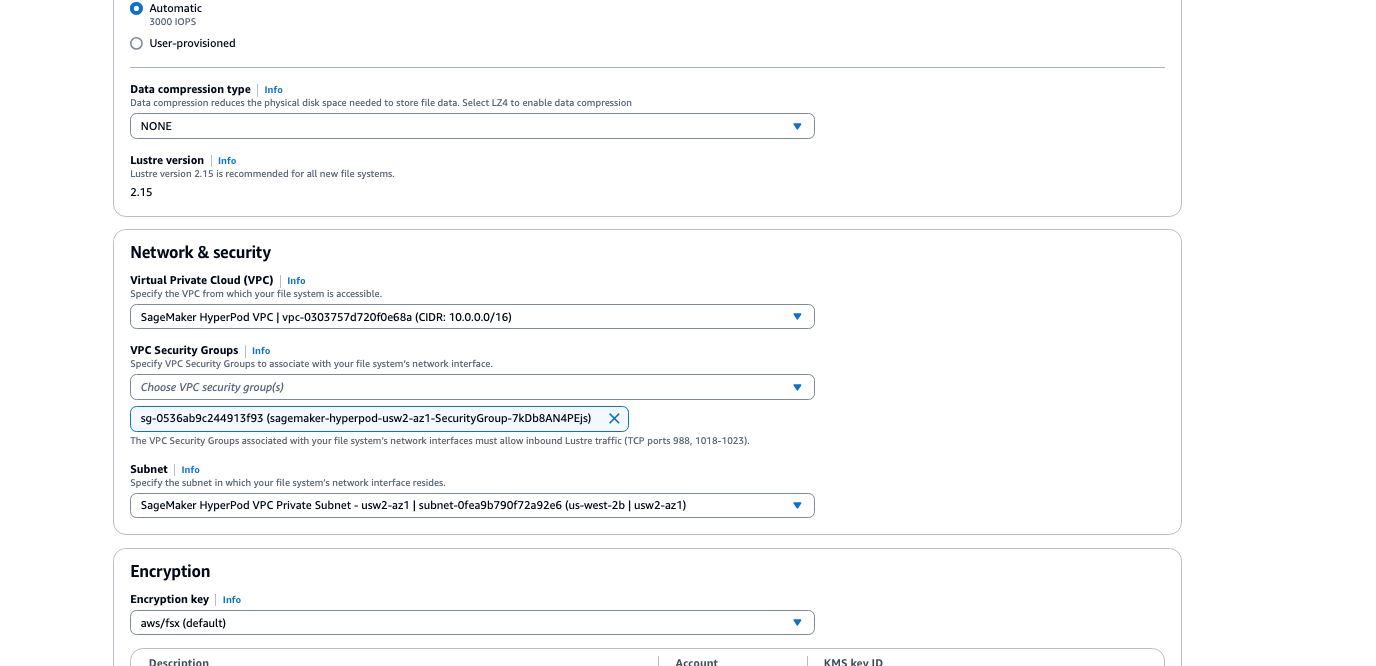
- Create file system for FSx - Persistent SSD, same configuration (VPC, Subnet, Security Group) as old FileSystem.
- Create a DRA Import Policy targeting s3 bucket created in step 1
4a. Create file system for FSx
Create new FSx Persistent or Scratch filesystem, ensure proper VPC, Subnet, Security Group -reference existing filesystem, SG can be same SG as HyperPod cluster nodes in SageMaker console.
4b. Create Data Repostiory Association for your new FSxL filesytem
Create a DRA Import Policy (and optional export policy) for your new Filesystem. Ensure you specify the path to the S3 bucket which you have backed up your existing Filesystem.
5. Unmount existing FSxL from HyperPod Nodes.
For reference, see FSx Lustre documentation for unmounting Filesystem. Instructions also provided below:
# on controller / login node of HyperPod cluster

# Login as Root User
$ sudo su

# cd to root directory
$ cd

#verify location as /root
pwd

#should show /root
if you see the following error, you will need to logout of ubuntu user which is auto mounted on home directory
root@ip-10-1-79-94:~# umount /fsx
umount: /fsx: target is busy.

# $exit
#sudo su
#retry
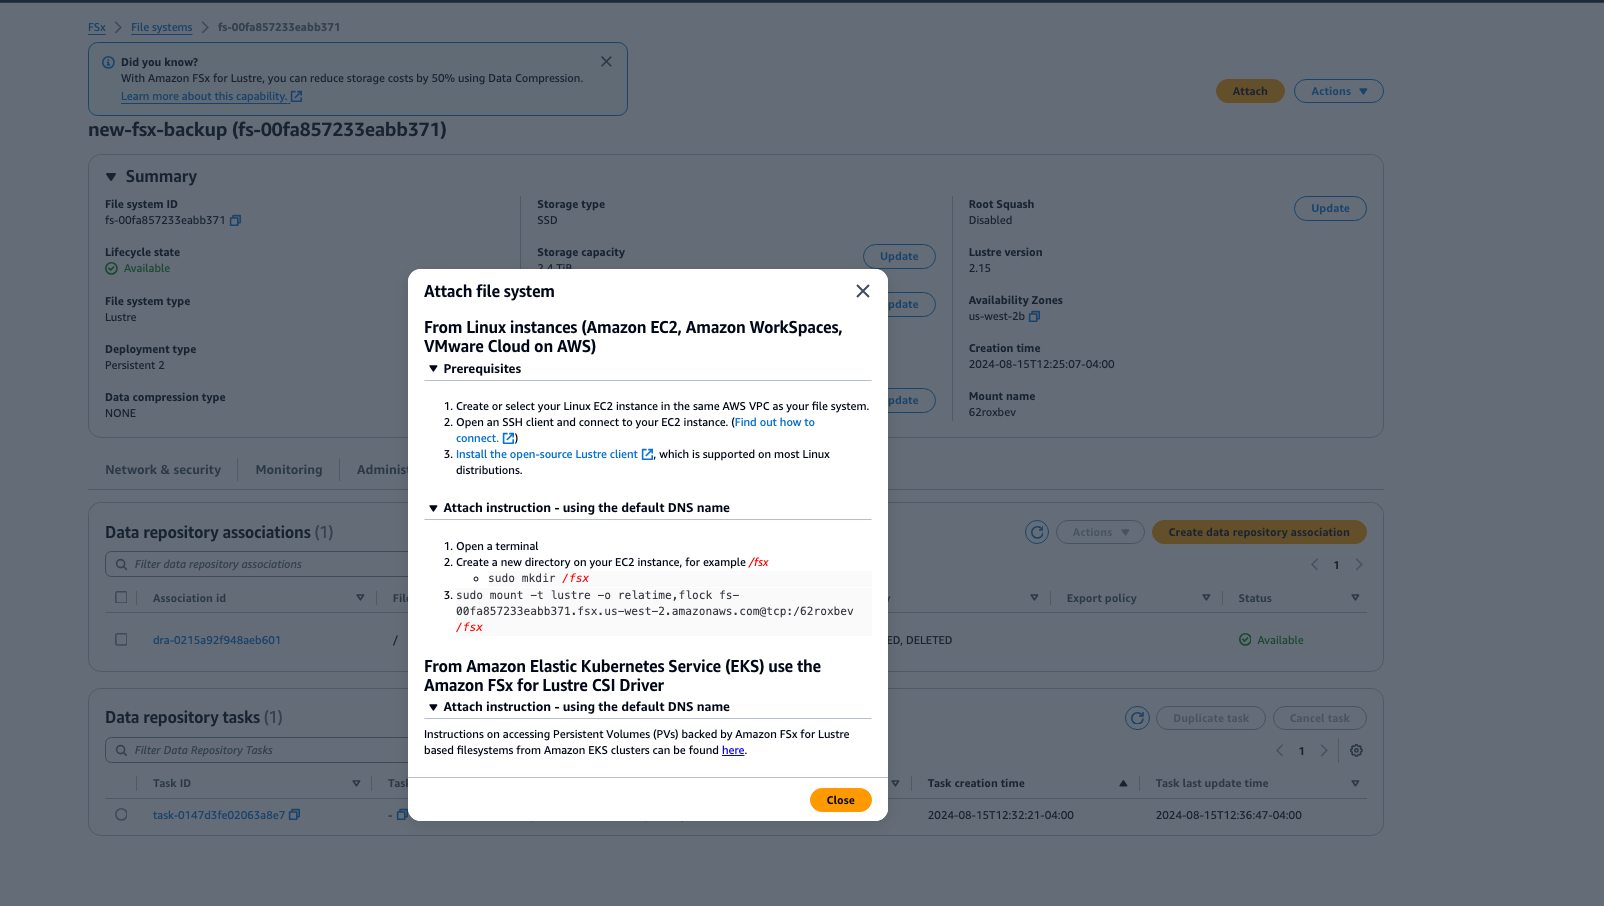
6. Mount new FSxL on Controller / Login Nodes
Mount new FSxL on cluster controller / login node following commands in FSxL console. Run the command from FSxL console as root, once filesystem is successful. Note, we recommend waiting for the DRA task to execute successfully before continuing with this task.
7. Unmount /fsx from the compute nodes using srun
srun -N <NUM_COMPUTE_NODES> sudo umount /fsx
8. Mount new filesystem to compute nodes
srun -N <NUM_COMPUTE_NODES> sudo mount -t lustre ... (command from FSxL console)
9. Delete old FSx Lustre Filesystem
Once you have confirmed the new filesystem is mounted and you can read files from it, proceed with deleting the old FSx Filesystem
10. Update HyperPod Lifecycle Scripts with new FSxL
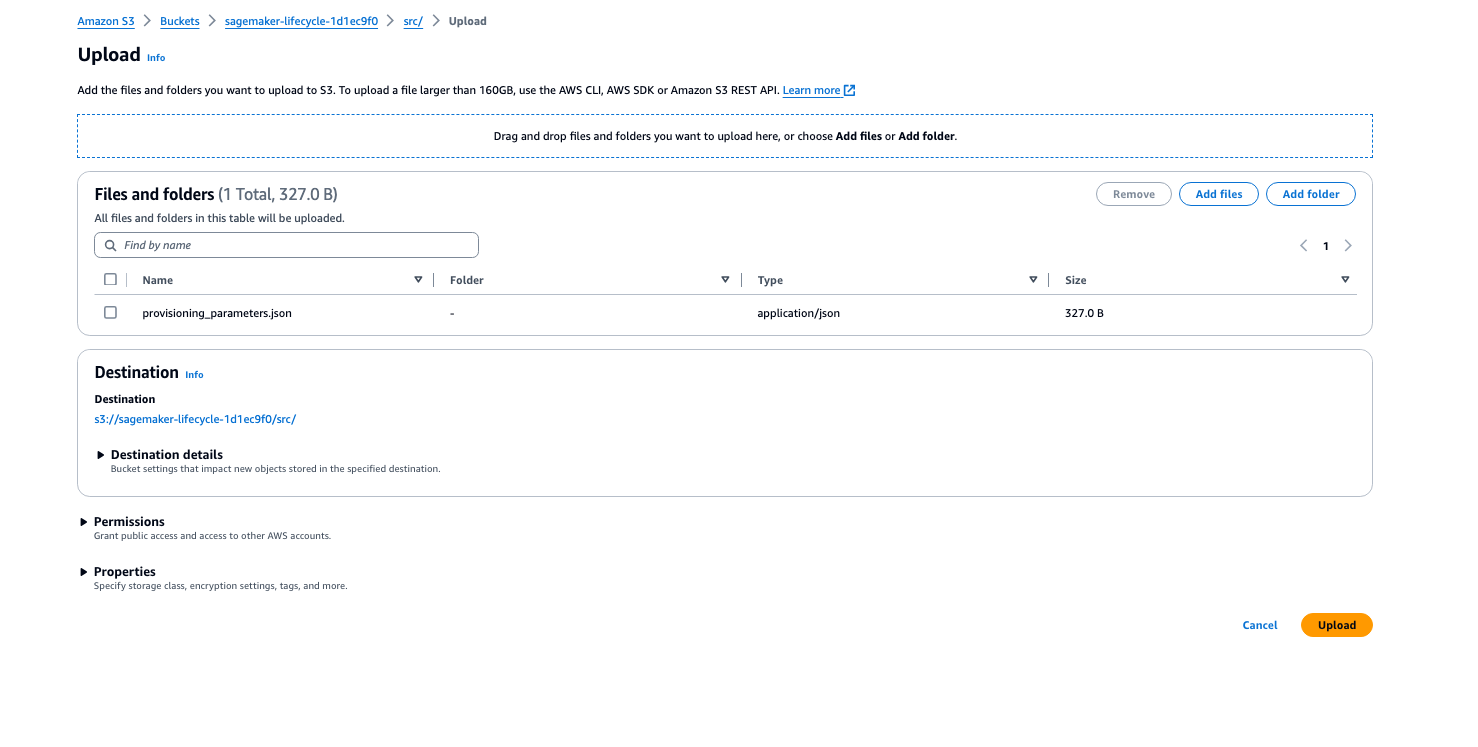
Update provisioning_parameters.json file in your sagemaker lifecycle bucket with new FSxL DNS and Mount Name.
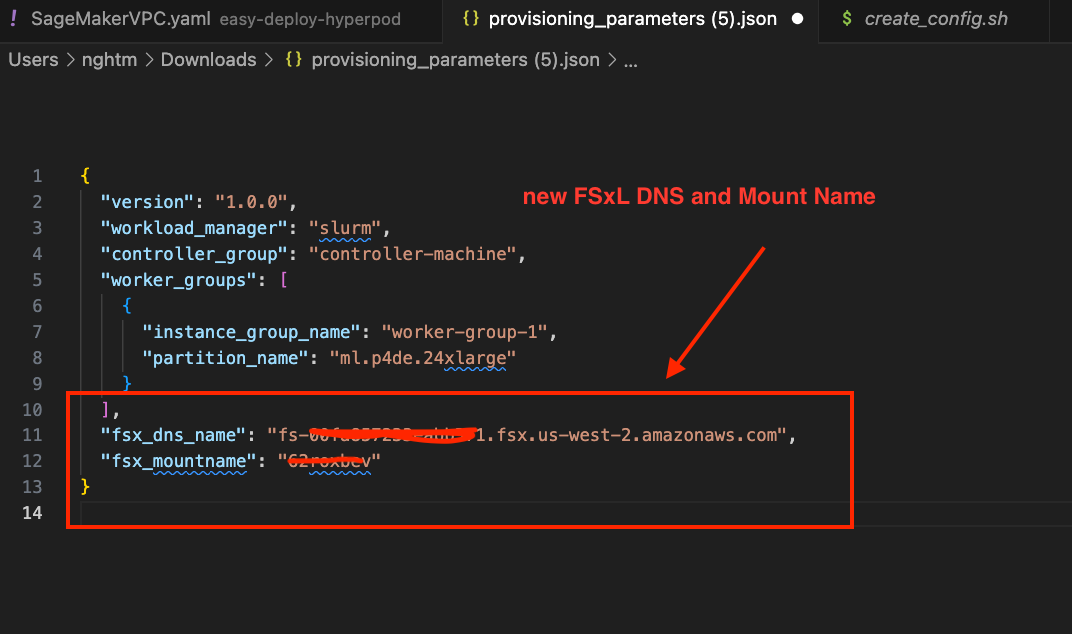
Once updated, upload the new provisioning_parameters.json file to your s3 bucket in the lifecycle script directory to overwrite the old provisioning_parameters.json file. You can do so via the console (image below) or CLI.
11. [Optional / Recommended] Test node replacement
After completing above steps, it is recommended to test that the new FSx Lustre defined in provisioning_parameters.json is mounted to new cluster nodes upon HyperPod replacement actions. You can trigger a manual node replacement from the head/controller node with the below command:
sudo scontrol update node=<NODE-IP> state=down reason="Action:Replace"
When the node comes back online, SSH into the node and confirm that FSx Lustre is properly mounted.