Serving Stable Diffusion Model for Inference with Ray Serve
Ray Serve is a scalable model serving library for building online inference APIs. Serve is framework-agnostic, so you can use a single toolkit to serve everything from deep learning models built with frameworks like PyTorch, TensorFlow, and Keras, to Scikit-Learn models, to arbitrary Python business logic.
A Ray Serve manages these components:
- RayCluster: Manages resources in a Kubernetes cluster
- Ray Serve Applications: Manages users' applications
Prerequisites
Before proceeding, ensure you have:
- A functional HyperPod EKS cluster with GPU nodes
- Ray cluster deployed (see Ray Train documentation)
- Access to the aws-do-ray repository
1. Create a RayService
1.1 Download Required Code
Ensure you have aws-do-ray downloaded:
git clone https://github.com/aws-samples/aws-do-ray.git
Navigate to the Ray service directory:
cd aws-do-ray/Container-Root/ray/rayservice/
ls
As you can see, there are multiple models we can serve for inference. For this workshop we will be deploying the Stable Diffusion model.
1.2 Explore Stable Diffusion GPU Files
Navigate to the Stable Diffusion GPU directory:
cd stable_diffusion_gpu
ls -alh
In here we have 3 files:
rayservice.stable_diffusion_gpu.yaml: Ray Service YAML configuration
Here is more information regarding the configuration for Ray Serve applications in the YAML. More details here:
- applications: A list of applications to be deployed
- name: The name of the application, in this case,
stable-diffusion-gpu - import_path: The import path for the application's module,
stable_diffusion_gpu:entrypoint - route_prefix: The route prefix for accessing the application
- runtime_env: Specifies the runtime environment for the application
- working_dir: The working directory for the application, must point to a zip file locally or through a URI
- pip: A list of Python packages to be installed in the runtime environment
- deployments: A list of deployments for the application
- name: The name of the deployment,
stable-diffusion-gpu - num_replicas: The number of replicas for the deployment, set to 1
- ray_actor_options: Options for the Ray actors
- num_gpus: The number of GPUs allocated for each actor, set to 1
stable_diffusion_gpu.py: Python code for processing stable diffusion requests
- Scalable Deployment: Ray Serve dynamically scales the APIIngress and StableDiffusionV2 components based on traffic, managing resources efficiently by adjusting the number of replicas
- Asynchronous Execution: Using
.remote(), Ray handles multiple requests concurrently, distributing tasks across the cluster for responsive API performance - GPU Resource Management: Ray ensures each model replica has a dedicated GPU and optimizes performance through mixed-precision, making inference faster and memory-efficient
stable_diffusion_req.py: Python code to send stable diffusion requests
1.3 Deploy the RayService
To create a Ray Service deployment, run:
kubectl apply -f rayservice.stable_diffusion_gpu.yaml
As our cluster is deploying, we will wait for the RayService Kubernetes service, which is created after the Serve applications are ready and running. This process may take approximately 1 minute after all pods in the RayCluster are running.
To check pods:
kubectl get pods
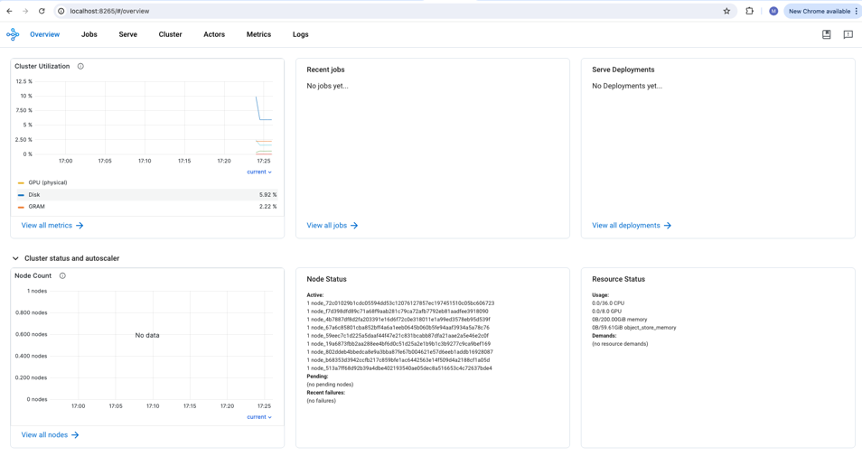
2. Access Ray Dashboard (Optional)
We will provide two ways through which the Ray dashboard can be accessed.
Option A: Port-forward Locally
Open a new bash shell by using the + button in the upper-right corner of your terminal, then execute the following command block to display the dashboard using a terminal-based browser:
kubectl port-forward svc/$(kubectl get svc | grep stable-diffusion-gpu-raycluster | grep head | cut -d ' ' -f 1) 8265 &
You can now access the dashboard locally at https://localhost:8265 or, if you are using SageMaker Studio which won't allow you to access these ports locally, you can use fathyb/carbonyl image which will transform your terminal into a browser:
docker run $DOCKER_NETWORK --rm -it fathyb/carbonyl http://localhost:8265
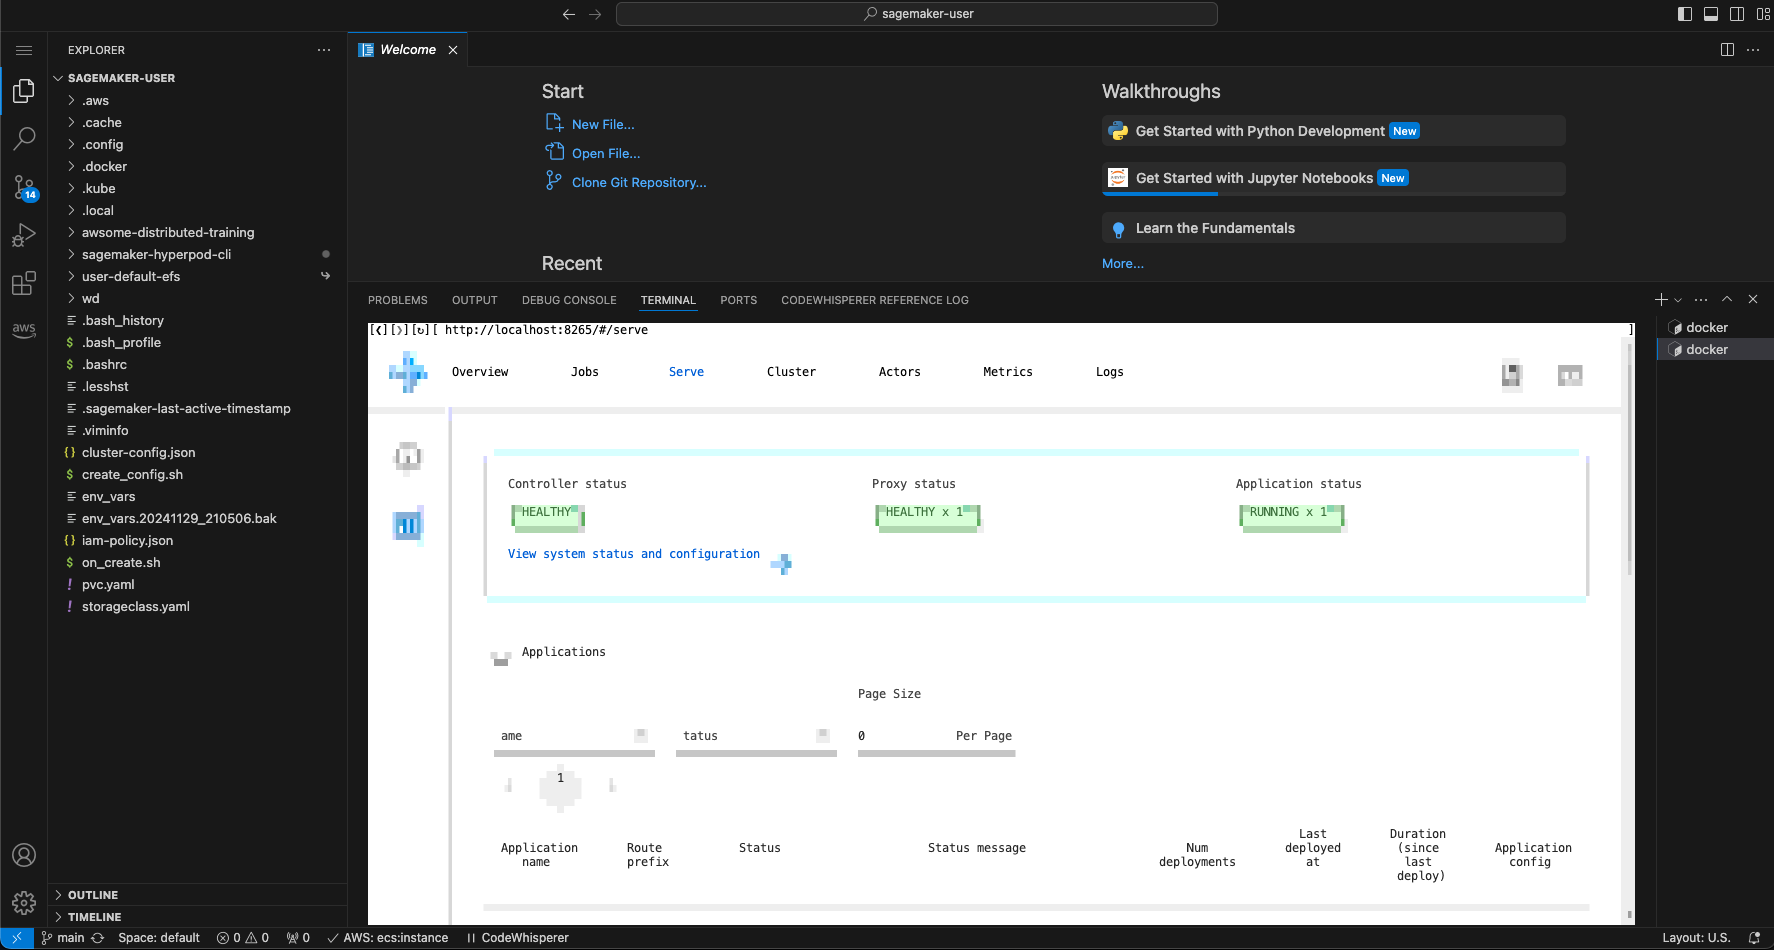
To exit the browser, just close the shell window.
If you are having issues port-forwarding, please run: pkill -f "kubectl port-forward", then retry.
Option B: Deploy Load Balancer
Before we can use an ingress object, we must deploy the Load Balancer Controller to the cluster. Please follow the instructions in the Load Balancer Inference section, then return here to create the ingress object.
-
Follow load balancer setup steps from the Load Balancer Controller documentation
-
Create an Ingress template:
# Retrieves name of head pod service
export HEAD_SERVICE=$(kubectl get service --all-namespaces -o jsonpath='{range .items[*]}{.metadata.name}{"\n"}{end}' | grep "raycluster")

export PUBLIC_SUBNETS=$(aws ec2 describe-subnets --filters "[ {\"Name\":\"vpc-id\",\"Values\":[\"${VPC_ID}\"]}, {\"Name\":\"map-public-ip-on-launch\",\"Values\":[\"true\"]} ]" --query 'Subnets[*].{SubnetId:SubnetId}' --output text)

export SUBNET1=$(echo $PUBLIC_SUBNETS | cut -d ' ' -f 1)

export SUBNET2=$(echo $PUBLIC_SUBNETS | cut -d ' ' -f 2)


cat << 'EOF' > ray-dashboard.yaml
apiVersion: networking.k8s.io/v1
kind: Ingress
metadata:
  name: ray-cluster-ingress
  annotations:
    # WARNING: Do not expose this ALB publicly without additional authentication/authorization.
    # The Ray Dashboard provides read and write access to the cluster. Anyone with access to the
    # ALB can launch arbitrary code execution on the Ray Cluster.
    alb.ingress.kubernetes.io/scheme: internet-facing
    # See ingress.md for more details about how to choose subnets.
    alb.ingress.kubernetes.io/subnets: ${SUBNET1}, ${SUBNET2}
    alb.ingress.kubernetes.io/target-type: ip
    # Restrict access to your IP address only (replace with your actual IP)
    # alb.ingress.kubernetes.io/inbound-cidrs: YOUR_IP_ADDRESS/32
spec:
  ingressClassName: alb
  rules:
    - http:
        paths:
          - path: /
            pathType: Prefix
            backend:
              service:
                name: ${HEAD_SERVICE} # Your head pod service
                port:
                  number: 8265
EOF
For security reasons, it's recommended to uncomment alb.ingress.kubernetes.io/inbound-cidrs: YOUR_IP_ADDRESS/32 and replace YOUR_IP_ADDRESS with your IP to limit traffic to only allow for your IP.
- Generate and apply the Ingress manifest:
envsubst < ray-dashboard.yaml | kubectl apply -f -
kubectl get ingress
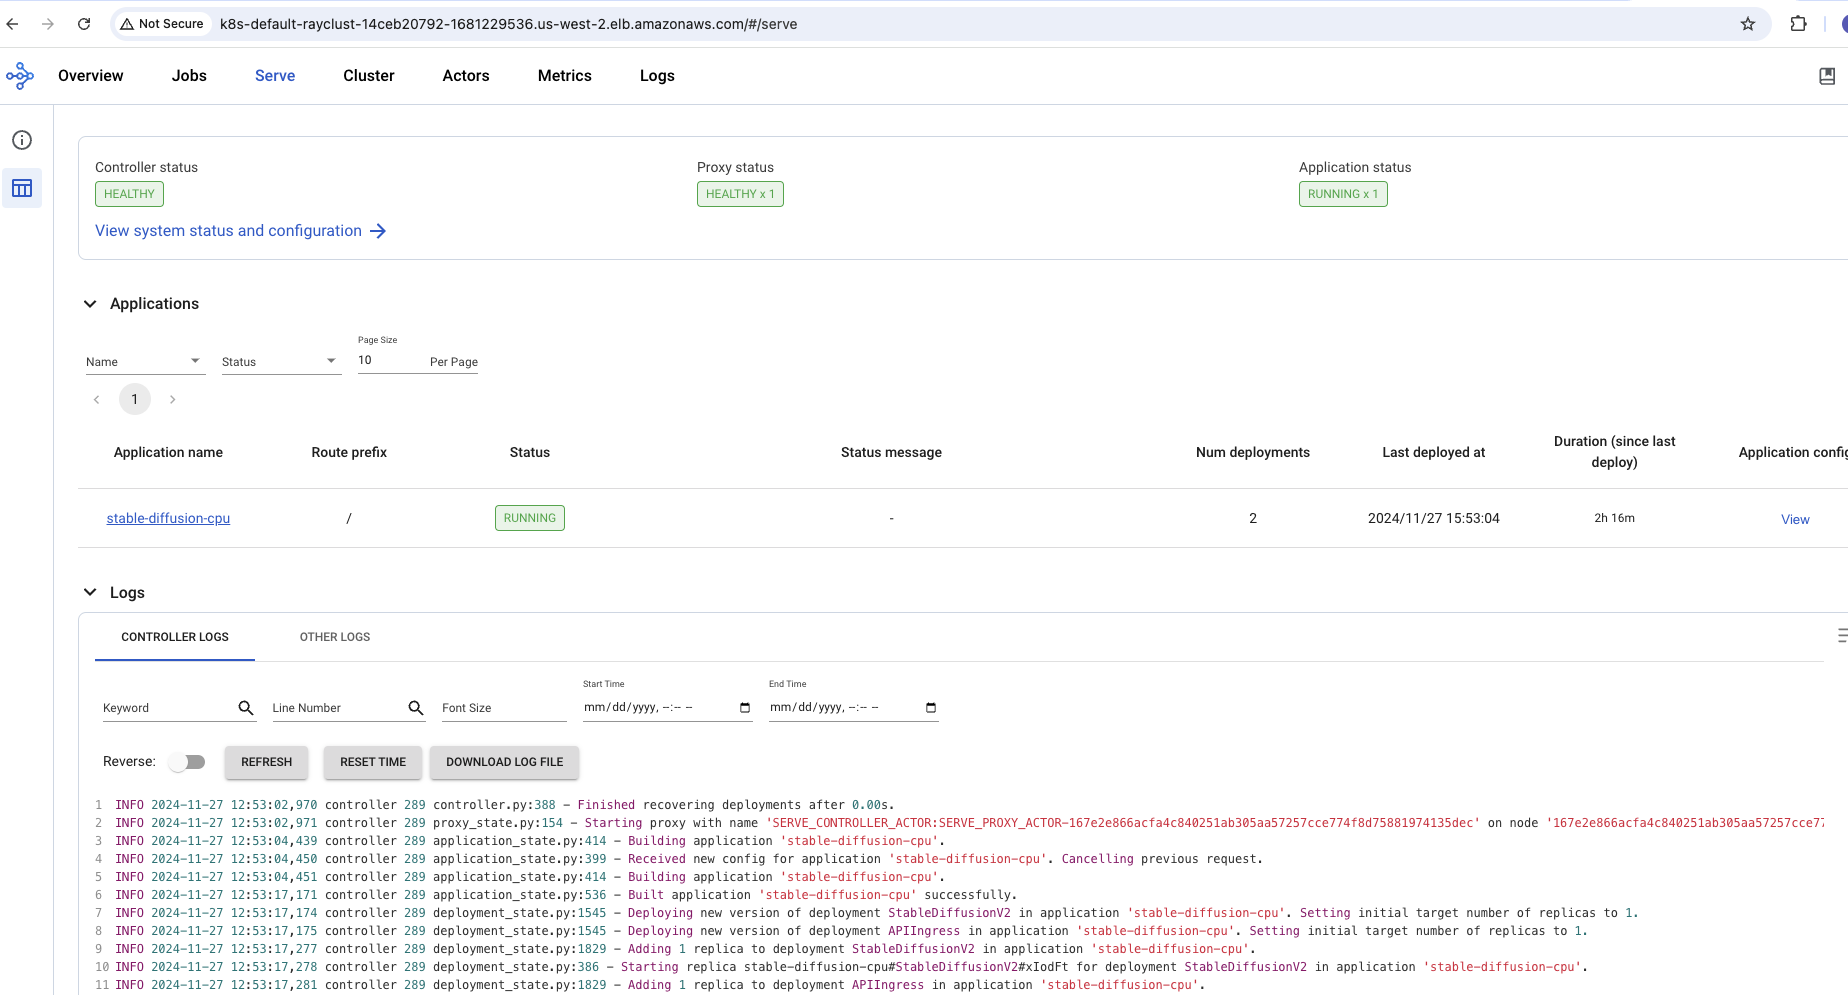
It takes about 6 minutes for the load balancer to be created and become active. Then you can paste the address you find on the ingress into your local browser to access the Ray dashboard.
NAME CLASS HOSTS ADDRESS PORTS AGE
ray-cluster-ingress alb * k8s-default-rayclust-14ceb20792-1681229536.us-west-2.elb.amazonaws.com 80 5m52s
Please visit the Serve Tab to see your application:
To clean up the load balancer, remove the Ingress object:
kubectl delete ingress ray-cluster-ingress
3. Inference
3.1 Set Up Port Forwarding
To check for the Kubernetes service:
kubectl get services
When you see the service stable-diffusion-gpu-serve-svc, we can now forward the port for Stable Diffusion query:
kubectl port-forward svc/stable-diffusion-gpu-serve-svc 8000 > /dev/null 2>&1 &
3.2 Send Inference Request
Now let's send a query request.
If you'd like to change the prompt request, please enter vi stable_diffusion_gpu/stable_diffusion_gpu_req.py and change the variable prompt to your request.
To send query request, please run:
python3 stable_diffusion_gpu_req.py
On GPU, a new image is created within 10 seconds (compared to about 5 minutes on CPU).
3.3 View Generated Images
Now we have a few options to view the image:
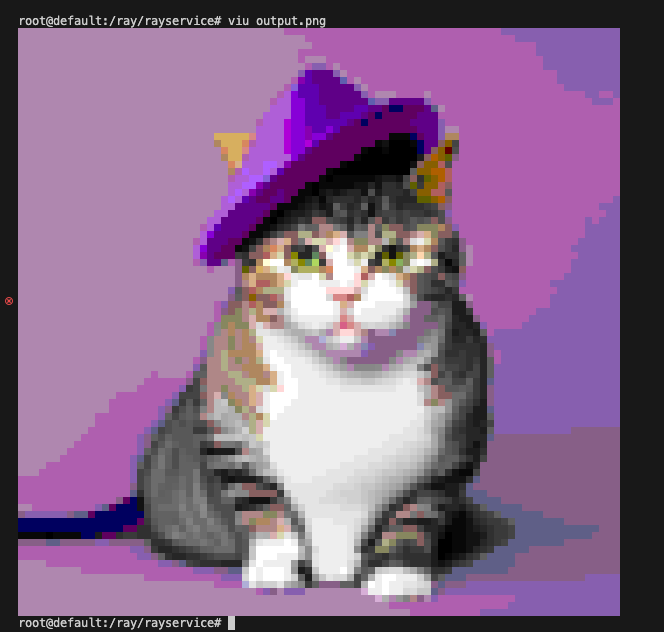
Option 1: VIU Tool (Terminal Viewer)
A fun way to view the image output, we can use the VIU tool.
To download the tool, please run:
# Download Rust
curl --proto '=https' --tlsv1.2 -sSf https://sh.rustup.rs | sh

# Download VIU
cargo install viu
To quickly view a low-resolution version of the image, please run:
viu output.png
Option 2: SageMaker Code Editor
If you are using SageMaker Code Editor, we can view the image directly in code editor.
Please use the Code editor explorer to navigate to output.png and open the image.
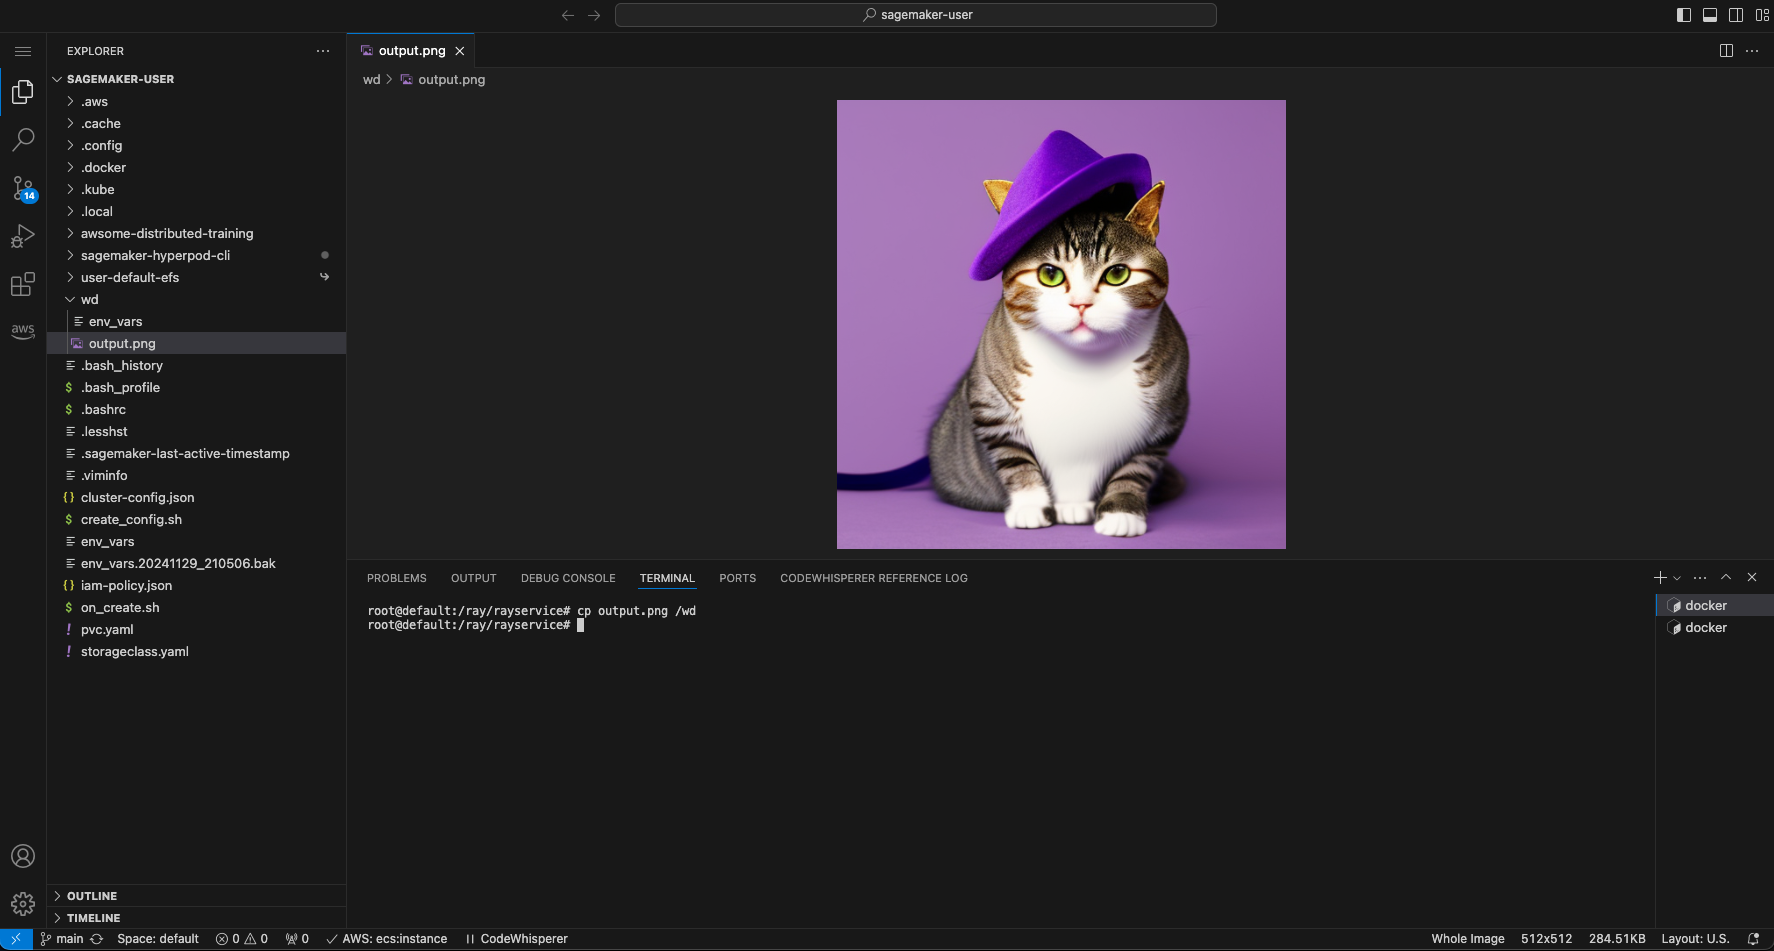
The following prompt was used to generate this image: "cat wearing a fancy hat on a purple mat".
If you'd like to download the image to your desktop, you can right-click the file output.png in the Code Editor File Explorer and select "Download...".
4. Cleanup
To clean up the Ray Service deployment:
kubectl delete -f rayservice.stable_diffusion_gpu.yaml
To verify cleanup:
kubectl get pods
kubectl get services
What's Next?
That was our inference example using Ray Service! You can:
- Try other prompts: Experiment with different text prompts for image generation
- Explore other models: Check out other inference examples available within the rayservice directory
- Scale the service: Modify the
num_replicasin the YAML to handle more concurrent requests - Monitor performance: Use the Ray dashboard to monitor GPU utilization and request latency
- Add authentication: Implement proper authentication for production deployments
For more advanced Ray Serve configurations, refer to the Ray Serve documentation.