Pipelines
For an overview of connecting to Kubeflow Pipelines using the SDK client, see the Pipelines SDK guide.
Authenticate Kubeflow Pipelines using SDK inside cluster
Refer to the following guide to connect to Kubeflow Pipelines from inside your cluster.
Authenticate Kubeflow Pipelines using SDK outside cluster
Refer to the following guide to connect to Kubeflow Pipelines from outside your cluster.
Refer to the following steps to use kfp to pass a cookie from your browser after you log into Kubeflow. The following example uses a Chrome browser.
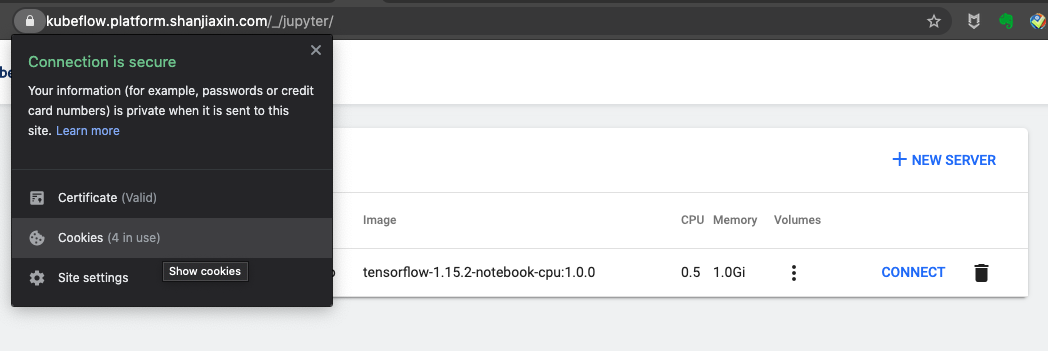
Once you get a cookie, authenticate kfp by passing the cookie from your browser. Use the session based on the appropriate manifest for your deployment, as done in the following examples.
Dex
If you want to use port forwarding to access Kubeflow, run the following command and use http://localhost:8080/pipeline as the host.
kubectl port-forward svc/istio-ingressgateway -n istio-system 8080:80
Pass the cookie from your browser:
# This is the "Domain" in your cookies. Eg: "localhost:8080" or "<ingress_alb_address>.elb.amazonaws.com"
kubeflow_gateway_endpoint="<YOUR_KUBEFLOW_GATEWAY_ENDPOINT>"

authservice_session_cookie="<YOUR_COOKIE>"

namespace="<YOUR_NAMESPACE>"

client = kfp.Client(host=f"http://{kubeflow_gateway_endpoint}/pipeline", cookies=f"authservice_session={authservice_session_cookie}")
client.list_experiments(namespace=namespace)
If you want to set up application load balancing (ALB) with Dex, see the Load Balancer guide and use the ALB address as the Kubeflow Endpoint.
To do programmatic authentication with Dex, refer to the following comments under issue #140 in the kfctl repository: #140 (comment) and #140 (comment).
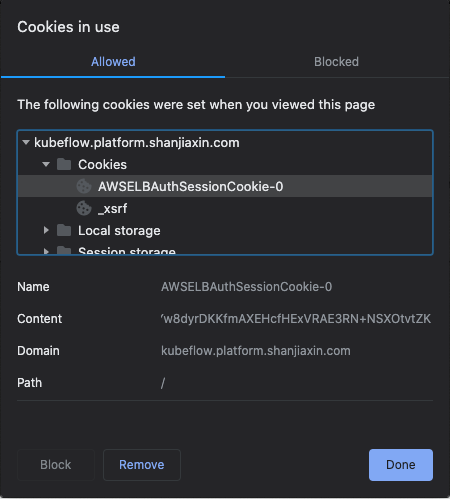
Cognito
# This is the "Domain" in your cookies. eg: kubeflow.<platform.example.com>
kubeflow_gateway_endpoint="<YOUR_KUBEFLOW_HTTPS_GATEWAY_ENDPOINT>"

alb_session_cookie0="<YOUR_COOKIE_0>"
alb_session_cookie1="<YOUR_COOKIE_1>"

namespace="<YOUR_NAMESPACE>"

client = kfp.Client(host=f"https://{kubeflow_gateway_endpoint}/pipeline", cookies=f"AWSELBAuthSessionCookie-0={alb_session_cookie0};AWSELBAuthSessionCookie-1={alb_session_cookie1}")
client.list_experiments(namespace=namespace)
Access AWS Services from Pipeline Components
For pipelines components to be granted access to AWS resources, the corresponding profile in which the pipeline is created needs to be configured with the AwsIamForServiceAccount plugin. To configure the AwsIamForServiceAccount plugin to work with profiles, follow the steps below.
Prerequisites
Configuration steps to configure Profiles with AWS IAM permissions can be found in the Profiles component guide. Follow the configuration steps to configure the profile controller to work with the AwsIamForServiceAccount plugin.
The following is an example of a profile using the AwsIamForServiceAccount plugin:
apiVersion: kubeflow.org/v1
kind: Profile
metadata:
  name: some_profile
spec:
  owner:
    kind: User
    name: some-user@kubeflow.org
  plugins:
  - kind: AwsIamForServiceAccount
    spec:
      awsIamRole: arn:aws:iam::123456789012:role/some-profile-role
The AWS IAM permissions granted to the pipelines components are specified in the profile’s awsIamRole.
Verify configuration
There are no additional configuration steps after the prerequisites.
You can verify that the profile was configured correctly by running the following commands:
export PROFILE_NAME=<name of the created profile>

kubectl get serviceaccount -n ${PROFILE_NAME} default-editor -oyaml | grep "eks.amazonaws.com/role-arn"
The output should look similar to the following:
eks.amazonaws.com/role-arn: arn:aws:iam::123456789012:role/some-profile-role
Example: S3 Access from a Pipeline Component
The following steps walk through creating a pipeline with a component that has permissions to list buckets in S3.
Prerequisites
Make sure that you have completed the prerequisites and Profile configuration steps.
Steps
-
Create and apply a
PodDefaultin the desired profile namespace that allows KFP access from Jupyter notebooks.- Instructions can be found in the Kubeflow Multi-User mode instructions.
-
Login to your central dashboard and select the desired profile namespace from the top left corner.
-
Create a notebook server using the
PodDefault. -
Open the notebook server and upload the sample notebook into the server.
-
Run the notebook.
-
Click on the
Run detailslink that appears. -
Verify that the run completes successfully and that the
Logsare populated with the S3 buckets in the account.
Support S3 as a source for Kubeflow Pipelines output viewers
Support for S3 Artifact Store is in active development. You can track the open issue to stay up-to-date on progress.
Support TensorBoard in Kubeflow Pipelines
Support for TensorBoard in Kubeflow Pipelines is in active development. You can track the open issue to stay up-to-date on progress.