

设置 monorepo
任务 1:创建 monorepo
Section titled “任务 1:创建 monorepo”要创建新的 monorepo,在目标目录中运行以下命令:
pnpm create @aws/nx-workspace dungeon-adventure --iac=cdkyarn create @aws/nx-workspace dungeon-adventure --iac=cdknpm create @aws/nx-workspace -- dungeon-adventure --iac=cdkbun create @aws/nx-workspace dungeon-adventure --iac=cdk这将在 dungeon-adventure 目录中设置 NX monorepo。在 VSCode 中打开该目录时,您将看到此文件结构:
文件夹.nx/
- …
文件夹.vscode/
- …
文件夹node_modules/
- …
文件夹packages/ 此处存放所有子项目
- …
- .gitignore
- biome.json 配置 Biome 用于代码检查和格式化
- nx.json 配置 Nx CLI 和 monorepo 默认值
- package.json 所有 node 依赖项在此定义
- pnpm-lock.yaml 或 bun.lock、yarn.lock、package-lock.json(取决于包管理器)
- pnpm-workspace.yaml(如果使用 pnpm)
- README.md
- tsconfig.base.json 所有基于 node 的子项目继承此配置
- tsconfig.json
- aws-nx-plugin.config.mts Nx Plugin for AWS 的配置
现在我们可以使用 @aws/nx-plugin 开始创建不同的子项目。
任务 2:创建游戏 API
Section titled “任务 2:创建游戏 API”首先创建游戏 API。通过以下步骤创建名为 GameApi 的 tRPC API:
- 安装 Nx Console VSCode Plugin 如果您尚未安装
- 在VSCode中打开Nx控制台
- 点击
Generate (UI)在"Common Nx Commands"部分 - 搜索
@aws/nx-plugin - ts#api - 填写必需参数
- name: GameApi
- framework: trpc
- 点击
Generate
pnpm nx g @aws/nx-plugin:ts#api --name=GameApi --framework=trpc --no-interactiveyarn nx g @aws/nx-plugin:ts#api --name=GameApi --framework=trpc --no-interactivenpx nx g @aws/nx-plugin:ts#api --name=GameApi --framework=trpc --no-interactivebunx nx g @aws/nx-plugin:ts#api --name=GameApi --framework=trpc --no-interactive您还可以执行试运行以查看哪些文件会被更改
pnpm nx g @aws/nx-plugin:ts#api --name=GameApi --framework=trpc --no-interactive --dry-runyarn nx g @aws/nx-plugin:ts#api --name=GameApi --framework=trpc --no-interactive --dry-runnpx nx g @aws/nx-plugin:ts#api --name=GameApi --framework=trpc --no-interactive --dry-runbunx nx g @aws/nx-plugin:ts#api --name=GameApi --framework=trpc --no-interactive --dry-run您将看到文件树中出现了新文件。
ts#api 更新文件
以下是 ts#api 生成器生成的所有文件列表。我们将重点查看文件树中高亮的关键文件:
文件夹packages/
文件夹common/
文件夹constructs/
文件夹src/
文件夹app/ 应用特定 CDK 构造体
文件夹apis/
- game-api.ts 创建 tRPC API 的 CDK 构造体
- index.ts
- …
- index.ts
文件夹core/ 通用 CDK 构造体
文件夹api/
- rest-api.ts API Gateway Rest API 的基础 CDK 构造体
- trpc-utils.ts tRPC API CDK 构造体的工具
- utils.ts API 构造体的工具
- index.ts
- runtime-config.ts
- index.ts
- project.json
- …
文件夹game-api/ tRPC API
文件夹src/
文件夹client/ 用于 TS 机器间调用的原生客户端
- index.ts
文件夹middleware/ Powertools 工具链
- error.ts
- index.ts
- logger.ts
- metrics.ts
- tracer.ts
文件夹schema/ API 输入输出定义
- index.ts
- echo.ts 示例输入和输出模式
- z-async-iterable.ts tRPC 订阅输出的 Zod 模式包装器
文件夹procedures/ API 过程/路由的具体实现
- echo.ts 示例过程实现
- index.ts
- init.ts 设置上下文和中间件
- handler.ts Lambda 处理程序入口点(REST API 使用响应流)
- local-server.ts 本地运行 tRPC 服务器时使用
- router.ts 定义 tRPC 路由和所有过程
- project.json
- …
- vitest.workspace.ts
查看部分关键文件:
import { echo } from './procedures/echo.js';import { t } from './init.js';
export const router = t.router;
export const appRouter = router({  echo,});
export type AppRouter = typeof appRouter;路由文件定义了 API 的 tRPC 路由,您需要在此声明所有 API 方法。如上所示,我们有一个名为 echo 的方法,其实现位于 ./procedures/echo.ts 文件中。Lambda 处理程序入口点位于 handler.ts,由生成器自动配置。
import { publicProcedure } from '../init.js';import {  EchoInputSchema,  EchoOutputSchema,} from '../schema/echo.js';
export const echo = publicProcedure .input(EchoInputSchema) .output(EchoOutputSchema) .query((opts) => ({ result: opts.input.message }));该文件是 echo 方法的实现,通过声明输入输出数据结构实现强类型。
import { z } from 'zod';
export const EchoInputSchema = z.object({  message: z.string().max(1024),});
export type IEchoInput = z.TypeOf<typeof EchoInputSchema>;
export const EchoOutputSchema = z.object({  message: z.string().max(1024),});
export type IEchoOutput = z.TypeOf<typeof EchoOutputSchema>;所有 tRPC 模式定义均使用 Zod 定义,并通过 z.TypeOf 语法导出为 TypeScript 类型。
import { Construct } from 'constructs';import * as url from 'url';import { Distribution } from 'aws-cdk-lib/aws-cloudfront';import {  Code,  Runtime,  Function,  FunctionProps,  Tracing,} from 'aws-cdk-lib/aws-lambda';import {  AuthorizationType,  LambdaIntegration,  ResponseTransferMode,} from 'aws-cdk-lib/aws-apigateway';import { Aspects, Duration } from 'aws-cdk-lib';import {  PolicyDocument,  PolicyStatement,  Effect,  AnyPrincipal,  IGrantable,  Grant,} from 'aws-cdk-lib/aws-iam';import {  IntegrationBuilder,  RestApiIntegration,} from '../../core/api/utils.js';import { AddCorsPreflightAspect, RestApi } from '../../core/api/rest-api.js';import { Procedures, routerToOperations } from '../../core/api/trpc-utils.js';import { AppRouter, appRouter } from ':dungeon-adventure/game-api';
// 所有 API 操作名称的字符串联合类型type Operations = Procedures<AppRouter>;
/** * 创建 GameApi 构造体的属性 * * @template TIntegrations - 操作名称到集成的映射 */export interface GameApiProps<  TIntegrations extends Record<Operations, RestApiIntegration>,> {  /**   * 操作名称到 API Gateway 集成的映射   */  integrations: TIntegrations;}
/** * 用于创建和配置 AWS API Gateway REST API 的 CDK 构造体 * 专门用于 GameApi。 * @template TIntegrations - 操作名称到集成的映射 */export class GameApi<  TIntegrations extends Record<Operations, RestApiIntegration>,> extends RestApi<Operations, TIntegrations> {  private allowedOrigins: readonly string[] = ['*'];
  /**   * 为所有操作创建默认集成,将每个操作实现为独立的 lambda 函数   *   * @param scope - CDK 构造体作用域   * @returns 包含默认 lambda 集成的 IntegrationBuilder   */  public static defaultIntegrations = (scope: Construct) => {    return IntegrationBuilder.rest({      operations: routerToOperations(appRouter),      defaultIntegrationOptions: <FunctionProps>{        runtime: Runtime.NODEJS_LATEST,        handler: 'index.handler',        code: Code.fromAsset(          url.fileURLToPath(            new URL(              '../../../../../../dist/packages/game-api/bundle',              import.meta.url,            ),          ),        ),        timeout: Duration.seconds(30),        tracing: Tracing.ACTIVE,      },      buildDefaultIntegration: (op, props: FunctionProps) => {        const handler = new Function(scope, `GameApi${op}Handler`, props);        return {          handler,          integration: new LambdaIntegration(handler, {            responseTransferMode: ResponseTransferMode.STREAM,          }),        };      },    });  };
  constructor(    scope: Construct,    id: string,    props: GameApiProps<TIntegrations>,  ) {    super(scope, id, {      apiName: 'GameApi',      defaultMethodOptions: {        authorizationType: AuthorizationType.IAM,      },      deployOptions: {        tracingEnabled: true,      },      policy: new PolicyDocument({        statements: [          // 开放 OPTIONS 方法以允许浏览器进行未经身份验证的预检请求          new PolicyStatement({            effect: Effect.ALLOW,            principals: [new AnyPrincipal()],            actions: ['execute-api:Invoke'],            resources: ['execute-api:/*/OPTIONS/*'],          }),        ],      }),      operations: routerToOperations(appRouter),      ...props,    });    Aspects.of(this).add(new AddCorsPreflightAspect(() => this.allowedOrigins));  }
  /**   * 将 CORS 限制为提供的来源   *   * 将 CloudFront 分发域或来源字符串配置为 API Gateway 预检响应和 AWS   * Lambda 集成中唯一允许的 CORS 来源   *   * @param origins - 授予 CORS 的来源字符串、CloudFront 分发或包含 CloudFront 分发的对象   */  public restrictCorsTo(    ...origins: (string | Distribution | { cloudFrontDistribution: Distribution })[]  ) {    const allowedOrigins = origins.map((origin) =>      typeof origin === 'string'        ? origin        : 'cloudFrontDistribution' in origin          ? `https://${origin.cloudFrontDistribution.distributionDomainName}`          : `https://${origin.distributionDomainName}`,    );
    this.allowedOrigins = allowedOrigins;
    // 为所有 Lambda 集成设置 ALLOWED_ORIGINS 环境变量    Object.values(this.integrations).forEach((integration) => {      if ('handler' in integration && integration.handler instanceof Function) {        integration.handler.addEnvironment(          'ALLOWED_ORIGINS',          allowedOrigins.join(','),        );      }    });  }
  /**   * 授予 IAM 权限以调用此 API 上的任何方法。   *   * @param grantee - 要授予权限的 IAM 主体   */  public grantInvokeAccess(grantee: IGrantable) {    // 此处授予被授权者调用 API 的权限    // 如需要,可使用更具体的主体(如角色或用户)和资源(如哪个主体可以调用哪个 API 路径)定义机器间细粒度访问    this.api.addToResourcePolicy(      new PolicyStatement({        effect: Effect.ALLOW,        principals: [grantee.grantPrincipal],        actions: ['execute-api:Invoke'],        resources: ['execute-api:/*'],      }),    );
Grant.addToPrincipal({ grantee, actions: ['execute-api:Invoke'], resourceArns: [this.api.arnForExecuteApi('*', '/*', '*')], }); }}这是定义 GameApi 的 CDK 构造体。其 defaultIntegrations 方法会自动为 tRPC API 中的每个过程创建 Lambda 函数,指向已打包的 API 实现。这意味着在 cdk synth 时不会进行打包(与使用 NodeJsFunction 不同),因为我们已经通过后端项目的构建目标完成了打包。
任务 3:创建故事代理
Section titled “任务 3:创建故事代理”现在创建故事代理。
故事代理:Python 项目
Section titled “故事代理:Python 项目”要创建 Python 项目:
- 安装 Nx Console VSCode Plugin 如果您尚未安装
- 在VSCode中打开Nx控制台
- 点击
Generate (UI)在"Common Nx Commands"部分 - 搜索
@aws/nx-plugin - py#project - 填写必需参数
- name: story
- 点击
Generate
pnpm nx g @aws/nx-plugin:py#project --name=story --no-interactiveyarn nx g @aws/nx-plugin:py#project --name=story --no-interactivenpx nx g @aws/nx-plugin:py#project --name=story --no-interactivebunx nx g @aws/nx-plugin:py#project --name=story --no-interactive您还可以执行试运行以查看哪些文件会被更改
pnpm nx g @aws/nx-plugin:py#project --name=story --no-interactive --dry-runyarn nx g @aws/nx-plugin:py#project --name=story --no-interactive --dry-runnpx nx g @aws/nx-plugin:py#project --name=story --no-interactive --dry-runbunx nx g @aws/nx-plugin:py#project --name=story --no-interactive --dry-run您将看到文件树中出现了新文件。
py#project 更新文件
py#project 生成器生成这些文件:
文件夹.venv/ monorepo 共享虚拟环境
- …
文件夹packages/
文件夹story/
文件夹dungeon_adventure_story/ Python 模块
- …
文件夹tests/
- …
- .python-version
- pyproject.toml
- project.json
- .python-version 固定 UV Python 版本
- pyproject.toml
- uv.lock
这配置了一个 Python 项目和 UV Workspace,使用共享虚拟环境。
使用 py#agent 生成器为项目添加 Strands 代理:
- 安装 Nx Console VSCode Plugin 如果您尚未安装
- 在VSCode中打开Nx控制台
- 点击
Generate (UI)在"Common Nx Commands"部分 - 搜索
@aws/nx-plugin - py#agent - 填写必需参数
- project: story
- auth: cognito
- protocol: ag-ui
- 点击
Generate
pnpm nx g @aws/nx-plugin:py#agent --project=story --auth=cognito --protocol=ag-ui --no-interactiveyarn nx g @aws/nx-plugin:py#agent --project=story --auth=cognito --protocol=ag-ui --no-interactivenpx nx g @aws/nx-plugin:py#agent --project=story --auth=cognito --protocol=ag-ui --no-interactivebunx nx g @aws/nx-plugin:py#agent --project=story --auth=cognito --protocol=ag-ui --no-interactive您还可以执行试运行以查看哪些文件会被更改
pnpm nx g @aws/nx-plugin:py#agent --project=story --auth=cognito --protocol=ag-ui --no-interactive --dry-runyarn nx g @aws/nx-plugin:py#agent --project=story --auth=cognito --protocol=ag-ui --no-interactive --dry-runnpx nx g @aws/nx-plugin:py#agent --project=story --auth=cognito --protocol=ag-ui --no-interactive --dry-runbunx nx g @aws/nx-plugin:py#agent --project=story --auth=cognito --protocol=ag-ui --no-interactive --dry-run您将看到文件树中出现了新文件。
py#agent 更新文件
py#agent 生成器生成这些文件:
文件夹packages/
文件夹story/
文件夹dungeon_adventure_story/ Python 模块
文件夹agent/
- init.py 设置 FastAPI 应用和中间件
- main.py Bedrock AgentCore Runtime 的代理入口点
- agent.py 定义示例代理和工具
- Dockerfile 部署到 AgentCore Runtime 的 Docker 镜像定义
文件夹common/constructs/
文件夹src
文件夹app/agents/story-agent/
- story-agent.ts 将故事代理部署到 AgentCore Runtime 的构造体
查看部分关键文件:
from contextlib import contextmanager
from strands import Agent, toolfrom strands_tools import current_time

@tooldef subtract(a: int, b: int) -> int:    return a - b

@contextmanagerdef get_agent(): yield Agent( name="StoryAgent", description="StoryAgent Agent", system_prompt="""You are a mathematical wizard.Use your tools for mathematical tasks.Refer to tools as your 'spellbook'.""", tools=[subtract, current_time], )创建了一个示例 Strands 代理并定义了减法工具。
import loggingimport uuid
from ag_ui_strands import StrandsAgent, create_strands_appfrom dungeon_adventure_agent_connection import session_id_contextfrom fastapi import Requestfrom starlette.middleware.base import BaseHTTPMiddleware
from .agent import get_agent
logging.basicConfig(level=logging.INFO)
SESSION_ID_HEADER = "x-amzn-bedrock-agentcore-runtime-session-id"
# Create AG-UI agent wrapper_agent_ctx = get_agent()_agent = _agent_ctx.__enter__()
agui_agent = StrandsAgent(    agent=_agent,    name="StoryAgent",    description="An Agent exposed via the AG-UI protocol.",)

class _SessionIdMiddleware(BaseHTTPMiddleware):    """Bind the session ID for this request so downstream MCP / A2A clients forward it on outbound calls."""
    async def dispatch(self, request: Request, call_next):        session_id = request.headers.get(SESSION_ID_HEADER) or str(uuid.uuid4())        with session_id_context(session_id):            return await call_next(request)

# Create FastAPI app with AG-UI endpoint and health checkapp = create_strands_app(agui_agent, path="/invocations")app.add_middleware(_SessionIdMiddleware)这是代理的入口点。因为我们选择了 --protocol=AG-UI,生成器将我们的 Strands Agent 用 ag_ui_strands 的 StrandsAgent 包装,并将其挂载到使用 AG-UI 协议的 FastAPI 应用上 — 这就是 CopilotKit 从 React 网站与之通信的方式。_SessionIdMiddleware 将入站的 AgentCore 运行时会话 ID 绑定到 ContextVar 上,这样我们稍后连接的任何下游 MCP/A2A 客户端(例如模块 2 中的库存 MCP 服务器)都会在其出站调用中自动转发该 ID。在模块 3 中,我们还将添加 session_manager_provider,使每个线程 ID 获得自己的 S3SessionManager,对话历史在多轮对话中持久化。
import { Lazy, Names } from 'aws-cdk-lib';import { Platform } from 'aws-cdk-lib/aws-ecr-assets';import { Construct } from 'constructs';import { execSync } from 'child_process';import * as path from 'path';import * as url from 'url';import {  AgentRuntimeArtifact,  ProtocolType,  Runtime,  RuntimeProps,} from 'aws-cdk-lib/aws-bedrockagentcore';import { IGrantable, IPrincipal } from 'aws-cdk-lib/aws-iam';
export type StoryAgentProps = Omit<  RuntimeProps,  'runtimeName' | 'protocolConfiguration' | 'agentRuntimeArtifact'>;
export class StoryAgent extends Construct implements IGrantable {  public readonly dockerImage: AgentRuntimeArtifact;  public readonly agentCoreRuntime: Runtime;
  constructor(scope: Construct, id: string, props?: StoryAgentProps) {    super(scope, id);
    this.dockerImage = AgentRuntimeArtifact.fromAsset(      path.dirname(url.fileURLToPath(new URL(import.meta.url))),      {        platform: Platform.LINUX_ARM64,        extraHash: execSync(          `docker inspect dungeon-adventure-story-agent:latest --format '{{.Id}}'`,          { encoding: 'utf-8' },        ).trim(),      },    );
    this.agentCoreRuntime = new Runtime(this, 'StoryAgent', {      runtimeName: Lazy.string({        produce: () =>          Names.uniqueResourceName(this.agentCoreRuntime, { maxLength: 40 }),      }),      protocolConfiguration: ProtocolType.HTTP,      agentRuntimeArtifact: this.dockerImage,      ...props,    });  }
public get grantPrincipal(): IPrincipal { return this.agentCoreRuntime.grantPrincipal; }}该配置使用 CDK 的 AgentRuntimeArtifact 将代理 Docker 镜像上传到 ECR,并通过 AgentCore Runtime 托管。
您可能注意到额外的 Dockerfile,它引用了 story 项目的 Docker 镜像,允许我们将 Dockerfile 与代理源代码放在一起。
任务 4:设置库存工具
Section titled “任务 4:设置库存工具”库存:TypeScript 项目
Section titled “库存:TypeScript 项目”创建 MCP 服务器,为故事代理提供管理玩家库存的工具。
首先创建 TypeScript 项目:
- 安装 Nx Console VSCode Plugin 如果您尚未安装
- 在VSCode中打开Nx控制台
- 点击
Generate (UI)在"Common Nx Commands"部分 - 搜索
@aws/nx-plugin - ts#project - 填写必需参数
- name: inventory
- 点击
Generate
pnpm nx g @aws/nx-plugin:ts#project --name=inventory --no-interactiveyarn nx g @aws/nx-plugin:ts#project --name=inventory --no-interactivenpx nx g @aws/nx-plugin:ts#project --name=inventory --no-interactivebunx nx g @aws/nx-plugin:ts#project --name=inventory --no-interactive您还可以执行试运行以查看哪些文件会被更改
pnpm nx g @aws/nx-plugin:ts#project --name=inventory --no-interactive --dry-runyarn nx g @aws/nx-plugin:ts#project --name=inventory --no-interactive --dry-runnpx nx g @aws/nx-plugin:ts#project --name=inventory --no-interactive --dry-runbunx nx g @aws/nx-plugin:ts#project --name=inventory --no-interactive --dry-run这将创建一个空的 TypeScript 项目。
ts#project 更新文件
ts#project 生成器生成这些文件:
文件夹packages/
文件夹inventory/
文件夹src/
- index.ts 包含示例函数的入口点
- project.json 项目配置
- vitest.config.mts 测试配置
- tsconfig.json 项目基础 TypeScript 配置
- tsconfig.lib.json 针对编译和打包的 TypeScript 配置
- tsconfig.spec.json 测试的 TypeScript 配置
- tsconfig.base.json 更新以配置其他项目引用该项目的别名
库存:MCP 服务器
Section titled “库存:MCP 服务器”接下来为 TypeScript 项目添加 MCP 服务器:
- 安装 Nx Console VSCode Plugin 如果您尚未安装
- 在VSCode中打开Nx控制台
- 点击
Generate (UI)在"Common Nx Commands"部分 - 搜索
@aws/nx-plugin - ts#mcp-server - 填写必需参数
- project: inventory
- 点击
Generate
pnpm nx g @aws/nx-plugin:ts#mcp-server --project=inventory --no-interactiveyarn nx g @aws/nx-plugin:ts#mcp-server --project=inventory --no-interactivenpx nx g @aws/nx-plugin:ts#mcp-server --project=inventory --no-interactivebunx nx g @aws/nx-plugin:ts#mcp-server --project=inventory --no-interactive您还可以执行试运行以查看哪些文件会被更改
pnpm nx g @aws/nx-plugin:ts#mcp-server --project=inventory --no-interactive --dry-runyarn nx g @aws/nx-plugin:ts#mcp-server --project=inventory --no-interactive --dry-runnpx nx g @aws/nx-plugin:ts#mcp-server --project=inventory --no-interactive --dry-runbunx nx g @aws/nx-plugin:ts#mcp-server --project=inventory --no-interactive --dry-run这将添加 MCP 服务器。
ts#mcp-server 更新文件
ts#mcp-server 生成器生成这些文件:
文件夹packages/
文件夹inventory/
文件夹src/mcp-server/
- index.ts barrel 导出
- server.ts 创建 MCP 服务器
文件夹tools/
- divide.ts 示例工具
文件夹resources/
- sample-guidance.ts 示例资源
- stdio.ts 使用 STDIO 传输的 MCP 入口点
- http.ts 使用可流式 HTTP 传输的 MCP 入口点
- Dockerfile 构建部署到 AgentCore Runtime 的镜像
- rolldown.config.ts 配置 MCP 服务器打包以部署到 AgentCore
文件夹common/constructs/
文件夹src
文件夹app/mcp-servers/inventory-mcp-server/
- inventory-mcp-server.ts 将库存 MCP 服务器部署到 AgentCore Runtime 的构造体
任务 5:创建游戏数据库
Section titled “任务 5:创建游戏数据库”我们的游戏状态 — 保存的游戏和每个玩家的库存 — 存储在 Amazon DynamoDB 中。使用 ts#dynamodb 生成器创建名为 DungeonDb 的 DynamoDB 项目:
- 安装 Nx Console VSCode Plugin 如果您尚未安装
- 在VSCode中打开Nx控制台
- 点击
Generate (UI)在"Common Nx Commands"部分 - 搜索
@aws/nx-plugin - ts#dynamodb - 填写必需参数
- name: DungeonDb
- 点击
Generate
pnpm nx g @aws/nx-plugin:ts#dynamodb --name=DungeonDb --no-interactiveyarn nx g @aws/nx-plugin:ts#dynamodb --name=DungeonDb --no-interactivenpx nx g @aws/nx-plugin:ts#dynamodb --name=DungeonDb --no-interactivebunx nx g @aws/nx-plugin:ts#dynamodb --name=DungeonDb --no-interactive您还可以执行试运行以查看哪些文件会被更改
pnpm nx g @aws/nx-plugin:ts#dynamodb --name=DungeonDb --no-interactive --dry-runyarn nx g @aws/nx-plugin:ts#dynamodb --name=DungeonDb --no-interactive --dry-runnpx nx g @aws/nx-plugin:ts#dynamodb --name=DungeonDb --no-interactive --dry-runbunx nx g @aws/nx-plugin:ts#dynamodb --name=DungeonDb --no-interactive --dry-run您将看到文件树中出现了新文件。
ts#dynamodb 更新文件
ts#dynamodb 生成器生成这些文件。
文件夹packages/
文件夹dungeon-db/
- config.json DynamoDB 配置,包括端口、表名、容器设置和全局二级索引
文件夹src/
- index.ts 入口点和导出
- client.ts DynamoDB 客户端单例和表名解析
文件夹entities/
- example.ts 示例 ElectroDB 实体(我们将替换此文件)
- index.ts 实体导出
- project.json 添加
dev和pull-image目标
文件夹common/
文件夹scripts/
文件夹src/
文件夹dynamodb/
- create-local-table.ts 在 DynamoDB Local 中创建表
- pull-image.ts 拉取 DynamoDB Local 镜像
- start-container.ts 启动 DynamoDB Local 容器
文件夹constructs/
文件夹src/
文件夹app/dynamodb/
- dungeon-db.ts 用于配置表的构造体
文件夹core/
- dynamodb.ts 通用 DynamoDB 表构造体
生成的 src/client.ts 导出 getDynamoDBClient() 和 resolveTableName()。当 LOCAL_DEV=true(由 dev 目标自动设置)时,它们连接到 DynamoDB Local;否则它们连接到 AWS 并从运行时配置解析已部署的表名。我们将在模块 2 中在此项目中建模 Game 和 Inventory 实体。
更多详情请参考 ts#dynamodb 生成器指南。
任务 6:创建用户界面 (UI)
Section titled “任务 6:创建用户界面 (UI)”在此任务中,我们将创建与游戏交互的 UI。
游戏 UI:网站
Section titled “游戏 UI:网站”要创建 UI,通过以下步骤创建名为 GameUI 的网站:
- 安装 Nx Console VSCode Plugin 如果您尚未安装
- 在VSCode中打开Nx控制台
- 点击
Generate (UI)在"Common Nx Commands"部分 - 搜索
@aws/nx-plugin - ts#website - 填写必需参数
- name: GameUI
- ux: shadcn
- 点击
Generate
pnpm nx g @aws/nx-plugin:ts#website --name=GameUI --ux=shadcn --no-interactiveyarn nx g @aws/nx-plugin:ts#website --name=GameUI --ux=shadcn --no-interactivenpx nx g @aws/nx-plugin:ts#website --name=GameUI --ux=shadcn --no-interactivebunx nx g @aws/nx-plugin:ts#website --name=GameUI --ux=shadcn --no-interactive您还可以执行试运行以查看哪些文件会被更改
pnpm nx g @aws/nx-plugin:ts#website --name=GameUI --ux=shadcn --no-interactive --dry-runyarn nx g @aws/nx-plugin:ts#website --name=GameUI --ux=shadcn --no-interactive --dry-runnpx nx g @aws/nx-plugin:ts#website --name=GameUI --ux=shadcn --no-interactive --dry-runbunx nx g @aws/nx-plugin:ts#website --name=GameUI --ux=shadcn --no-interactive --dry-run您将看到文件树中出现了新文件。
ts#website 更新文件
ts#website 生成器生成这些文件。我们将重点查看文件树中高亮的关键文件:
文件夹packages/
文件夹common/
文件夹constructs/
文件夹src/
文件夹app/ 应用特定 CDK 构造体
文件夹static-websites/
- game-ui.ts 创建游戏 UI 的 CDK 构造体
文件夹core/
- static-website.ts 通用静态网站构造体
文件夹game-ui/
文件夹public/
- …
文件夹src/
文件夹components/
文件夹AppLayout/
- index.tsx 使用 shadcn
SidebarProvider+ 页头的整体页面布局
- index.tsx 使用 shadcn
- app-sidebar.tsx 带导航项的默认 shadcn 侧边栏
- alert.tsx, spinner.tsx shadcn 包装的反馈原语
文件夹routes/ @tanstack/react-router 基于文件的路由
- index.tsx 根 ’/’ 页面
- __root.tsx 所有页面使用此组件作为基础
- config.ts
- main.tsx React 入口点
- routeTree.gen.ts 由 @tanstack/react-router 自动更新
- styles.css 导入共享 shadcn 全局样式(Tailwind v4)
- index.html
- project.json
- vite.config.mts
- …
文件夹common/
文件夹shadcn/ 共享 shadcn/ui 库(主题令牌、
Button、Card、Input、Sidebar等),由每个uxProvider=Shadcn网站导入- src/components/ui/*
- src/styles/globals.css Tailwind + shadcn 设计令牌
- …
import * as url from 'url';import { Construct } from 'constructs';import { StaticWebsite } from '../../core/index.js';
export class GameUI extends StaticWebsite { constructor(scope: Construct, id: string) { super(scope, id, { websiteName: 'GameUI', websiteFilePath: url.fileURLToPath( new URL( '../../../../../../dist/packages/game-ui/bundle', import.meta.url, ), ), }); }}这是定义 GameUI 的 CDK 构造体。已配置指向 Vite 构建产出的文件路径,这意味着在 build 时,打包发生在 game-ui 项目的构建目标中,其输出在此处使用。
import React from 'react';import { createRoot } from 'react-dom/client';import { RouterProvider, createRouter } from '@tanstack/react-router';import { routeTree } from './routeTree.gen';import './styles.css';
export type RouterProviderContext = {};
const router = createRouter({ routeTree, context: {} });
declare module '@tanstack/react-router' {  interface Register {    router: typeof router;  }}
const App = () => <RouterProvider router={router} context={{}} />;
const root = document.getElementById('root');root && createRoot(root).render( <React.StrictMode> <App /> </React.StrictMode>, );这是挂载 React 的入口点。样式来自通过 styles.css 导入的 Tailwind v4 令牌。@tanstack/react-router 配置为基于文件的路由模式:只要开发服务器运行,在 routes/ 下创建的任何文件都会自动被识别并重新生成路由树。稍后的生成器(auth、connection)将通过 AST 修补此文件,用额外的提供者包装 <App />。
import { createFileRoute } from '@tanstack/react-router';
export const Route = createFileRoute('/')({  component: RouteComponent,});
function RouteComponent() { return ( <div className="text-center"> <header> <h1>Welcome</h1> <p>Welcome to your new React website!</p> </header> </div> );}导航到 / 路由时将渲染该组件。只要开发服务器运行,@tanstack/react-router 会在创建/移动此文件时管理 Route。
游戏 UI:身份验证
Section titled “游戏 UI:身份验证”通过以下步骤配置游戏 UI 要求通过 Amazon Cognito 进行身份验证:
- 安装 Nx Console VSCode Plugin 如果您尚未安装
- 在VSCode中打开Nx控制台
- 点击
Generate (UI)在"Common Nx Commands"部分 - 搜索
@aws/nx-plugin - ts#website#auth - 填写必需参数
- cognitoDomain: game-ui
- project: @dungeon-adventure/game-ui
- allowSignup: true
- 点击
Generate
pnpm nx g @aws/nx-plugin:ts#website#auth --cognitoDomain=game-ui --project=@dungeon-adventure/game-ui --allowSignup=true --no-interactiveyarn nx g @aws/nx-plugin:ts#website#auth --cognitoDomain=game-ui --project=@dungeon-adventure/game-ui --allowSignup=true --no-interactivenpx nx g @aws/nx-plugin:ts#website#auth --cognitoDomain=game-ui --project=@dungeon-adventure/game-ui --allowSignup=true --no-interactivebunx nx g @aws/nx-plugin:ts#website#auth --cognitoDomain=game-ui --project=@dungeon-adventure/game-ui --allowSignup=true --no-interactive您还可以执行试运行以查看哪些文件会被更改
pnpm nx g @aws/nx-plugin:ts#website#auth --cognitoDomain=game-ui --project=@dungeon-adventure/game-ui --allowSignup=true --no-interactive --dry-runyarn nx g @aws/nx-plugin:ts#website#auth --cognitoDomain=game-ui --project=@dungeon-adventure/game-ui --allowSignup=true --no-interactive --dry-runnpx nx g @aws/nx-plugin:ts#website#auth --cognitoDomain=game-ui --project=@dungeon-adventure/game-ui --allowSignup=true --no-interactive --dry-runbunx nx g @aws/nx-plugin:ts#website#auth --cognitoDomain=game-ui --project=@dungeon-adventure/game-ui --allowSignup=true --no-interactive --dry-run您将看到文件树中出现了新文件或变更。
ts#website#auth 更新文件
ts#website#auth 生成器更新/生成这些文件。我们将重点查看文件树中高亮的关键文件:
文件夹packages/
文件夹common/
文件夹constructs/
文件夹src/
文件夹core/
- user-identity.ts 创建用户/身份池的 CDK 构造体
文件夹game-ui/
文件夹src/
文件夹components/
文件夹AppLayout/
- index.tsx 在页头添加已登录用户/注销功能
文件夹CognitoAuth/
- index.tsx 管理 Cognito 登录
文件夹RuntimeConfig/
- index.tsx 获取
runtime-config.json并通过上下文提供给子组件
- index.tsx 获取
文件夹hooks/
- useRuntimeConfig.tsx
- main.tsx 更新添加 Cognito
import { useAuth } from 'react-oidc-context';import CognitoAuth from './components/CognitoAuth';import { useRuntimeConfig } from './hooks/useRuntimeConfig';import RuntimeConfigProvider from './components/RuntimeConfig';import React from 'react';import { createRoot } from 'react-dom/client';import { RouterProvider, createRouter } from '@tanstack/react-router';import { routeTree } from './routeTree.gen';import './styles.css';export type RouterProviderContext = {};export type RouterProviderContext = { runtimeConfig?: ReturnType<typeof useRuntimeConfig>; auth?: ReturnType<typeof useAuth>;};const router = createRouter({ routeTree, context: {} });const router = createRouter({ routeTree, context: { runtimeConfig: undefined, auth: undefined },});// Register the router instance for type safetydeclare module '@tanstack/react-router' { interface Register { router: typeof router; }}const App = () => <RouterProvider router={router} context={{}} />;const App = () => { const auth = useAuth(); const runtimeConfig = useRuntimeConfig(); return <RouterProvider router={router} context={{ runtimeConfig, auth }} />;};const root = document.getElementById('root');root && createRoot(root).render( <React.StrictMode> <RuntimeConfigProvider> <CognitoAuth> <App /> </CognitoAuth> </RuntimeConfigProvider> </React.StrictMode>, );通过 AST 转换在 main.tsx 文件中添加了 RuntimeConfigProvider 和 CognitoAuth 组件。这使得 CognitoAuth 组件可以通过获取包含 Cognito 连接配置的 runtime-config.json 来与 Amazon Cognito 进行身份验证,以便向正确的目标发起后端调用。
游戏 UI:连接游戏 API
Section titled “游戏 UI:连接游戏 API”配置游戏 UI 连接之前创建的游戏 API。
- 安装 Nx Console VSCode Plugin 如果您尚未安装
- 在VSCode中打开Nx控制台
- 点击
Generate (UI)在"Common Nx Commands"部分 - 搜索
@aws/nx-plugin - connection - 填写必需参数
- sourceProject: @dungeon-adventure/game-ui
- targetProject: @dungeon-adventure/game-api
- 点击
Generate
pnpm nx g @aws/nx-plugin:connection --sourceProject=@dungeon-adventure/game-ui --targetProject=@dungeon-adventure/game-api --no-interactiveyarn nx g @aws/nx-plugin:connection --sourceProject=@dungeon-adventure/game-ui --targetProject=@dungeon-adventure/game-api --no-interactivenpx nx g @aws/nx-plugin:connection --sourceProject=@dungeon-adventure/game-ui --targetProject=@dungeon-adventure/game-api --no-interactivebunx nx g @aws/nx-plugin:connection --sourceProject=@dungeon-adventure/game-ui --targetProject=@dungeon-adventure/game-api --no-interactive您还可以执行试运行以查看哪些文件会被更改
pnpm nx g @aws/nx-plugin:connection --sourceProject=@dungeon-adventure/game-ui --targetProject=@dungeon-adventure/game-api --no-interactive --dry-runyarn nx g @aws/nx-plugin:connection --sourceProject=@dungeon-adventure/game-ui --targetProject=@dungeon-adventure/game-api --no-interactive --dry-runnpx nx g @aws/nx-plugin:connection --sourceProject=@dungeon-adventure/game-ui --targetProject=@dungeon-adventure/game-api --no-interactive --dry-runbunx nx g @aws/nx-plugin:connection --sourceProject=@dungeon-adventure/game-ui --targetProject=@dungeon-adventure/game-api --no-interactive --dry-run您将看到文件树中出现了新文件或变更。
UI -> tRPC connection 更新文件
connection 生成器生成/更新这些文件。我们将重点查看文件树中高亮的关键文件:
文件夹packages/
文件夹game-ui/
文件夹src/
文件夹components/
- GameApiClientProvider.tsx 设置 GameAPI 客户端
文件夹hooks/
- useGameApi.tsx 调用 GameApi 的钩子
- main.tsx 注入 trpc 客户端提供者
- package.json
import { useContext } from 'react';import { GameApiTRPCContext } from '../components/GameApiClientProvider';
export const useGameApi = () => {  const container = useContext(GameApiTRPCContext);  if (!container) {    throw new Error('useGameApi must be used within GameApiClientProvider');  }  return container.optionsProxy;};
export const useGameApiClient = () => { const container = useContext(GameApiTRPCContext); if (!container) { throw new Error( 'useGameApiClient must be used within GameApiClientProvider', ); } return container.client;};该钩子提供访问 tRPC 客户端以调用 GameApi 的功能。有关如何调用 tRPC API 的示例,请参考 使用 tRPC 钩子指南。
import GameApiClientProvider from './components/GameApiClientProvider';import QueryClientProvider from './components/QueryClientProvider';import { useAuth } from 'react-oidc-context';import CognitoAuth from './components/CognitoAuth';import { useRuntimeConfig } from './hooks/useRuntimeConfig';import RuntimeConfigProvider from './components/RuntimeConfig';import React from 'react';import { createRoot } from 'react-dom/client';import { RouterProvider, createRouter } from '@tanstack/react-router';import { routeTree } from './routeTree.gen';import './styles.css';...const root = document.getElementById('root');root && createRoot(root).render( <React.StrictMode> <RuntimeConfigProvider> <CognitoAuth> <QueryClientProvider> <GameApiClientProvider> <App /> </GameApiClientProvider> </QueryClientProvider> </CognitoAuth> </RuntimeConfigProvider> </React.StrictMode>, );通过 AST 转换更新了 main.tsx 文件以注入 tRPC 提供者。
故事代理:连接库存 MCP 服务器
Section titled “故事代理:连接库存 MCP 服务器”连接故事代理到库存 MCP 服务器,使代理能够发现和调用 MCP 服务器的工具。
- 安装 Nx Console VSCode Plugin 如果您尚未安装
- 在VSCode中打开Nx控制台
- 点击
Generate (UI)在"Common Nx Commands"部分 - 搜索
@aws/nx-plugin - connection - 填写必需参数
- sourceProject: story
- targetProject: inventory
- 点击
Generate
pnpm nx g @aws/nx-plugin:connection --sourceProject=story --targetProject=inventory --no-interactiveyarn nx g @aws/nx-plugin:connection --sourceProject=story --targetProject=inventory --no-interactivenpx nx g @aws/nx-plugin:connection --sourceProject=story --targetProject=inventory --no-interactivebunx nx g @aws/nx-plugin:connection --sourceProject=story --targetProject=inventory --no-interactive您还可以执行试运行以查看哪些文件会被更改
pnpm nx g @aws/nx-plugin:connection --sourceProject=story --targetProject=inventory --no-interactive --dry-runyarn nx g @aws/nx-plugin:connection --sourceProject=story --targetProject=inventory --no-interactive --dry-runnpx nx g @aws/nx-plugin:connection --sourceProject=story --targetProject=inventory --no-interactive --dry-runbunx nx g @aws/nx-plugin:connection --sourceProject=story --targetProject=inventory --no-interactive --dry-run故事代理 -> 库存 MCP 连接更新文件
connection 生成器生成/更新这些文件:
文件夹packages/
文件夹common/
文件夹agent_connection/
文件夹dungeon_adventure_agent_connection/
文件夹core/
- agentcore_endpoints.py 框架无关的 ARN/URL 解析
- agentcore_mcp_transport.py 框架无关的 MCP 传输
- agentcore_mcp_client_strands.py 包装传输的 Strands MCP 客户端
文件夹auth/ 框架无关的 SigV4 / 会话转发
httpx.Auth- …
文件夹app/
- inventory_mcp_server_client_strands.py 连接库存 MCP 服务器的 Strands 客户端
- __init__.py 重新导出各连接客户端
文件夹story/
文件夹dungeon_adventure_story/agent/
- agent.py 修改以导入和使用 MCP 客户端
生成器会:
- 创建共享的
agent_connectionPython 项目(如果尚不存在),包含核心AgentCoreMCPClientStrands - 生成
InventoryMcpServerClientStrands类,处理本地(直接 HTTP)和部署时(通过 AgentCore 使用 IAM 身份验证)连接 MCP 服务器 - 转换
agent.py以导入客户端、创建实例并将 MCP 服务器的工具连接到代理 - 将
agent_connection项目作为工作区依赖添加到 story 项目 - 更新
dev目标,在本地运行时自动启动 MCP 服务器
更多详情请参考 Python Agent 到 MCP 连接指南。
游戏 UI:连接故事代理
Section titled “游戏 UI:连接故事代理”连接游戏 UI 到故事代理。由于代理使用 AG-UI,connection 生成器会连接 CopilotKit:一个主题化的聊天组件和一个准备好渲染的 @ag-ui/client HttpAgent。
- 安装 Nx Console VSCode Plugin 如果您尚未安装
- 在VSCode中打开Nx控制台
- 点击
Generate (UI)在"Common Nx Commands"部分 - 搜索
@aws/nx-plugin - connection - 填写必需参数
- sourceProject: @dungeon-adventure/game-ui
- targetProject: story
- 点击
Generate
pnpm nx g @aws/nx-plugin:connection --sourceProject=@dungeon-adventure/game-ui --targetProject=story --no-interactiveyarn nx g @aws/nx-plugin:connection --sourceProject=@dungeon-adventure/game-ui --targetProject=story --no-interactivenpx nx g @aws/nx-plugin:connection --sourceProject=@dungeon-adventure/game-ui --targetProject=story --no-interactivebunx nx g @aws/nx-plugin:connection --sourceProject=@dungeon-adventure/game-ui --targetProject=story --no-interactive您还可以执行试运行以查看哪些文件会被更改
pnpm nx g @aws/nx-plugin:connection --sourceProject=@dungeon-adventure/game-ui --targetProject=story --no-interactive --dry-runyarn nx g @aws/nx-plugin:connection --sourceProject=@dungeon-adventure/game-ui --targetProject=story --no-interactive --dry-runnpx nx g @aws/nx-plugin:connection --sourceProject=@dungeon-adventure/game-ui --targetProject=story --no-interactive --dry-runbunx nx g @aws/nx-plugin:connection --sourceProject=@dungeon-adventure/game-ui --targetProject=story --no-interactive --dry-runUI -> 故事代理连接更新文件
connection 生成器生成/更新这些文件:
文件夹packages/
文件夹game-ui/
文件夹src/
文件夹components/
- AguiProvider.tsx 注册了所有连接的 AG-UI 代理的
CopilotKitProvider 文件夹copilot/
- index.tsx Shadcn 主题的
CopilotChat/CopilotSidebar/CopilotPopup - ShadcnAssistantMessage.tsx, ShadcnUserMessage.tsx, ShadcnChatInput.tsx, ShadcnCursor.tsx, copilot.css
- index.tsx Shadcn 主题的
- AguiProvider.tsx 注册了所有连接的 AG-UI 代理的
文件夹hooks/
- useAguiStoryAgent.tsx 构建
HttpAgent,注入 Cognito bearer 令牌,并将threadId填充到 AgentCore 的 33 字符会话 id
- useAguiStoryAgent.tsx 构建
- main.tsx 用
<AguiProvider>包装<App />
生成器会:
- 检测 React 网站的
uxProvider(此处为 Shadcn)并提供匹配的聊天组件。 - 在单个
CopilotKitProvider上注册每个连接的代理 — 为另一个代理重新运行只会添加另一个钩子。 - 从运行时配置读取代理的运行时 ARN,构建 AgentCore 调用 URL,并附加 Cognito bearer 令牌和 AgentCore 会话 ID 头。
更多详情请参考 React 到 AG-UI 连接指南。
连接游戏 API 和库存 MCP 服务器到数据库
Section titled “连接游戏 API 和库存 MCP 服务器到数据库”游戏 API 和库存 MCP 服务器都会读写我们的 DynamoDB 表,因此让我们将它们连接到 DungeonDb 项目。connection 生成器检测到目标是 ts#dynamodb 项目,并将每个源项目的 dev 目标配置为自动启动 DynamoDB Local。
- 安装 Nx Console VSCode Plugin 如果您尚未安装
- 在VSCode中打开Nx控制台
- 点击
Generate (UI)在"Common Nx Commands"部分 - 搜索
@aws/nx-plugin - connection - 填写必需参数
- sourceProject: @dungeon-adventure/game-api
- targetProject: @dungeon-adventure/dungeon-db
- 点击
Generate
pnpm nx g @aws/nx-plugin:connection --sourceProject=@dungeon-adventure/game-api --targetProject=@dungeon-adventure/dungeon-db --no-interactiveyarn nx g @aws/nx-plugin:connection --sourceProject=@dungeon-adventure/game-api --targetProject=@dungeon-adventure/dungeon-db --no-interactivenpx nx g @aws/nx-plugin:connection --sourceProject=@dungeon-adventure/game-api --targetProject=@dungeon-adventure/dungeon-db --no-interactivebunx nx g @aws/nx-plugin:connection --sourceProject=@dungeon-adventure/game-api --targetProject=@dungeon-adventure/dungeon-db --no-interactive您还可以执行试运行以查看哪些文件会被更改
pnpm nx g @aws/nx-plugin:connection --sourceProject=@dungeon-adventure/game-api --targetProject=@dungeon-adventure/dungeon-db --no-interactive --dry-runyarn nx g @aws/nx-plugin:connection --sourceProject=@dungeon-adventure/game-api --targetProject=@dungeon-adventure/dungeon-db --no-interactive --dry-runnpx nx g @aws/nx-plugin:connection --sourceProject=@dungeon-adventure/game-api --targetProject=@dungeon-adventure/dungeon-db --no-interactive --dry-runbunx nx g @aws/nx-plugin:connection --sourceProject=@dungeon-adventure/game-api --targetProject=@dungeon-adventure/dungeon-db --no-interactive --dry-run- 安装 Nx Console VSCode Plugin 如果您尚未安装
- 在VSCode中打开Nx控制台
- 点击
Generate (UI)在"Common Nx Commands"部分 - 搜索
@aws/nx-plugin - connection - 填写必需参数
- sourceProject: @dungeon-adventure/inventory
- targetProject: @dungeon-adventure/dungeon-db
- 点击
Generate
pnpm nx g @aws/nx-plugin:connection --sourceProject=@dungeon-adventure/inventory --targetProject=@dungeon-adventure/dungeon-db --no-interactiveyarn nx g @aws/nx-plugin:connection --sourceProject=@dungeon-adventure/inventory --targetProject=@dungeon-adventure/dungeon-db --no-interactivenpx nx g @aws/nx-plugin:connection --sourceProject=@dungeon-adventure/inventory --targetProject=@dungeon-adventure/dungeon-db --no-interactivebunx nx g @aws/nx-plugin:connection --sourceProject=@dungeon-adventure/inventory --targetProject=@dungeon-adventure/dungeon-db --no-interactive您还可以执行试运行以查看哪些文件会被更改
pnpm nx g @aws/nx-plugin:connection --sourceProject=@dungeon-adventure/inventory --targetProject=@dungeon-adventure/dungeon-db --no-interactive --dry-runyarn nx g @aws/nx-plugin:connection --sourceProject=@dungeon-adventure/inventory --targetProject=@dungeon-adventure/dungeon-db --no-interactive --dry-runnpx nx g @aws/nx-plugin:connection --sourceProject=@dungeon-adventure/inventory --targetProject=@dungeon-adventure/dungeon-db --no-interactive --dry-runbunx nx g @aws/nx-plugin:connection --sourceProject=@dungeon-adventure/inventory --targetProject=@dungeon-adventure/dungeon-db --no-interactive --dry-run游戏 UI:基础设施
Section titled “游戏 UI:基础设施”创建 CDK 基础设施的最终子项目。
- 安装 Nx Console VSCode Plugin 如果您尚未安装
- 在VSCode中打开Nx控制台
- 点击
Generate (UI)在"Common Nx Commands"部分 - 搜索
@aws/nx-plugin - ts#infra - 填写必需参数
- name: infra
- 点击
Generate
pnpm nx g @aws/nx-plugin:ts#infra --name=infra --no-interactiveyarn nx g @aws/nx-plugin:ts#infra --name=infra --no-interactivenpx nx g @aws/nx-plugin:ts#infra --name=infra --no-interactivebunx nx g @aws/nx-plugin:ts#infra --name=infra --no-interactive您还可以执行试运行以查看哪些文件会被更改
pnpm nx g @aws/nx-plugin:ts#infra --name=infra --no-interactive --dry-runyarn nx g @aws/nx-plugin:ts#infra --name=infra --no-interactive --dry-runnpx nx g @aws/nx-plugin:ts#infra --name=infra --no-interactive --dry-runbunx nx g @aws/nx-plugin:ts#infra --name=infra --no-interactive --dry-run您将看到文件树中出现了新文件或变更。
ts#infra 更新文件
ts#infra 生成器生成/更新这些文件。我们将重点查看文件树中高亮的关键文件:
文件夹packages/
文件夹common/
文件夹constructs/
文件夹src/
文件夹core/
- checkov.ts
- index.ts
文件夹infra
文件夹src/
文件夹stages/
- application-stage.ts 定义 CDK 堆栈
文件夹stacks/
- application-stack.ts 定义 CDK 资源
- main.ts 定义所有阶段的入口点
- cdk.json
- checkov.yml
- project.json
- …
- package.json
- tsconfig.json 添加引用
- tsconfig.base.json 添加别名
import { ApplicationStage } from './stages/application-stage.js';import { App } from ':dungeon-adventure/common-constructs';
const app = new App();
// 部署自己的沙盒环境(假设已配置 CLI 凭证)new ApplicationStage(app, 'dungeon-adventure-infra-sandbox', {  env: {    account: process.env.CDK_DEFAULT_ACCOUNT,    region: process.env.CDK_DEFAULT_REGION,  },});
app.synth();这是 CDK 应用的入口点。
import { Stack, StackProps } from 'aws-cdk-lib';import { Construct } from 'constructs';
export class ApplicationStack extends Stack {  constructor(scope: Construct, id: string, props?: StackProps) {    super(scope, id, props);
// 在此定义堆栈代码 }}实例化 CDK 构造体以构建地牢冒险游戏。
任务 7:更新基础设施
Section titled “任务 7:更新基础设施”更新 packages/infra/src/stacks/application-stack.ts 以实例化部分已生成的构造体:
import {  GameApi,  GameUI,  InventoryMcpServer,  StoryAgent,  UserIdentity,} from ':dungeon-adventure/common-constructs';import { Stack, StackProps, CfnOutput } from 'aws-cdk-lib';import { Construct } from 'constructs';export class ApplicationStack extends Stack {  constructor(scope: Construct, id: string, props?: StackProps) {    super(scope, id, props);
    const userIdentity = new UserIdentity(this, 'UserIdentity');
    const gameApi = new GameApi(this, 'GameApi', {      integrations: GameApi.defaultIntegrations(this).build(),    });
    const mcpServer = new InventoryMcpServer(this, 'InventoryMcpServer');
    // Use Cognito for user authentication with the agent    const storyAgent = new StoryAgent(this, 'StoryAgent', {      identity: userIdentity,    });
    new CfnOutput(this, 'StoryAgentArn', {      value: storyAgent.agentCoreRuntime.agentRuntimeArn,    });    new CfnOutput(this, 'InventoryMcpArn', {      value: mcpServer.agentCoreRuntime.agentRuntimeArn,    });
    // Grant the agent permissions to invoke our mcp server    mcpServer.grantInvokeAccess(storyAgent);
    // Grant the authenticated role access to invoke the api    gameApi.grantInvokeAccess(userIdentity.identityPool.authenticatedRole);
    new GameUI(this, 'GameUI');  }}
import { Stack, StackProps } from 'aws-cdk-lib';import { GameApi, GameUI, InventoryMcpServer, StoryAgent, UserIdentity,} from ':dungeon-adventure/common-constructs';import { Stack, StackProps, CfnOutput } from 'aws-cdk-lib';import { Construct } from 'constructs';
export class ApplicationStack extends Stack { constructor(scope: Construct, id: string, props?: StackProps) { super(scope, id, props);
// The code that defines your stack goes here const userIdentity = new UserIdentity(this, 'UserIdentity');
const gameApi = new GameApi(this, 'GameApi', { integrations: GameApi.defaultIntegrations(this).build(), });
const mcpServer = new InventoryMcpServer(this, 'InventoryMcpServer');
// Use Cognito for user authentication with the agent const storyAgent = new StoryAgent(this, 'StoryAgent', { identity: userIdentity, });
new CfnOutput(this, 'StoryAgentArn', { value: storyAgent.agentCoreRuntime.agentRuntimeArn, }); new CfnOutput(this, 'InventoryMcpArn', { value: mcpServer.agentCoreRuntime.agentRuntimeArn, });
// Grant the agent permissions to invoke our mcp server mcpServer.grantInvokeAccess(storyAgent);
// Grant the authenticated role access to invoke the api gameApi.grantInvokeAccess(userIdentity.identityPool.authenticatedRole);
new GameUI(this, 'GameUI'); }}任务 8:构建代码
Section titled “任务 8:构建代码”Nx 命令
单目标 vs 多目标
Section titled “单目标 vs 多目标”run-many 命令将在多个列出的子项目上运行目标(--all 将针对所有项目)。这确保依赖项按正确顺序执行。
也可以通过直接在项目上运行目标来触发构建(或任何其他任务)。例如,要构建 @dungeon-adventure/infra 项目,运行以下命令:
pnpm nx build infrayarn nx build infranpx nx build infrabunx nx build infra也可以省略作用域,使用 Nx 简写语法:
pnpm nx build infrayarn nx build infranpx nx build infrabunx nx build infra可视化依赖关系
Section titled “可视化依赖关系”要可视化依赖关系,运行:
pnpm nx graphyarn nx graphnpx nx graphbunx nx graph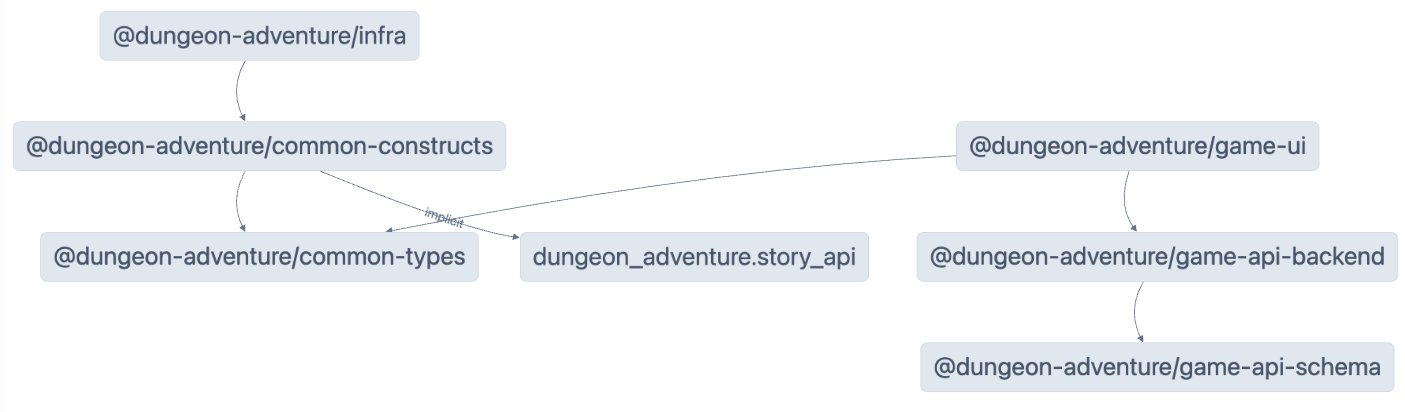
Nx 依赖缓存以重用先前构建产物加速开发。需要配置才能正常工作,有时可能需要不使用缓存进行构建。为此,只需在命令后添加 --skip-nx-cache 参数。例如:
pnpm nx build infra --skip-nx-cacheyarn nx build infra --skip-nx-cachenpx nx build infra --skip-nx-cachebunx nx build infra --skip-nx-cache如需清除缓存(存储在 .nx 文件夹),可运行:
pnpm nx resetyarn nx resetnpx nx resetbunx nx reset使用命令行运行以下命令首先修复任何代码检查问题:
pnpm lintyarn lintnpm run lintbun lint然后运行以下命令进行完整构建:
pnpm buildyarn buildnpm run buildbun build您将看到以下提示:
 NX   The workspace is out of sync
[@nx/js:typescript-sync]: Some TypeScript configuration files are missing project references to the projects they depend on or contain outdated project references.
This will result in an error in CI.
? Would you like to sync the identified changes to get your workspace up to date? …Yes, sync the changes and run the tasksNo, run the tasks without syncing the changes
该消息表示 NX 检测到可自动更新的文件。此处指未设置项目引用的 tsconfig.json 文件。
选择 Yes, sync the changes and run the tasks 选项继续。您会注意到所有 IDE 相关导入错误自动解决,因为同步生成器会自动添加缺失的 TypeScript 引用!
所有构建产物现在位于 monorepo 根目录的 dist/ 文件夹中。这是使用 @aws/nx-plugin 生成项目的标准做法,避免生成文件污染文件树。如需清理文件,删除 dist/ 文件夹即可,无需担心构建产物散布在文件树各处。
恭喜!您已创建开始实现 AI 地牢冒险游戏核心所需的所有子项目。🎉🎉🎉