Prepare your account for AppStream
Note: Read this section only if you want to enable AppStream.
AWS AppStream service limits may block resource creation in a new AWS account, or an account that has not yet hosted AppStream resources. The following actions will best prepare the hosting account.
- Required: Go to AppStream 2.0 services (AWS Console), and choose Get Started. This will take you to a screen asking if you want to try out some templates. At this screen choose Next. This will only need to be done once for the account (it activates a role required for AppStream to be initiated).
- Recommended: Launch at least one EC2 instance (size of instance and duration of run prior to termination do not matter), as this establishes the base compute service limits.
- Optional: Open a support ticket within the hosting account to AWS AppStream service, noting your intention to create a fleet. This should only be necessary if you are creating a large fleet, but if the account is very new or has never had resources created prior to being onboarded as a hosting account, this is recommended.
Once prerequisites are complete and the CloudFormation stack has been created, go to AppStream on the AWS console of the hosting account. Go to Fleet and then choose the newly created fleet. Choose Action>Start to start the fleet. This step must be completed for any researcher workspace to be successfully launched within the hosting account.
After proceeding from the Onboard AWS Account Screen, you will be returned to the Account listing page with a status.
- Up to Date : The account has successfully onboarded and the version of the main and hosting account code is in sync.
- Needs Update : This status means that the main account code is more up to date than the hosting account code. There is an update button available and it is advised that you use this to bring the hosting account to the latest version.
- Needs Onboarding : The account has been onboarded via the Service Workbench UI but the cloudformation template has not been generated
- Errored : The onboarding of the hosting account failed. Check the cloudformation stack in the hosting account.
- Pending : The account onboarding process is ongoing. If a hosting account remains in pending status beyond 30 minute, it is likely that there is an issue onboarding the account. Check the CloudFormation stack in the hosting account.
Setting up an AppStream Image
Overview
This section describes the procedure of setting up an AppStream image with the following applications installed: Firefox, Notepad, PuttyGen, and Putty. AppStream should be built in the main account. To do this:
- Launch an AppStream Image Builder instance.
- Log in to the AppStream Image builder instance and run a script to build an image with Firefox, PuttyGen, Putty, and Notepad.
Pre-requisites
- Navigate to AWS AppStream in your main account using the AWS Management Console.
- Choose Get Started and then choose Next. This activates AppStream in your main account, following which you could proceed with the commands in
SETUP.mdfile.
Launching an AppStream Image Builder instance
Navigate to the
scripts/app-streamdirectory.Enter the following commands:
npm install
npm run start-image-builder
-- <AWS Profile> <region> <Base image name> <instance size>

# Example: npm run start-image-builder -- default us-east-1
AppStream-WinServer2019-07-12-2022 stream.standard.medium

# If preferred you can choose the default base image name and instance size by running this command:

npm run start-image-builder -- default us-east-1 default defaultNote: Set up your AWS profile beforehand so that you have permission to launch an AppStream Image Builder instance in your AWS Account.
Once the Image Builder is launched and ready, choose the URL provided in the terminal console. This opens the AppStream page on the AWS Management Console.
Building AppStream image

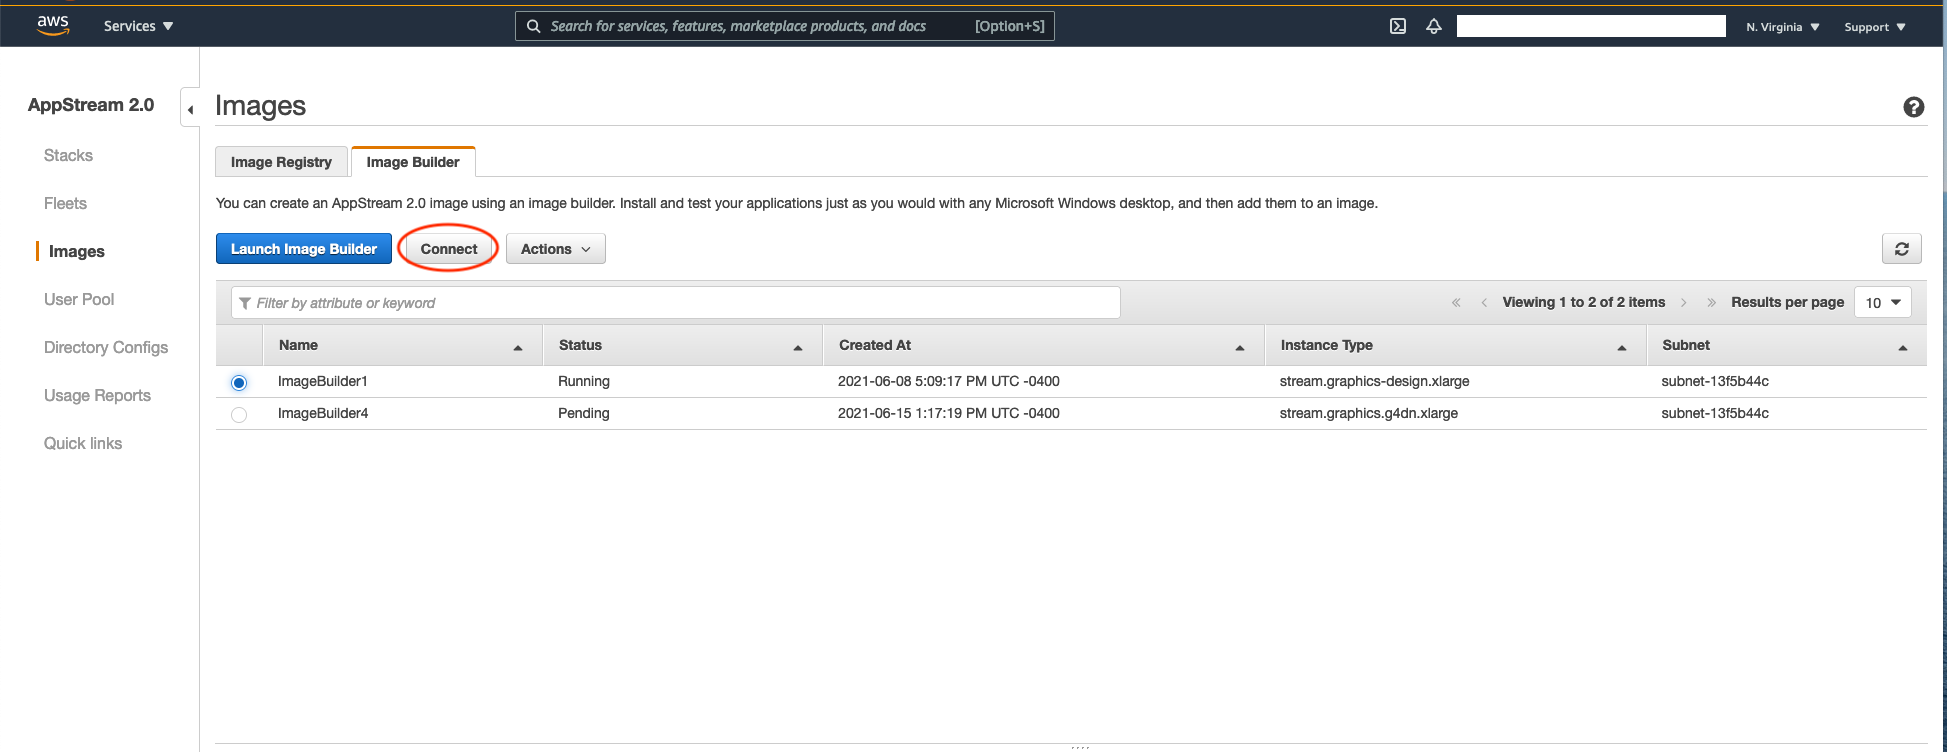
Figure: Create an AppStream image
On the AppStream page in the console, choose the AppStream image that was built in the previous step and choose Connect.
This opens a new tab in your browser. When prompted, log in as administrator. This opens the Windows Desktop that you can interact with to create your AppStream image.
On the Windows Desktop, choose Start and enter
Windows Powershell.Right-click the application and choose Run as administrator.
Enter the following commands:
cd ~\Documents

# Pull the Image Builder script from Github
Invoke-WebRequest -Uri https://raw.githubusercontent.com/awslabs/service-workbench-on-aws/mainline/scripts/app-stream/buildImage.ps1 -OutFile buildImage.ps1

# Execute Image builder script
.\buildImage.ps1
At this point, the Image builder builds your image and the
Failed to reserve a sessionmessage is displayed.Log in to AppStream on the console and wait till the AppStream image is built.