Useful Links
1 - Preparing Cognito User Pool
- Open the Cognito User Pool console:
https://console.aws.amazon.com/cognito/users/ - Select your User Pool (
orbit-{YOUR_ENV_NAME}) - In the left navigation pane, under
General settings, get the Pool Id of the User Pool and save it for later - In the left pane, click on
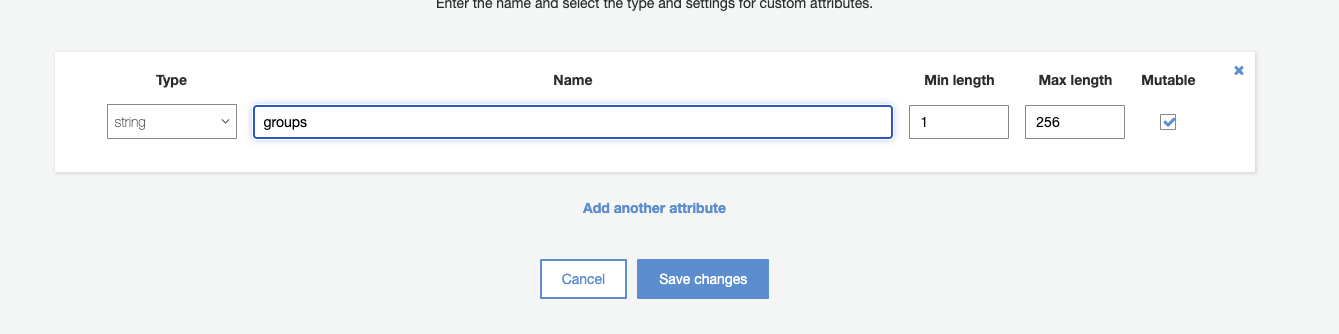
General settings>Attributes - In the page botton click on
Add custom attributeand then save it.
- In the left pane, click on
App integration>Domain name - Add any valid domain name

2 - Create a KeyCloak Server
If you already have a KeyCloak implementation, sign in and skip this topic.
- You create a KeyCloak server on AWS. Please refer to KeyCloak on AWS
3 - Configuring the KeyCloak Server
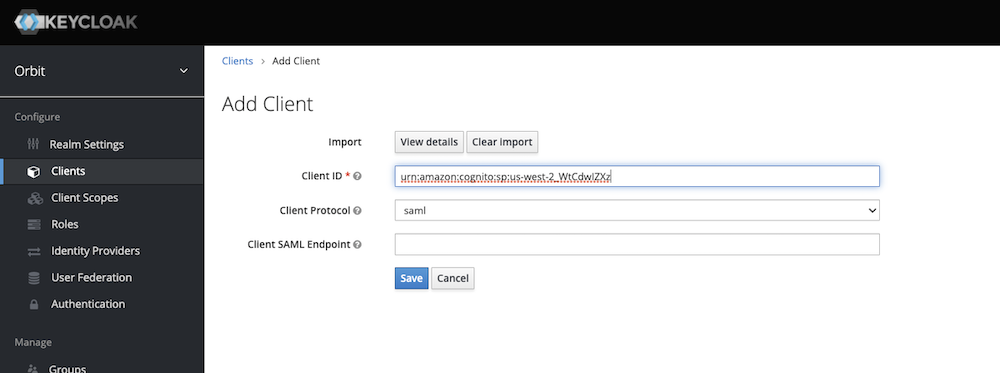
- Select the
REALMyou’d like to use, or create a new one - On
Clients->Createupload the AWS SAML Metadata File - Once resolved, edit the Client Id
- REMOVE:
urn:amazon:webservices - ADD:
urn:amazon:cognito:sp:us-west-2_xxxxxxxxx(Replace xxxxxxxxx with the UserPoolId you got above)
- REMOVE:
-
Click
Create
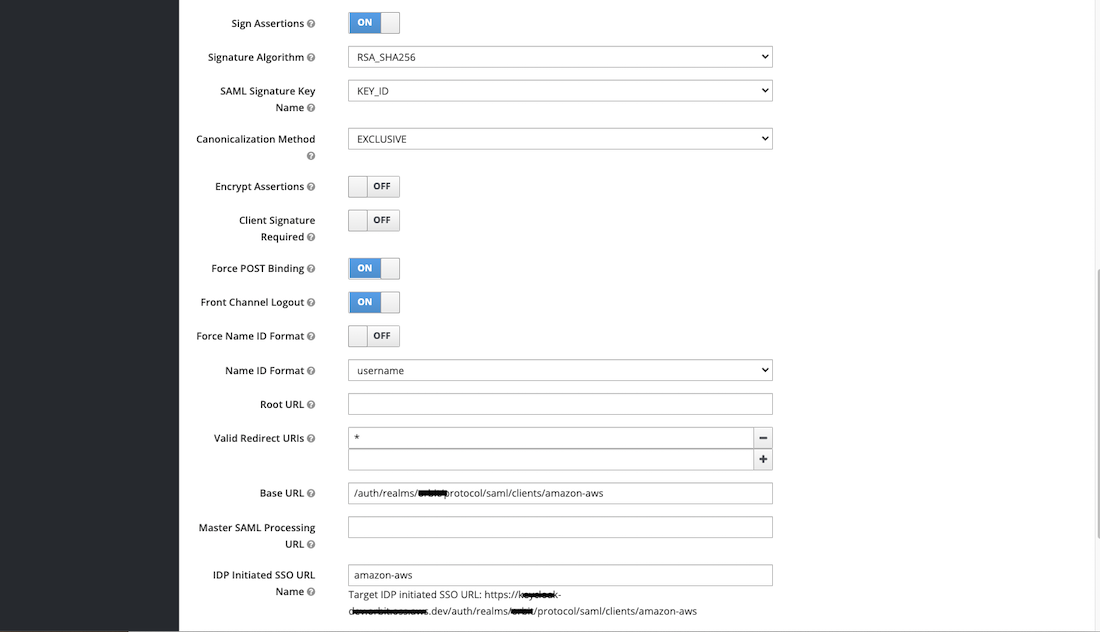
- Edit the following properties:
- Client Signature Required – TURN OFF
- Name ID Format - username
- Valid Redirect URI’s – change to wildcard
* - Base URL: change to /auth/realms/{realm}/protocol/saml/clients/amazon-aws (replace realm with your realm)
- IDP Initiated SSO URL Name: change to amazon-aws
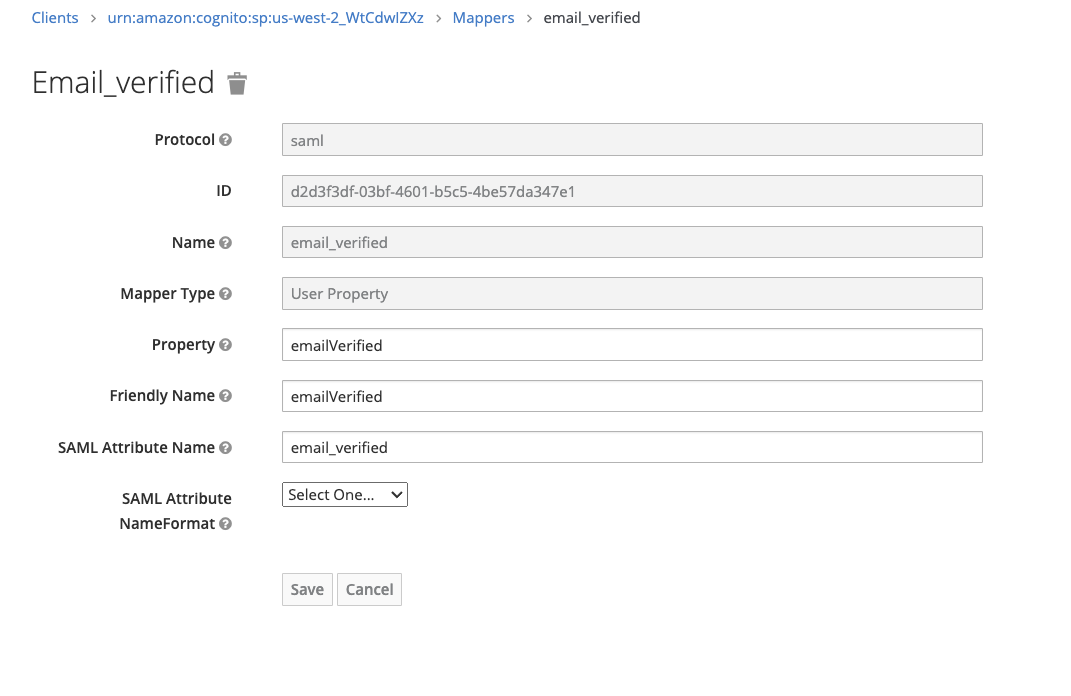
- The following mappings need to be set up:
- email_verified – confirm that the email address is verified (all emailaddress MUST be verified in KeyCloak)
- emailaddress – email address of logged in user
- group – represents the ROLES that the user is assigned to
- be sure to mark the Single Role Attribute as ON
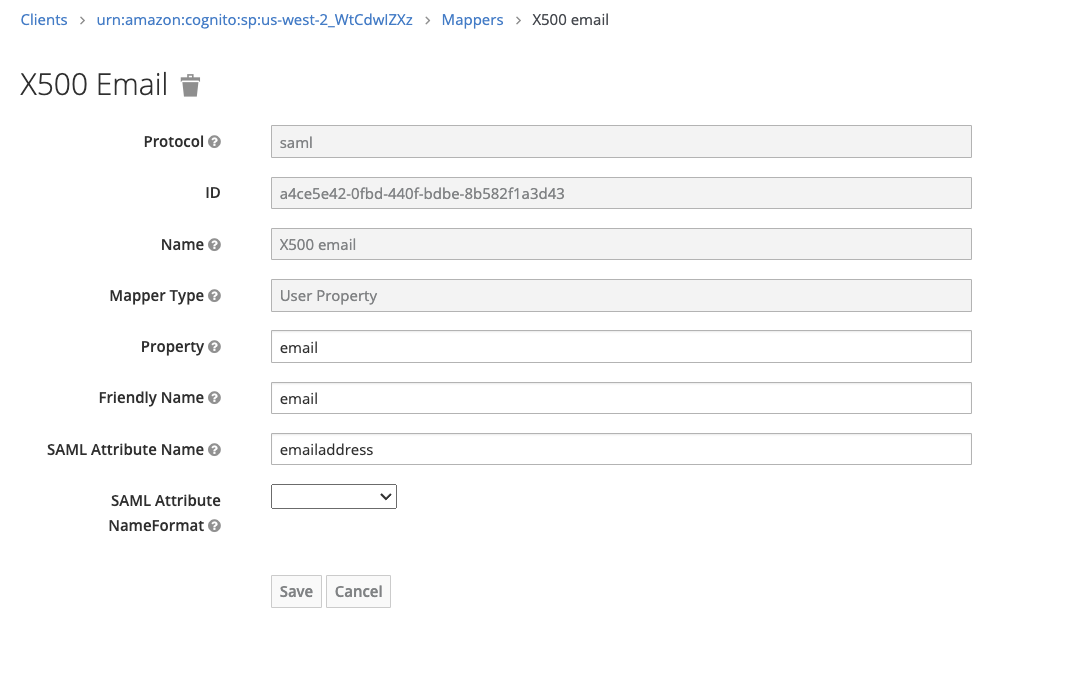
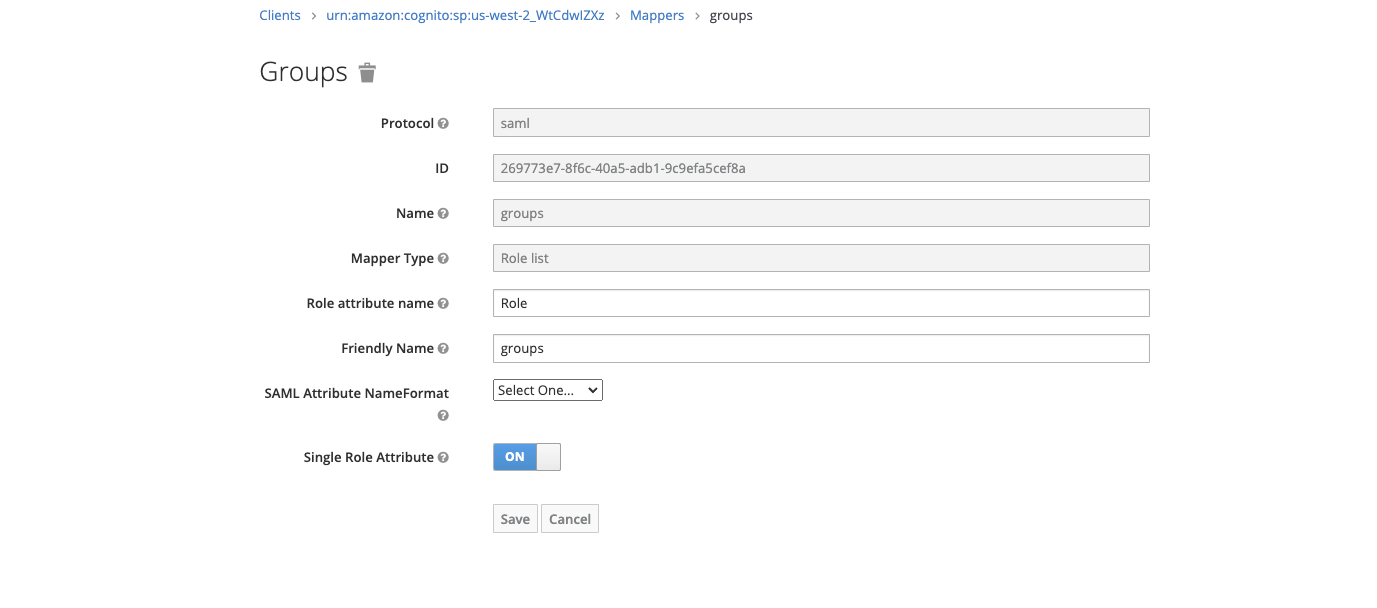
- be sure to mark the Single Role Attribute as ON
4 - Get the IdP metadata for your KeyCloak realm
Fetch the SAML-Metadata-IDPSSODescriptor.xml file from your KeyCloak Server
- Typically, it can be found at
https://{keycloak-server}/auth/realms/{realm}/protocol/saml/descriptor(change the DNS of your server and the realm)
5 - Configuring Cognito User Pool - Identity Provider
- Open the Cognito User Pool console:
https://console.aws.amazon.com/cognito/users/ - Select your User Pool (
orbit-{YOUR_ENV_NAME}) - In the left navigation pane, under Federation, choose Identity providers.
- Choose SAML.
- Under Metadata document, paste the Identity Provider metadata URL that you copied.
- For Provider name, enter
keycloak. For more information, see Choosing SAML Identity Provider Names. - (Optional) Enter any SAML identifiers (Identifiers (Optional)) and enable sign-out from the IdP (Keycloak) when your users sign out from your user pool (Enable IdP sign out flow).
- Choose Create provider.
For more information, see Creating and managing a SAML identity provider for a user pool (AWS Management Console).
7 - Configuring Cognito User Pool - Attributes Mapping
- In the left navigation pane, under Federation, choose Attribute mapping.
- On the attribute mapping page, choose the SAML tab.
- Choose Add SAML attribute.
- Map the groups attributes
- For SAML attribute, enter the SAML attribute name
groups. - For User pool attribute, choose
custom:groupsfrom the list.
- For SAML attribute, enter the SAML attribute name
- Map the e-mail attributes
- For SAML attribute, enter the SAML attribute name
emailaddress. - For User pool attribute, choose
Emailfrom the list.
- For SAML attribute, enter the SAML attribute name
- Map the email_verified attributes
- For SAML attribute, enter the SAML attribute name
email_verified. - For User pool attribute, choose
Email Verifiedfrom the list.
- For SAML attribute, enter the SAML attribute name
- Map the username attributes
- For SAML attribute, enter the SAML attribute name
username. - For User pool attribute, choose
Preferred User Namefrom the list.
- For SAML attribute, enter the SAML attribute name

For more information, see Specifying identity provider attribute mappings for your user pool.
- Save Changes
8 - Get the Orbit Workbench URL
- Open the Systems Manager Console
- On the left, select
Parameter Store - Select /orbit/
{your-env-name}/context - Search for LandingPageUrl, you will need it below
- On the left, select
9 - Configuring Cognito User Pool - Client Settings
- In the left navigation pane, under General settings, get the
Pool Idof the User Pool
10 - Configuring the Orbit Workbench manifest file (YAML)
- Add these new attributes in the root level, and fill in
CognitoExternalProviderDomainandCognitoExternalProviderRedirectwith your configurations:
UserPoolId: us-west-X_xXXXxxXXx
CognitoExternalProvider: keycloak
CognitoExternalProviderLabel: KEYCLOAK
# The domain created in Coginto
CognitoExternalProviderDomain: domain.auth.region.amazoncognito.com
# The Orbit Workbench URL
CognitoExternalProviderRedirect: https://a12389bc893fa0980ce08f1000ecf89a.region.elb.amazonaws.com/orbit/login
- Deploy:
orbit deploy env -f YOUR_FILE.yaml
You should see a ‘Sign in with Keycloak’ button on the landing page
11 - Sign in
- Go back to your landing page and click on
Sign in with Keycloak- You will be prompted to login with with your Keycloak account
- You should see the Lake Admin, Lake Creator and Lake User groups after you sign in