CLI Guide
The CloudFront Hosting Toolkit CLI is designed to simplify the process of deploying and managing your frontend applications on AWS.
Usage
The CLI can be executed in two ways:
- In a folder where your project is cloned from GitHub. This allows the CLI to auto-detect the framework, repository URL, and branch name.
- In any other folder, where you’ll need to manually input this information.
Available Commands
Init
Initialize your deployment configuration:
cloudfront-hosting-toolkit initOptions:
--s3: Initialize an S3 repository deployment instead of GitHub.
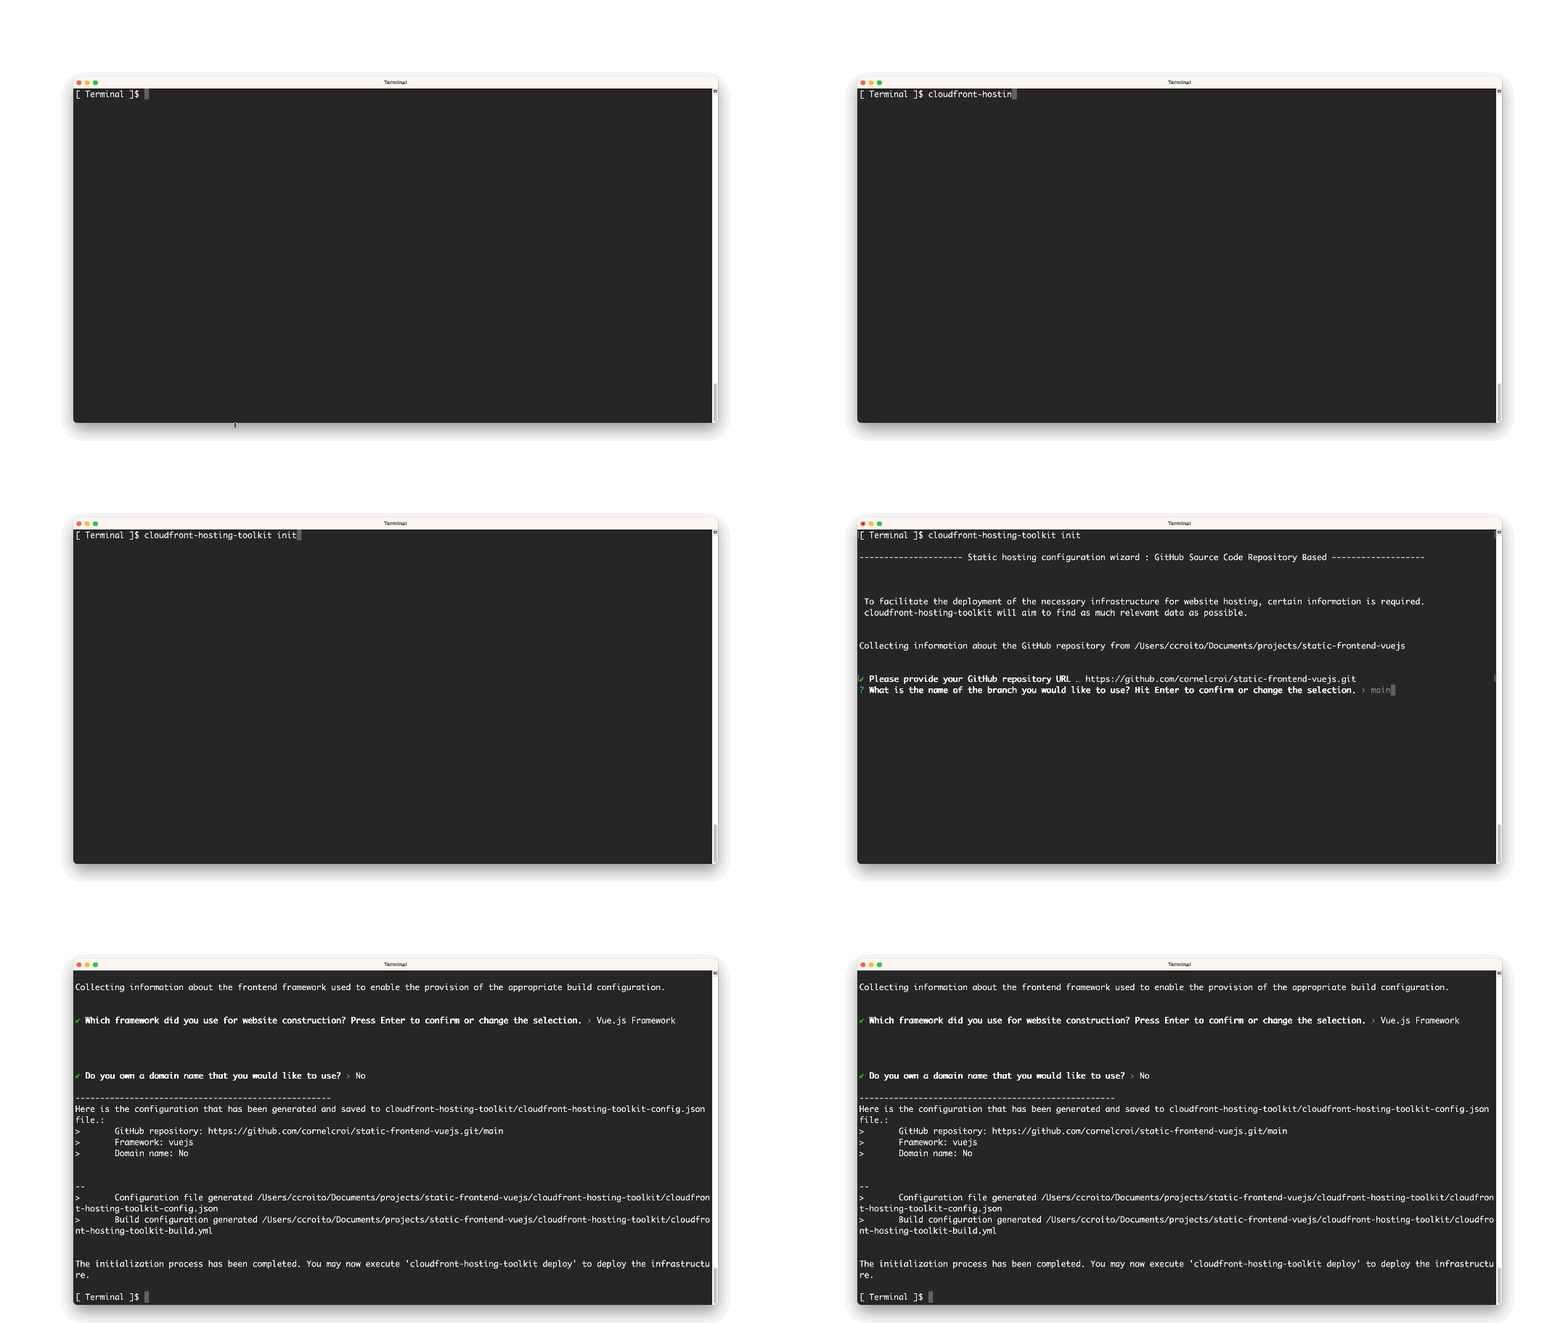
The following animated GIF demonstrates the initialization process:

After running cloudfront-hosting-toolkit init, CloudFront Hosting Toolkit will create a folder named cloudfront-hosting-toolkit in the directory where the tool is executed.
This cloudfront-hosting-toolkit folder contains essential files for managing your deployment process:
cloudfront-hosting-toolkit-config.json: This JSON file stores the configuration settings gathered during theinitprocess. You can review and modify these settings as needed.cloudfront-hosting-toolkit-config.yml: This YAML file is necessary for CodeBuild to build your website. It contains build configuration information, ensuring that your website is built correctly.cloudfront-hosting-toolkit-cff.js: This JavaScript file encapsulates the code utilized by the CloudFront Function for URL rewriting. Given the variability in rules based on the framework, this file is accessible for modifications at any time, enabling the addition of additional logic required to execute at the edge.- During deployment, the CLI generates log files to capture important information and log messages. These log files are named using the format
YYYY-MM-DD_HH-MM-SS.logand are stored in thecloudfront-hosting-toolkitfolder. You can review these logs to troubleshoot any deployment issues or monitor the deployment process.
Make sure to keep these files in the cloudfront-hosting-toolkit folder for seamless management of your future deployments.
Deploy
Deploy your website:
cloudfront-hosting-toolkit deployImportant
You typically only need to run the deploy command once after your initial init command. Subsequent code updates will be automatically deployed through the established pipeline.
You should only need to run deploy again if:
- You’ve run the init command again to change your configuration.
- You’ve manually deleted or significantly altered your AWS infrastructure.
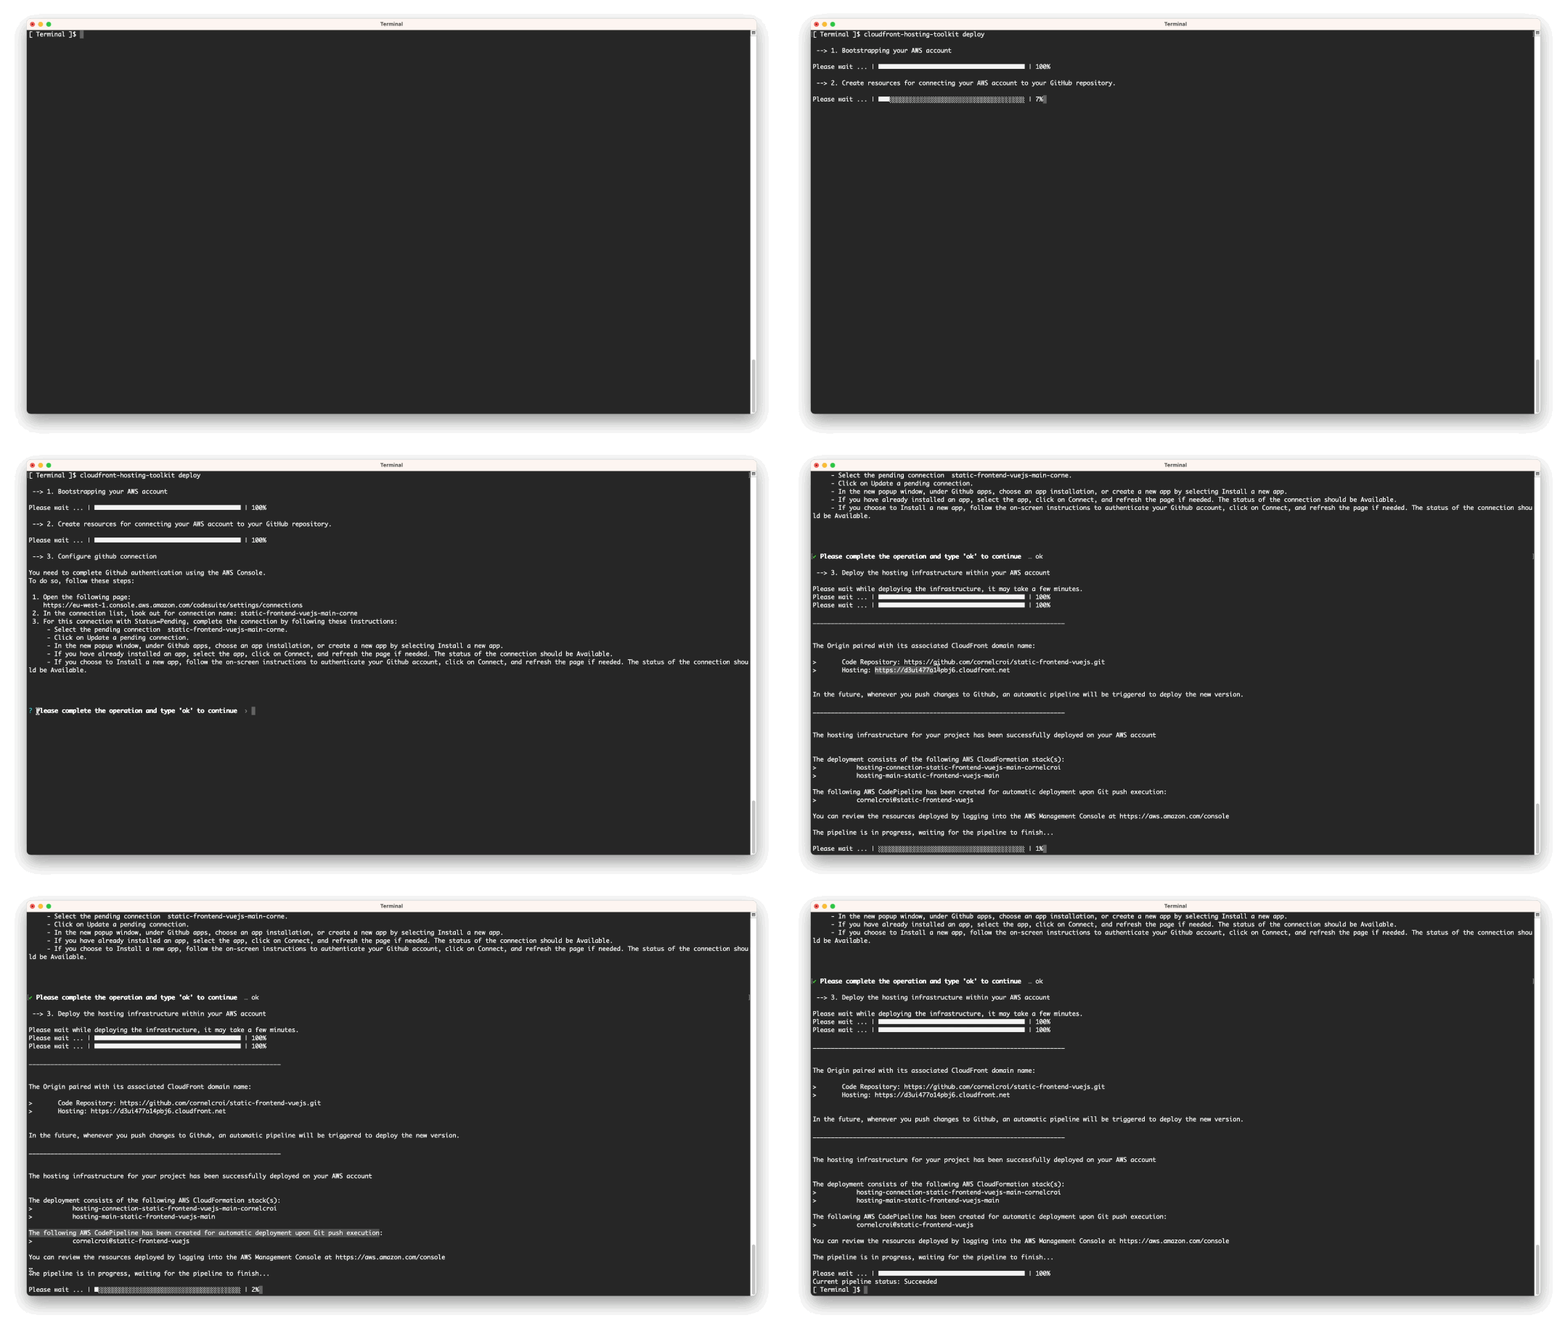
When you run this command, the CLI will:
-
For GitHub-based workflows, create an AWS CodeStar connection to your GitHub repository. This process involves:
- Creating a connection in a PENDING state.
- Prompting you to complete the connection setup in the AWS console.
- Guiding you through the process of installing the AWS Connector for GitHub app and granting necessary permissions.
- You’ll need to select the specific GitHub repository you want to deploy.
This step is crucial for establishing secure access between your AWS account and your GitHub repository. For more detailed information on this process, refer to the AWS documentation on GitHub connections.
-
Display the progress of the infrastructure deployment in real-time.
-
Continue to show updates until the entire infrastructure is successfully deployed.
-
After the infrastructure deployment is complete, automatically trigger the pipeline for your initial website deployment.
-
Wait for the pipeline to finish, providing status updates throughout the process.
The deployment is only considered complete when both the infrastructure is set up and the initial pipeline run has finished successfully.
Upon successful completion of the deployment:
- The domain name under which your website is available will be displayed.
- The pipeline status and name will be shown.
If the pipeline fails, you’ll receive an error message. For troubleshooting information and potential solutions, please refer to the Troubleshooting Guide.
The following animated GIF demonstrates the deployment process:

Note: The actual time for deployment can vary based on the complexity of your project and current AWS service response times.
Show
Display the domain name linked to your deployed source code repository:
cloudfront-hosting-toolkit showStatus
Check the current status of your pipeline deployment:
cloudfront-hosting-toolkit statusDelete
Remove the hosting infrastructure from your AWS account:
cloudfront-hosting-toolkit deleteBest Practices
- Run
initin your project root directory for accurate auto-detection of project settings when using a GitHub repository. - Review the generated log files in the
cloudfront-hosting-toolkitfolder for troubleshooting and monitoring. - If you need to customize URL rewriting rules, modify the
cloudfront-hosting-toolkit-cff.jsfile as needed.