Transfer S3 object from Alibaba Cloud OSS
This tutorial describes how to transfer Objects from Alibaba Cloud OSS to Amazon S3.
Prerequisite
You have already deployed the Data Transfer Hub in Oregon (us-west-2) region. For more information, see deployment.
Step 1: Configure credentials for OSS
- Open the Secrets Manager console.
- Choose Secrets in the left navigation bar.
- Click Store a new secret button.
- Select Other type of secrets.
-
Enter the credentials of Alibaba Cloud as text in Plaintext. The credentials are in the format of:
{ "access_key_id": "<Your Access Key ID>", "secret_access_key": "<Your Access Key Secret>" } -
Click Next.
- Enter Secret name. For example,
dth-oss-credentials. - Click Next.
- Select Disable automatic rotation.
- Click Store.
Step 2: Create an OSS transfer task
-
From the Create Transfer Task page, select Start a New Task, and then select Next.
-
From the Engine options page, under engine, select Amazon S3, and then choose Next Step.
-
Specify the transfer task details.
- Under Source Type, select the data source Aliyun OSS.
-
Enter bucket name and choose to sync Full Bucket or Objects with a specific prefix or Objects with different prefixes.
-
Provide destination settings for the S3 buckets.
-
From Engine settings, verify the values and modify them if necessary. For incremental data transfer, set the minimum capacity to at least 1.
-
At Task Scheduling Settings, select your task scheduling configuration.
- If you want to configure the timed task at a fixed frequency to compare the data difference on both sides of the time, select Fixed Rate.
- If you want to configure a scheduled task through Cron Expression to achieve a scheduled comparison of data differences on both sides, select Cron Expression.
- If you only want to perform the data synchronization task once, select One Time Transfer.
- If you need to achieve real-time incremental data synchronization, please refer to the event config guide.
-
For Advanced Options, keep the default values.
-
At Need Data Comparison before Transfer, select your task configuration. -If you want to skip the data comparison process and transfer all files, select No. -If you only want to synchronize files with differences, select Yes.
-
Enter an email address in Alarm Email.
-
Choose Next and review your task parameter details.
-
Choose Create Task.
After the task is created successfully, it will appear on the Tasks page.

Transfer task details and status
Select the Task ID to go to the task Details page, and then choose CloudWatch Dashboard to monitor the task status.
How to achieve real-time data transfer by OSS event trigger
If you want to achieve real-time data transfer from Alibaba Cloud OSS to Amazon S3, follow this section to enable OSS event trigger.
After you created the task, go to SQS console and record the Queue URL and Queue arn that will be used later.
Prepare your AWS account's Access Key/Secret Key
-
Sign in to the IAM console.
-
In the navigation pane, choose Policies, then choose Create poliy.
-
Select the JSON tab, and enter the following information.
{
    "Version": "2012-10-17",
    "Statement": [
        {
            "Effect": "Allow",
            "Action": [
                "sqs:SendMessage"
            ],
            "Resource": "arn:aws:sqs:us-west-2:xxxxxxxxxxx:DTHS3Stack-S3TransferQueue-1TSF4ESFQEFKJ"
        }
    ]
}
Note
Replace your queue ARN in the JSON.
-
Complete the workflow to create the policy.
-
In the navigation pane, choose Users, then choose Add users.
-
Attach the policy you created previously to the user.
-
Save the ACCESS_KEY/SECRET_KEY which will be used later.
Prepare the event-sender function for Alibaba Cloud
-
Open the terminal and enter the following command. You can use docker or Linux machine.
mkdir tmp cd tmp pip3 install -t . boto3 -
Create an
index.pyin the same folder, and enter the code below.import json import logging import os import boto3 def handler(event, context): logger = logging.getLogger() logger.setLevel('INFO') evt = json.loads(event) if 'events' in evt and len(evt['events']) == 1: evt = evt['events'][0] logger.info('Got event {}'.format(evt['eventName'])) obj = evt['oss']['object'] # logger.info(obj) ak = os.environ['ACCESS_KEY'] sk = os.environ['SECRET_KEY'] queue_url = os.environ['QUEUE_URL'] region_name = os.environ['REGION_NAME'] # minimum info of a message obj_msg = { 'key': obj['key'], 'size': obj['size'] } # start sending the msg sqs = boto3.client('sqs', region_name=region_name, aws_access_key_id=ak, aws_secret_access_key=sk) try: sqs.send_message( QueueUrl=queue_url, MessageBody=json.dumps(obj_msg) ) except Exception as e: logger.error( 'Unable to send the message to Amazon SQS, Exception:', e) else: logger.warning('Unknown Message '+evt) return 'Done' -
Zip the code (including boto3).
zip -r code.zip *
Create a function in Alibaba Cloud
-
Use your Alibaba Cloud account to log in to Function Compute, and select Task.
-
Choose Create Function.
-
Choose Python3.x as the Runtime Environments.
-
In Code Upload Method, choose Upload ZIP.
-
Upload the
code.zipcreated in the previous step to create the function. -
Select Create.
Configure the function's environment variables
-
Choose the Configurations.
-
Select Modify in the Environment Variables.
-
Enter the config JSON in the Environment Variables. Here you need to use your own
ACCESS_KEY,SECRET_KEYandQUEUE_URL.4. Click OK.{ "ACCESS_KEY": "XXX", "QUEUE_URL": "https://sqs.us-west-2.amazonaws.com/xxxx/DTHS3Stack-S3TransferQueue-xxxx", "REGION_NAME": "us-west-2", "SECRET_KEY": "XXXXX" }
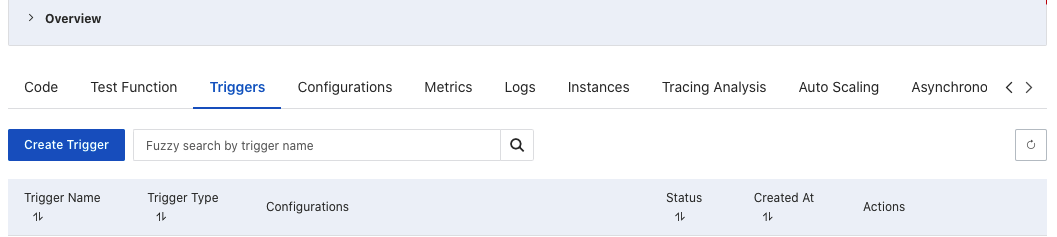
Create the trigger
-
Navigate to the Create Trigger in Triggers tab to create the trigger for the function.
-
Choose OSS as the Trigger Type, choose the bucket name.
-
For Trigger Event, choose:
oss:ObjectCreated:PutObject oss:ObjectCreated:PostObject oss:ObjectCreated:CopyObject oss:ObjectCreated:CompleteMultipartUpload oss:ObjectCreated:AppendObject -
Select OK.