OIDC Providers Settings
This section is for creating OIDC IdP client and creating Service Workbench root user in OIDC IdP.
Creating OIDC IdP Client and User
OpenID Connect (OIDC) IdP is an alternative of Cognito User Pool for authentication of Service Workbench. Before deploying Service Workbench with OIDC IdP, you have to create your OIDC provider in external OIDC services.
Below are example procedures for creating OIDC providers in Authing, Keycloak and Okta for reference. You can use other OIDC providers as well.
- (Authing Option) Authing is an example of a third-party authentication provider.
- (Keycloak on AWS Option) Keycloak on AWS is a solution maintained by AWS and can serve as an authentication identity provider.
- (Okta Option) Okta is one trusted platform to secure every identity, from customers to your workforce.
Follow the steps below to create an OIDC client and , and obtain the client_id, issuer, user_name, first_name and last_name
Authing
Creating Authing.cn OIDC client
Go to the Authing console.
Create a user pool if you don't have one. Note: if you need a long-term free user pool, please do not check the 30-day trial checkbox
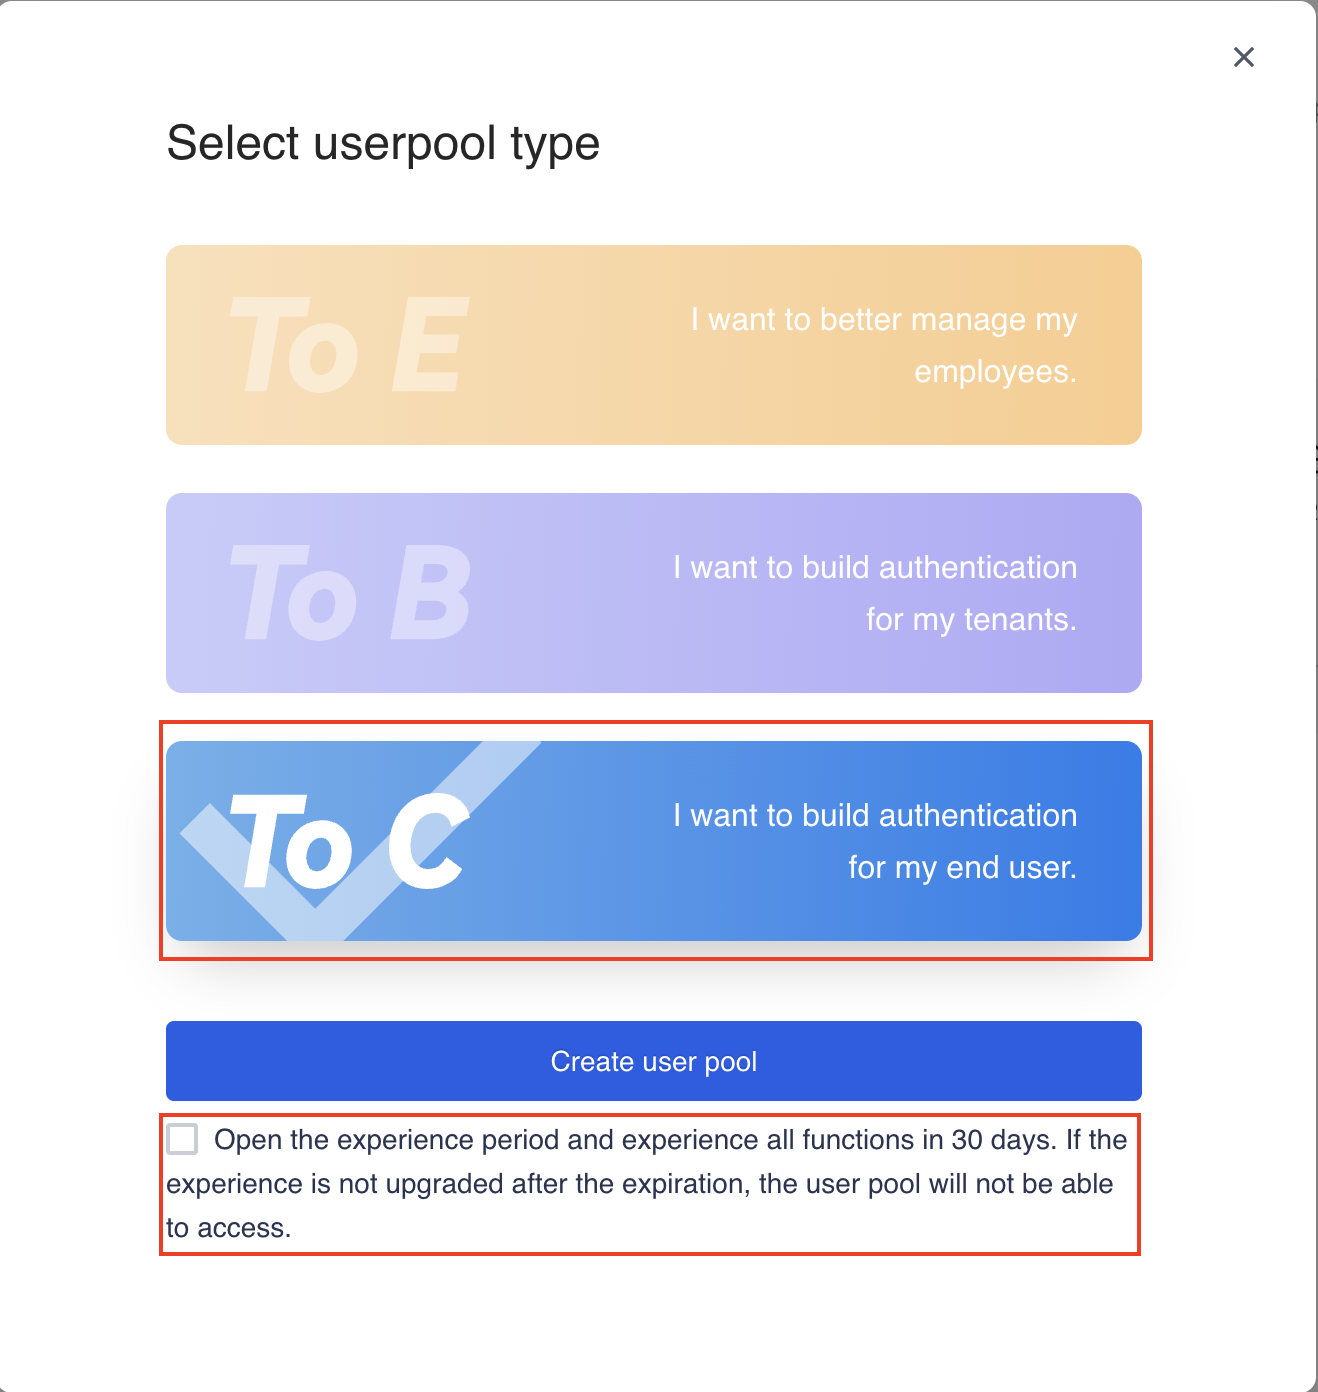
Select the user pool.
On the left navigation bar, select Self-built App under Applications.
Click the Create button.
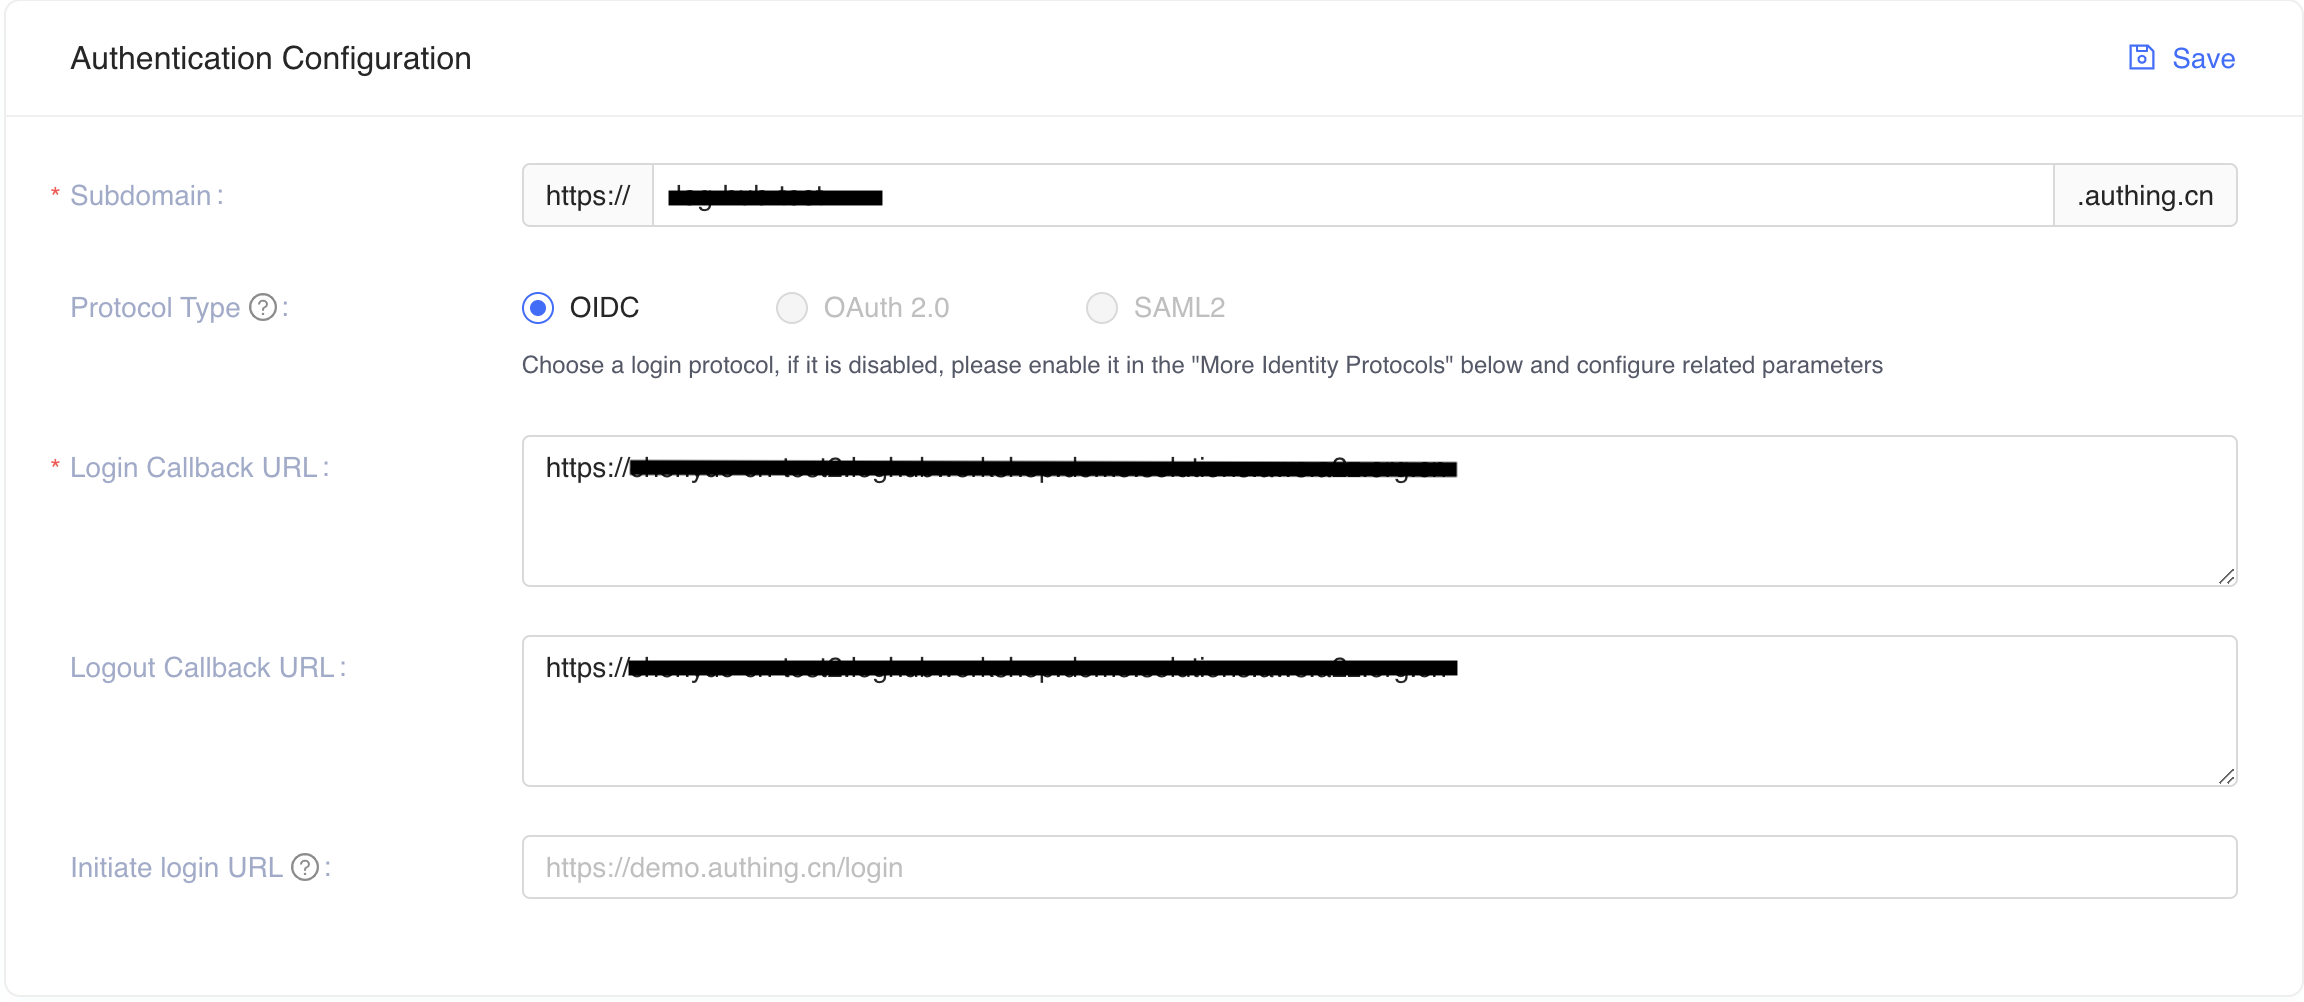
Enter the Application Name, and Subdomain.
Save the
App ID(that is,client_id) andIssuerto a text file from Endpoint Information, which will be used later.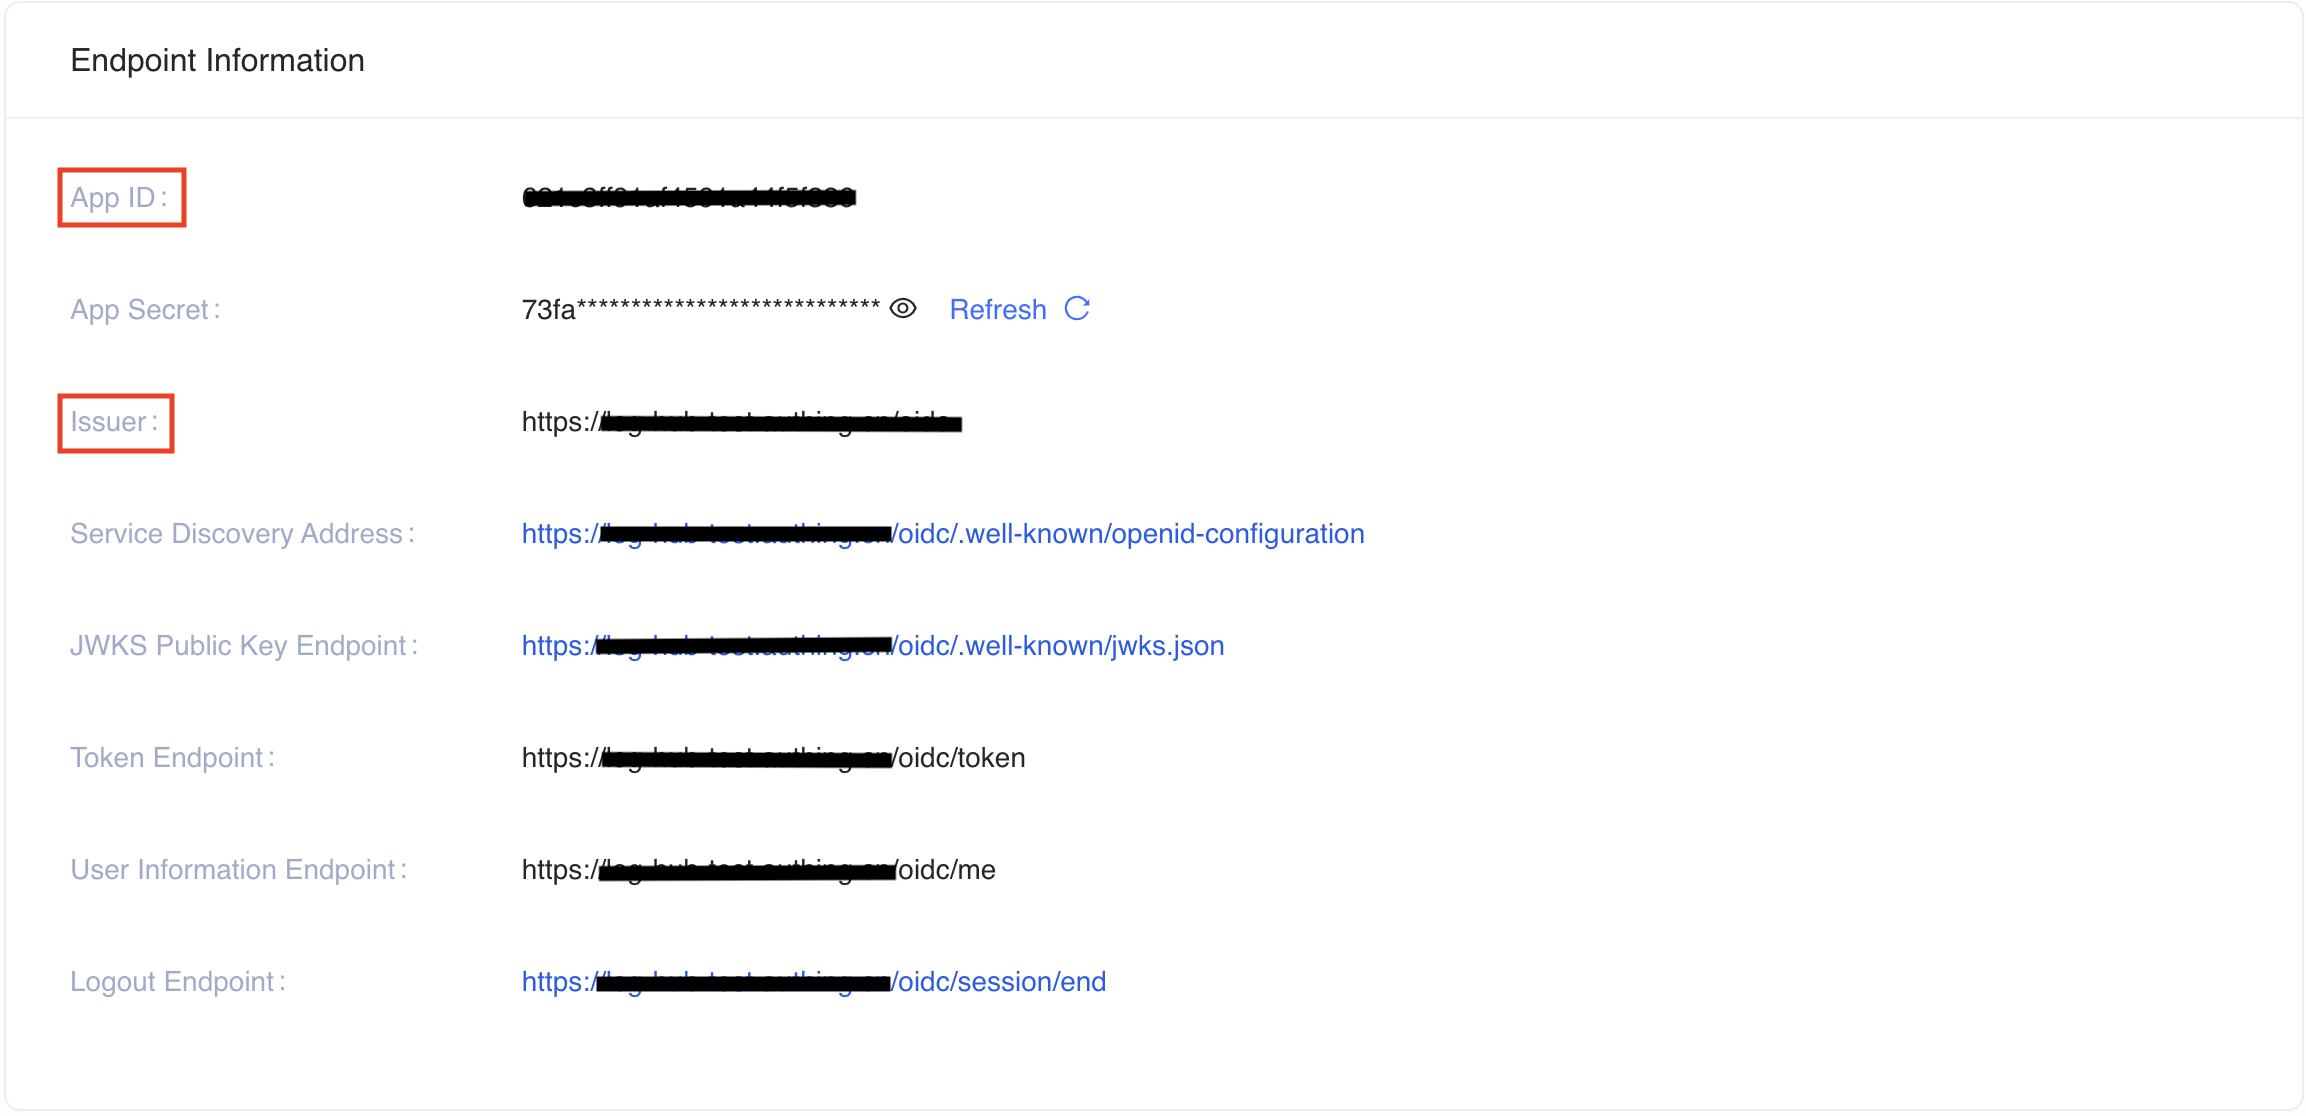
Update the
Login Callback URLandLogout Callback URLto your ICP recorded domain name. For example: suppose our Service Workbench domain iswww.swb-example.com, please inputhttps://www.swb-example.com/for bothLogin Callback URLandLogout Callback URL.tipPlease make sure that the URL you fill in ends with "/"
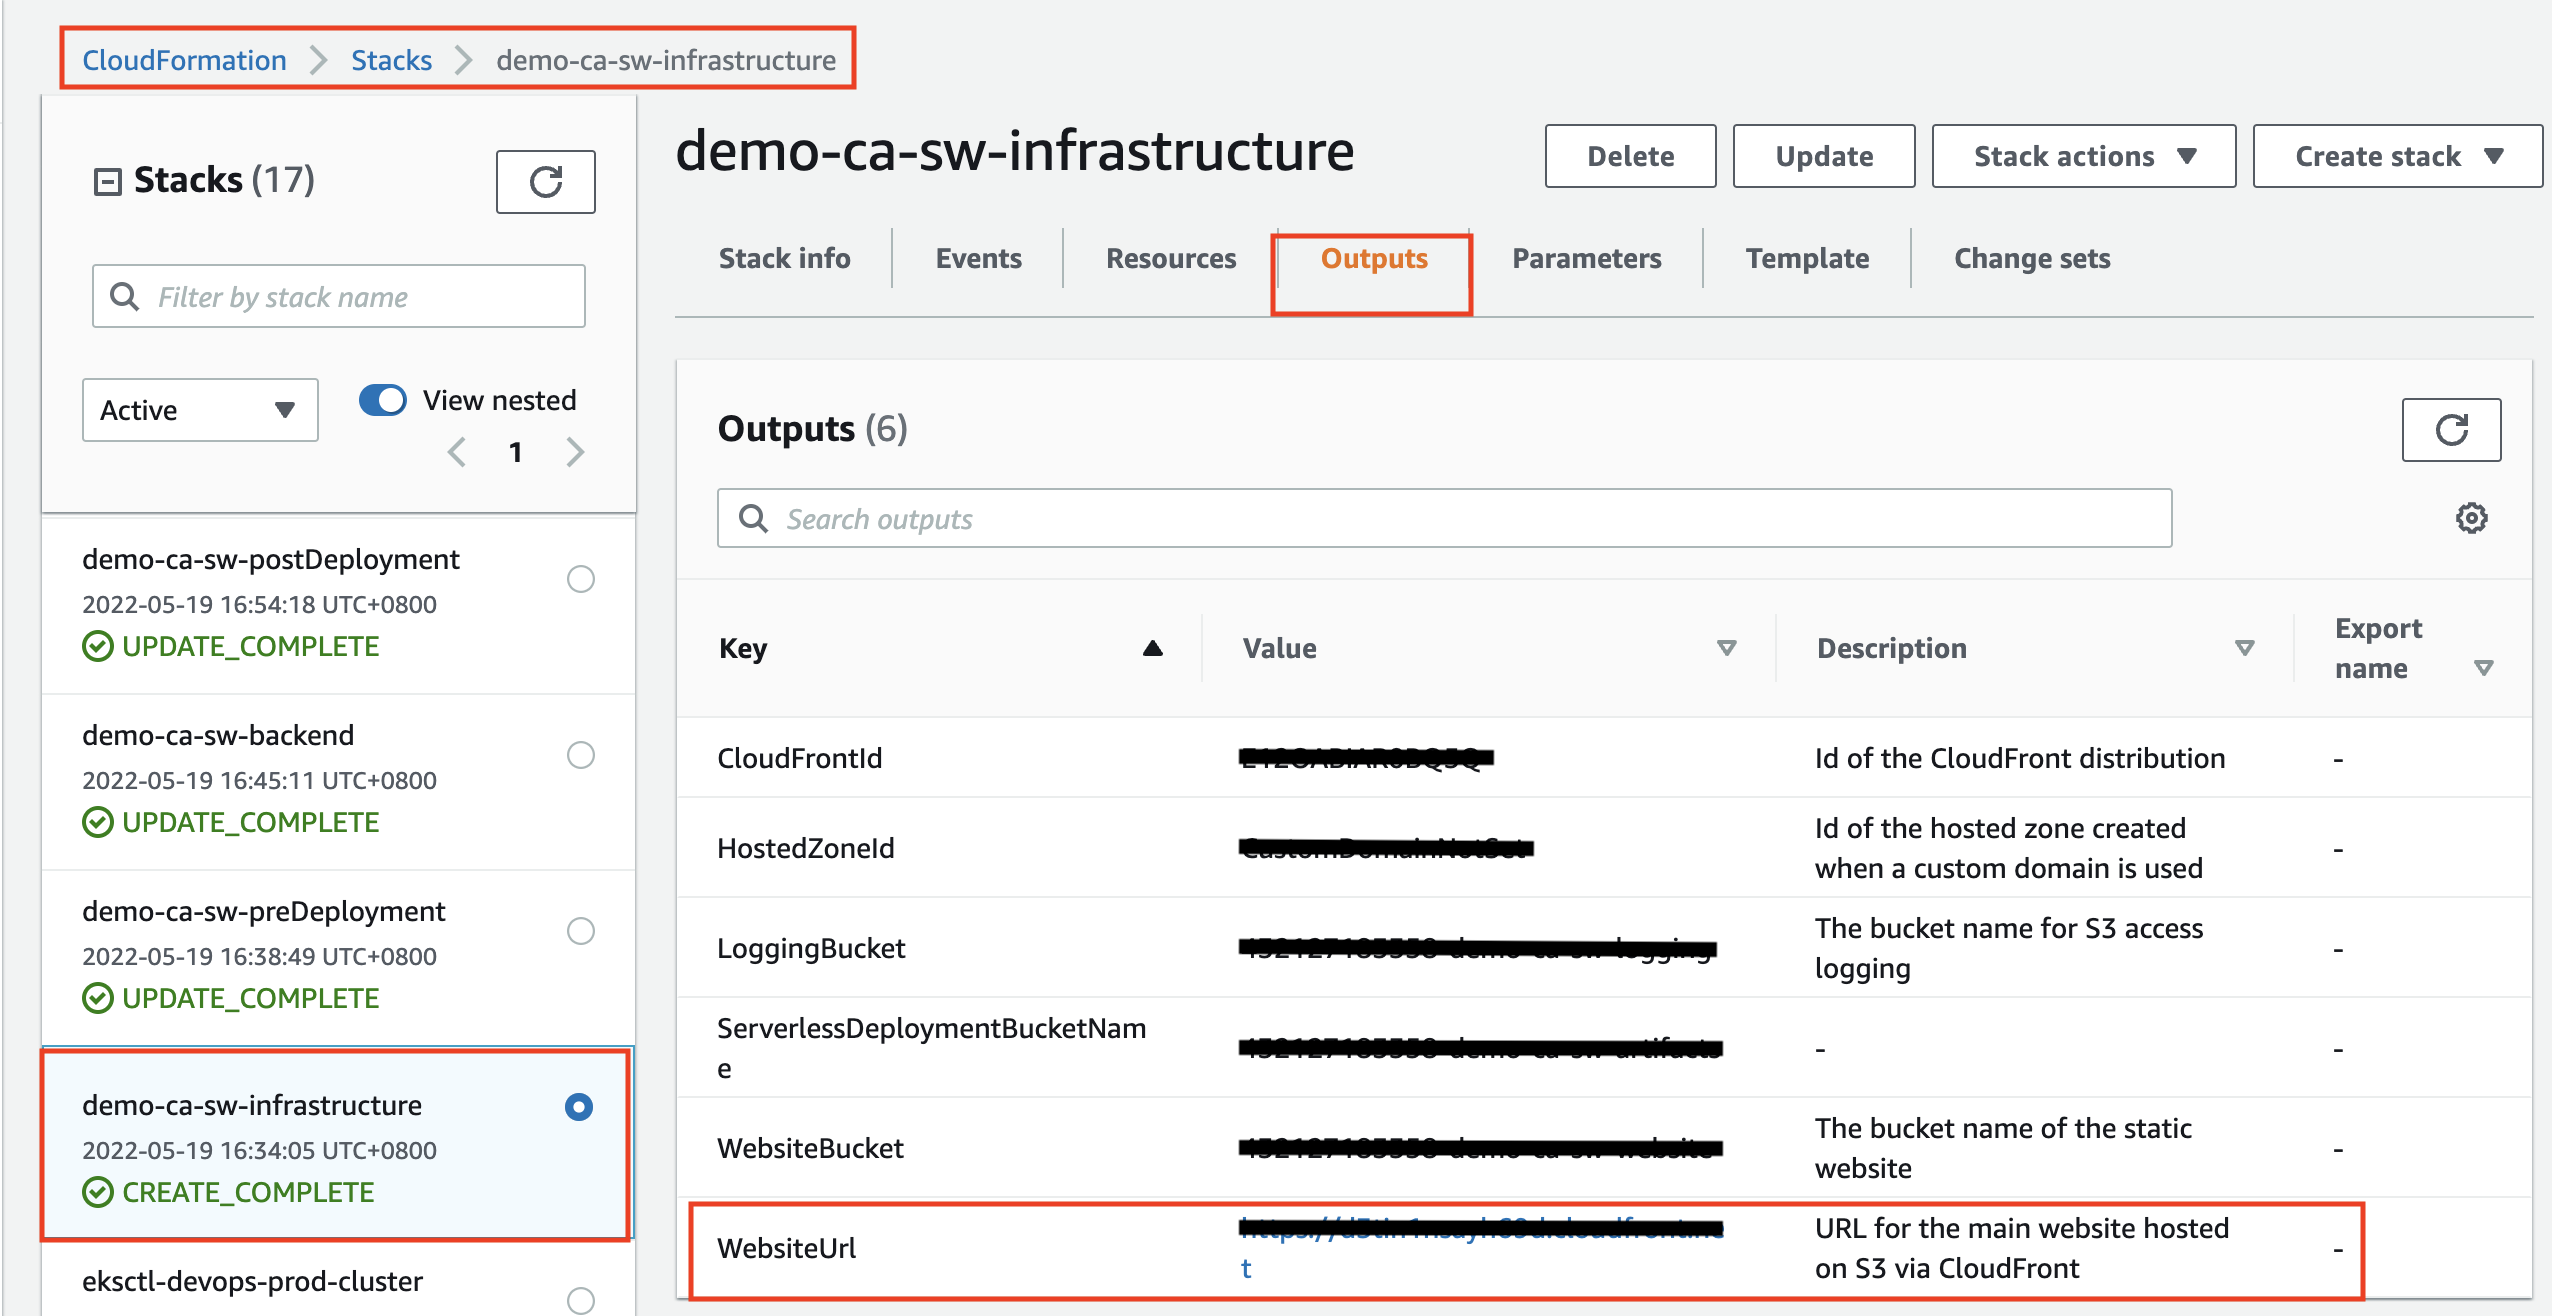
If we don't use custom domain for Service Workbench, the Service Workbench provide cloudfront domain to access. So we need to config deployed Service Workbench cloudfront domain to
Login Callback URLandLogout Callback URL, before deploying Service Workbench, we can keepLogin Callback URLandLogout Callback URLas*. After Service Workbench is deployed, we need to get cloudfront domain and enter it intoLogin Callback URLandLogout Callback URLagain.
You have successfully created an authing self-built application. For more information, please visit authing doc
Creating user in Authing.cn
Login the Authing console.
Choose Users & Roles, Users, Create User and Email, input
EmailandPassword, click Confirm to create user.Edit Personal Info, confirm
Email,Given NameandFamily Namehave been fulled.tipIf there is no
Given NameorFamily Namein Personal Info,please choose sidebar Setting,Field Management,set Given Name and Family Name's Visible from Console as Yes,and then edit Personal Info again.
You have successfully created an user in authing.
Keycloak on AWS
Creating Keycloak OIDC client
Deploy the Keycloak solution in AWS China Regions following this guide.
Make sure you can log in to the Keycloak console.
On the left navigation bar, select Add realm. Skip this step if you already have a realm.
Go to the realm setting page. Choose Endpoints, and then OpenID Endpoint Configuration from the list.
In the JSON file that opens up in your browser, record the issuer value which will be used later.
Go back to Keycloak console and select Clients on the left navigation bar, and choose Create.
Enter a Client ID, which must contain 24 letters (case-insensitive) or numbers. Record the Client ID which will be used later.
Change client settings. Update the
Valid Redirect URIsandWeb Originsto your ICP recorded domain name. For example: suppose our Service Workbench domain iswww.swb-example.com, please inputhttps://www.swb-example.com/for bothValid Redirect URIsandWeb Origins.tipPlease make sure that the URL you fill in ends with "/"
If we don't use custom domain for Service Workbench, the Service Workbench provide cloudfront domain to access. So we need to config deployed Service Workbench cloudfront domain to
Valid Redirect URIsandWeb Origins, before deploying Service Workbench, we can keepValid Redirect URIsandWeb Originsas*. After Service Workbench is deployed, we need to get cloudfront domain and enter it intoValid Redirect URIsandWeb Originsagain.
The issuer value is https://<KEYCLOAK_DOMAIN_NAME>/auth/realms/<REALM_NAME>.
Creating user in Keycloak
Login your deployed Keycloak Administration Console and choose the realm that you created before.
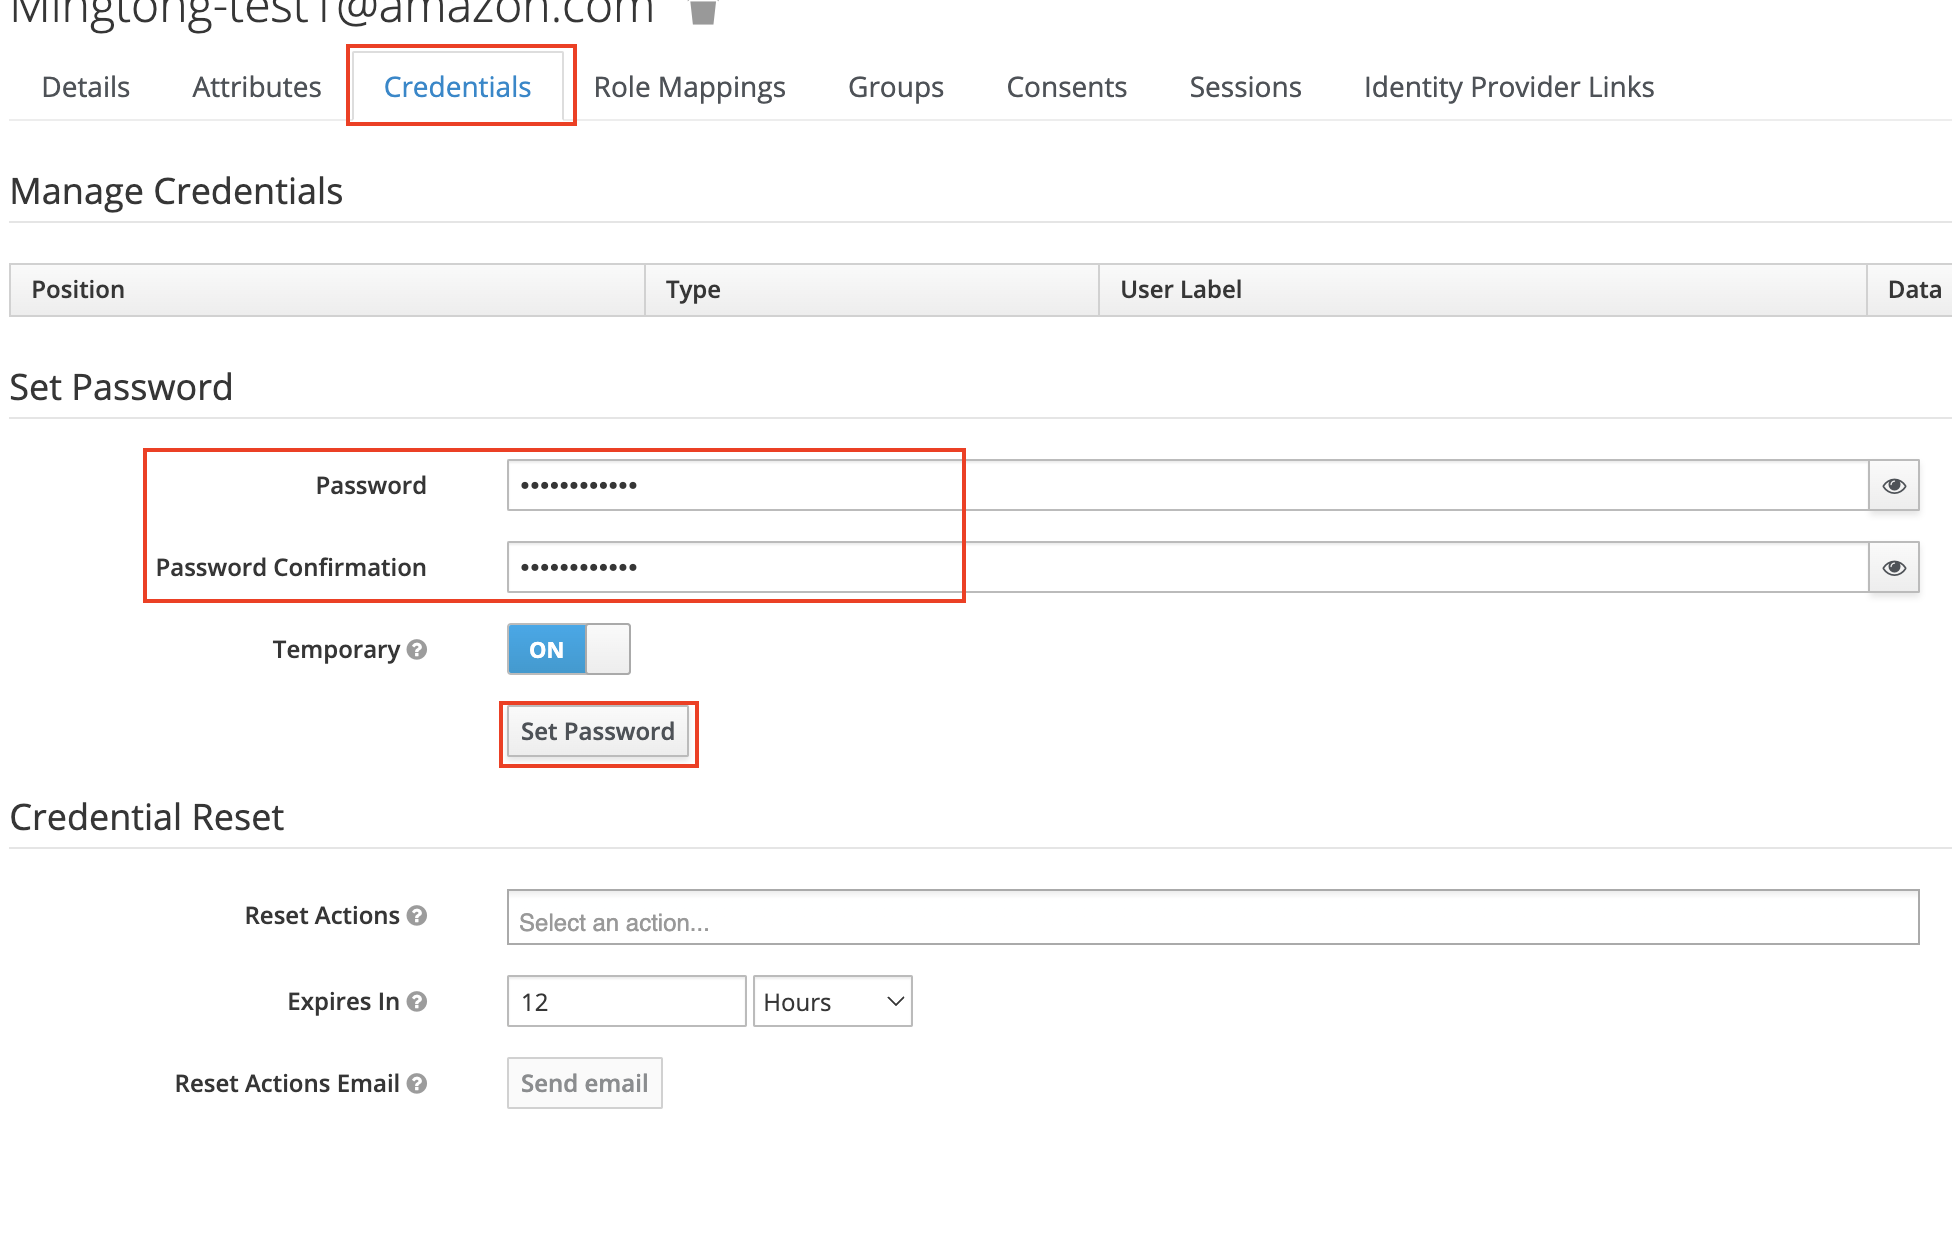
Choose User and Add user, input
Username,Email,First NameandLast Name, then click Save to create user.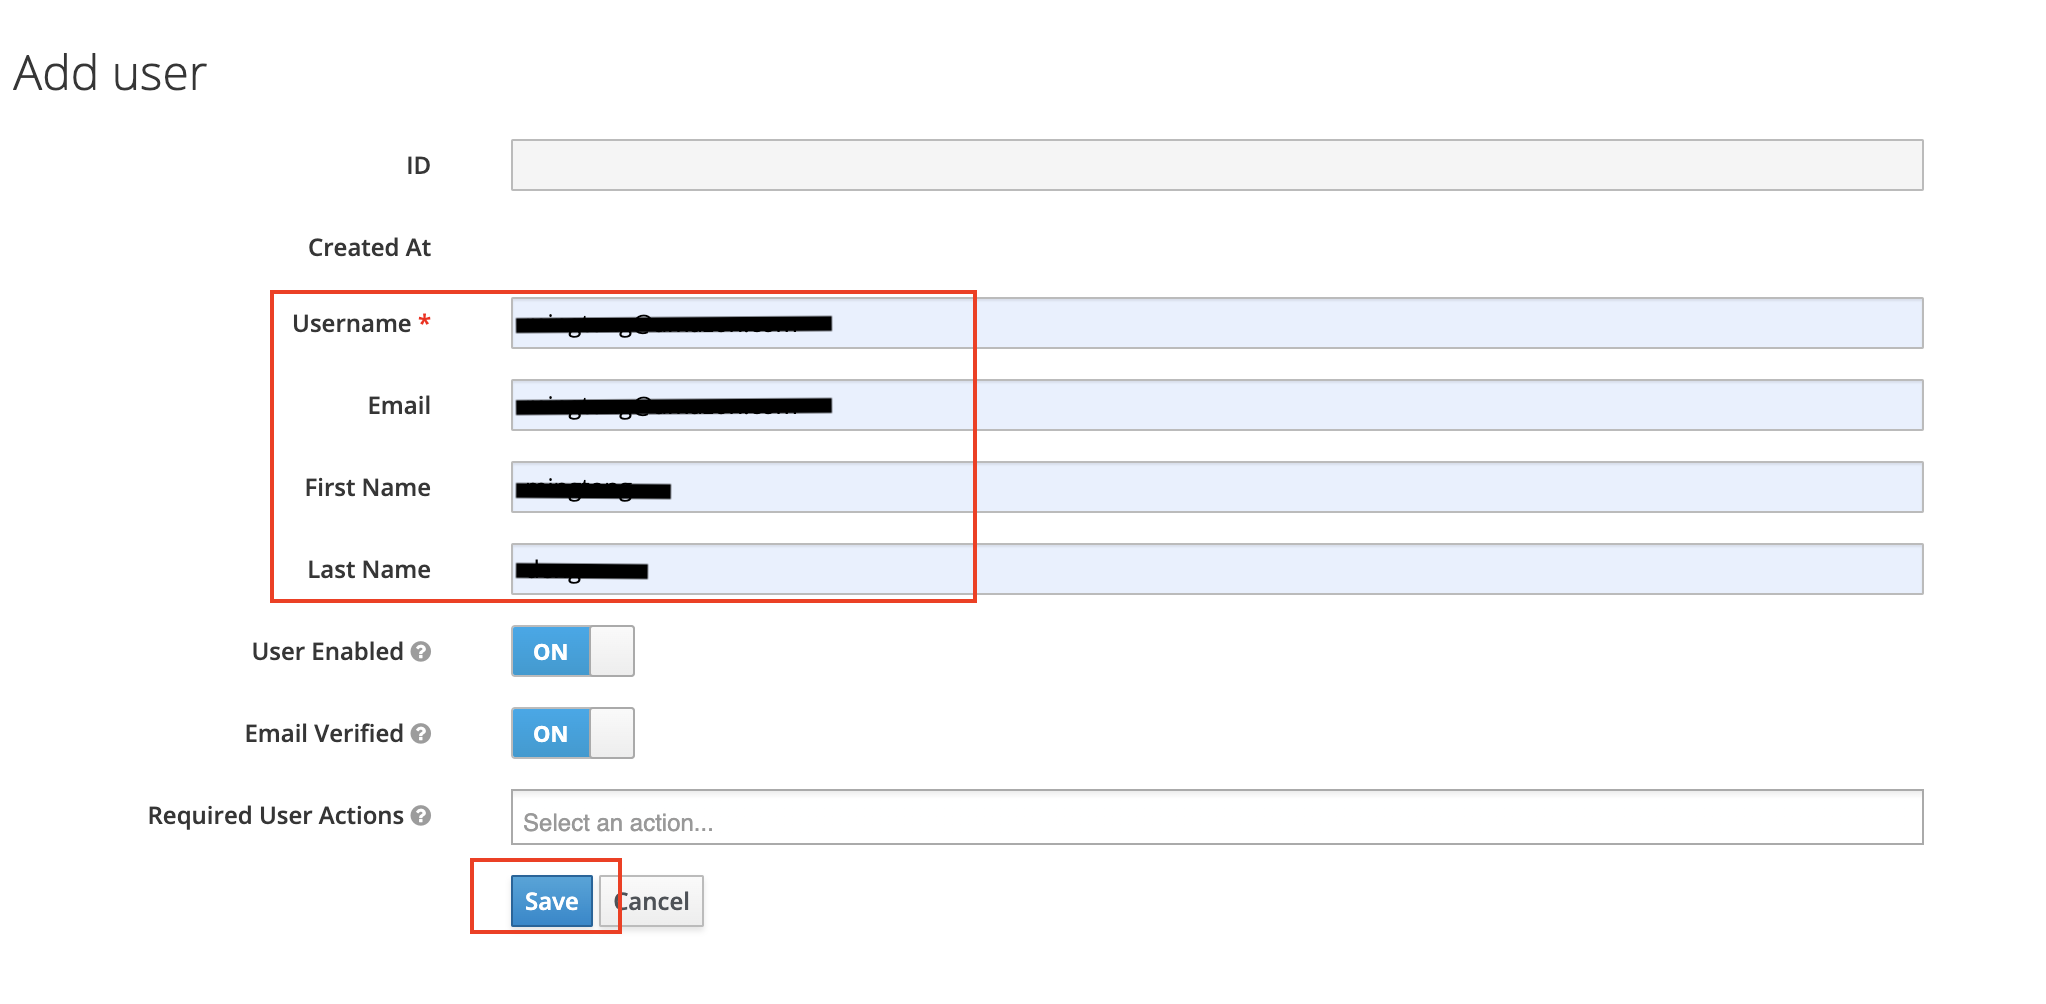
You have successfully created an user in keycloak.
Okta
Creating Okta OIDC client
Go to the Okta console.
Create an account if you don't have one.
Access Admin console.
Create an application if you don't have one, choose Applications, Application, Create App Integration, Create App Integration, OIDC - OpenID Connect and Single-Page Application, click Next button.
Click the Create button.
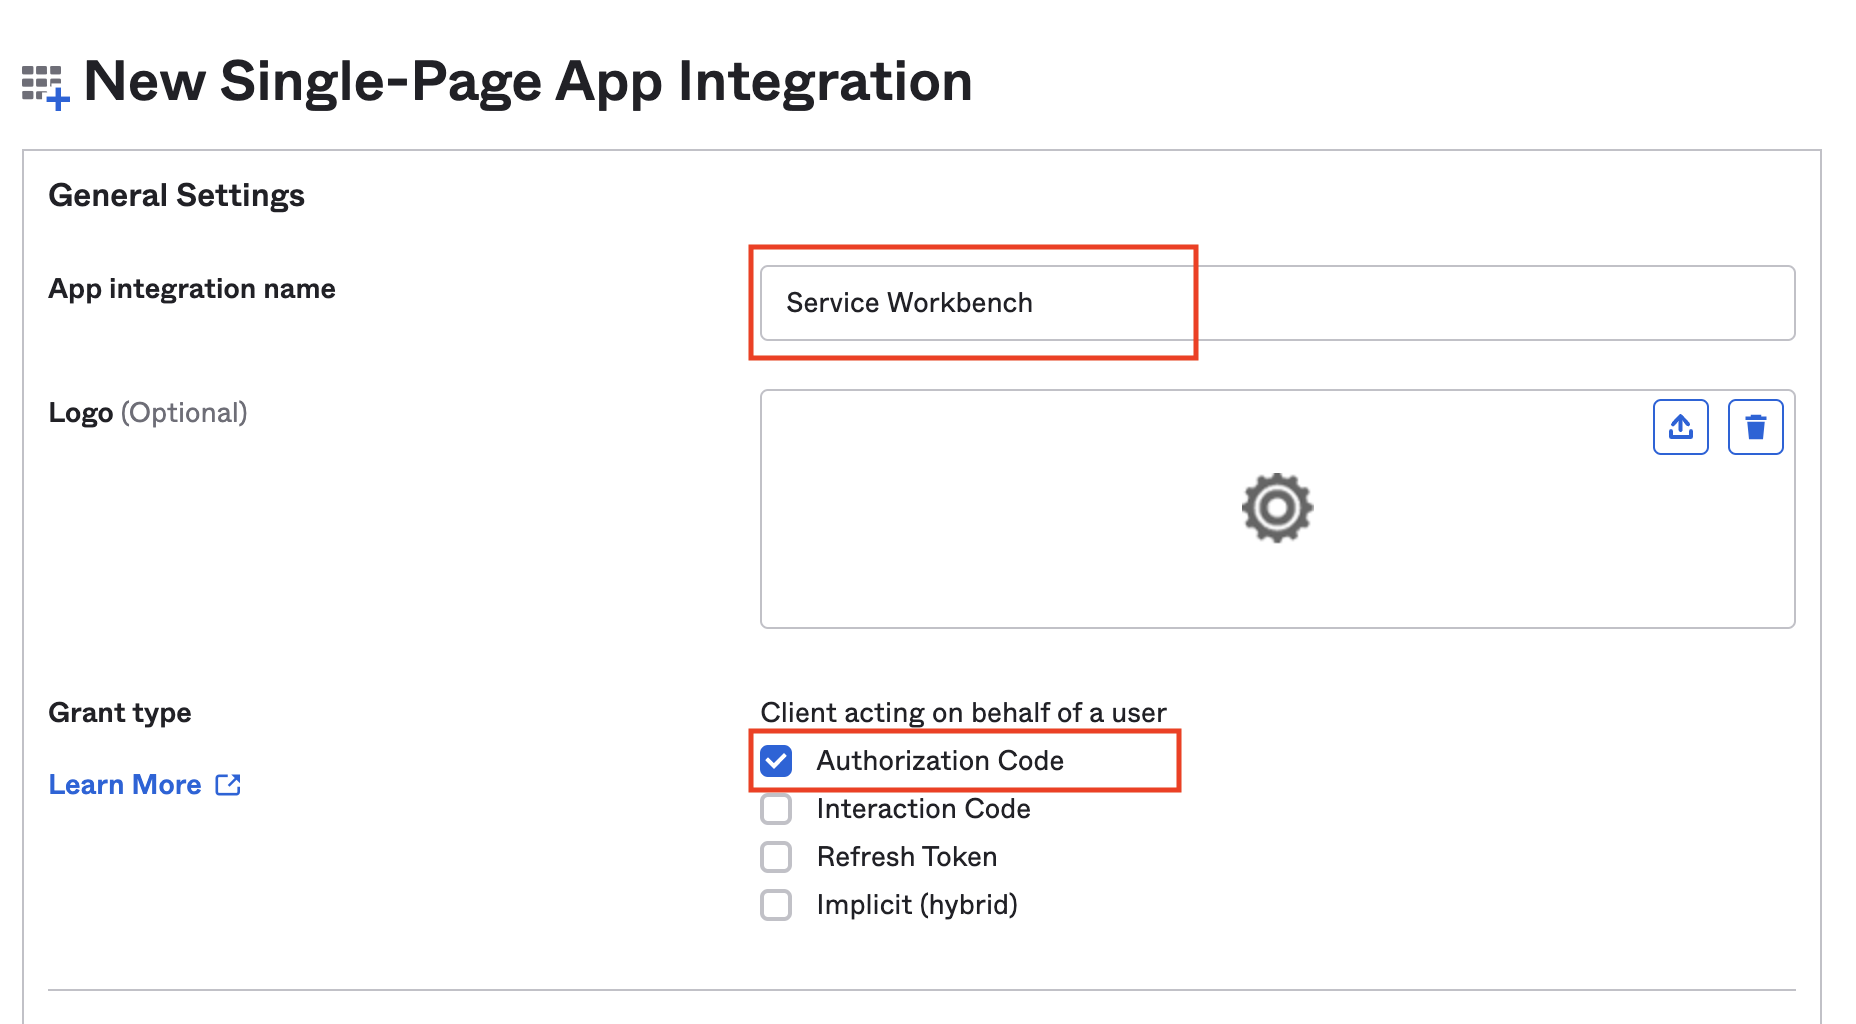
Enter the App integration name, set Grant type as Authorization Code.
Update the
Sign-in redirect URIsandSign-out redirect URIsto your ICP recorded domain name. For example: suppose our Service Workbench domain iswww.swb-example.com, please inputhttps://www.swb-example.com/for bothSign-in redirect URIsandSign-out redirect URIs.tipPlease make sure that the URL you fill in ends with "/"
If we don't use custom domain for Service Workbench, the Service Workbench provide cloudfront domain to access. So we need to config deployed Service Workbench cloudfront domain to
Sign-in redirect URIsandSign-out redirect URIs, before deploying Service Workbench, we can keepSign-in redirect URIsandSign-out redirect URIsas*. After Service Workbench is deployed, we need to get cloudfront domain and enter it intoSign-in redirect URIsandSign-out redirect URIsagain.After creating application, you can get the
Client ID(that isclient_idtext) and theIssuer(that is your Okta URL, for example:https://xxx.okta.com). Please save them which will be used later.
Creating user in Okta
- Login the Okta console Admin console.
- Choose Directory, People and Add person, then input
First name,Last name,UsernameandPrimary email, chooseI will set passwordto set password, then click Save.
You have successfully created an user in Okta.
