Permissions
VAMS uses a two-tier authorization system to control access to both the user interface and the underlying data. Every request must pass both tiers before access is granted. This defense-in-depth approach ensures that even if a user can reach an API endpoint, they can only interact with the specific resources they are authorized to access.
How authorization works
Tier 1: API and web route authorization
Tier 1 controls which API endpoints a user can call and which pages they can see in the web interface. This is configured through constraints on the api and web object types.
- API constraints determine which backend API routes (for example,
/assets,/database,/search) a role can access, and which HTTP methods (GET, PUT, POST, DELETE) are allowed. - Web constraints determine which frontend pages (for example,
/assets,/databases,/upload) are visible in the navigation and accessible by URL.
Tier 2: Data entity authorization
Tier 2 controls which specific data entities a user can access. Even if Tier 1 allows a user to call the assets API, Tier 2 determines which databases and assets they can actually see or modify.
Entity-level constraints use criteria fields such as databaseId, assetName, assetType, and tags to filter access to specific resources.
Both tiers must allow access for a request to succeed. A user with Tier 1 API access to /assets but no Tier 2 asset constraints will receive empty results or 403 Forbidden responses.
For the complete technical reference of all object types, constraint fields, operators, web routes, and API routes, see Permissions Model.
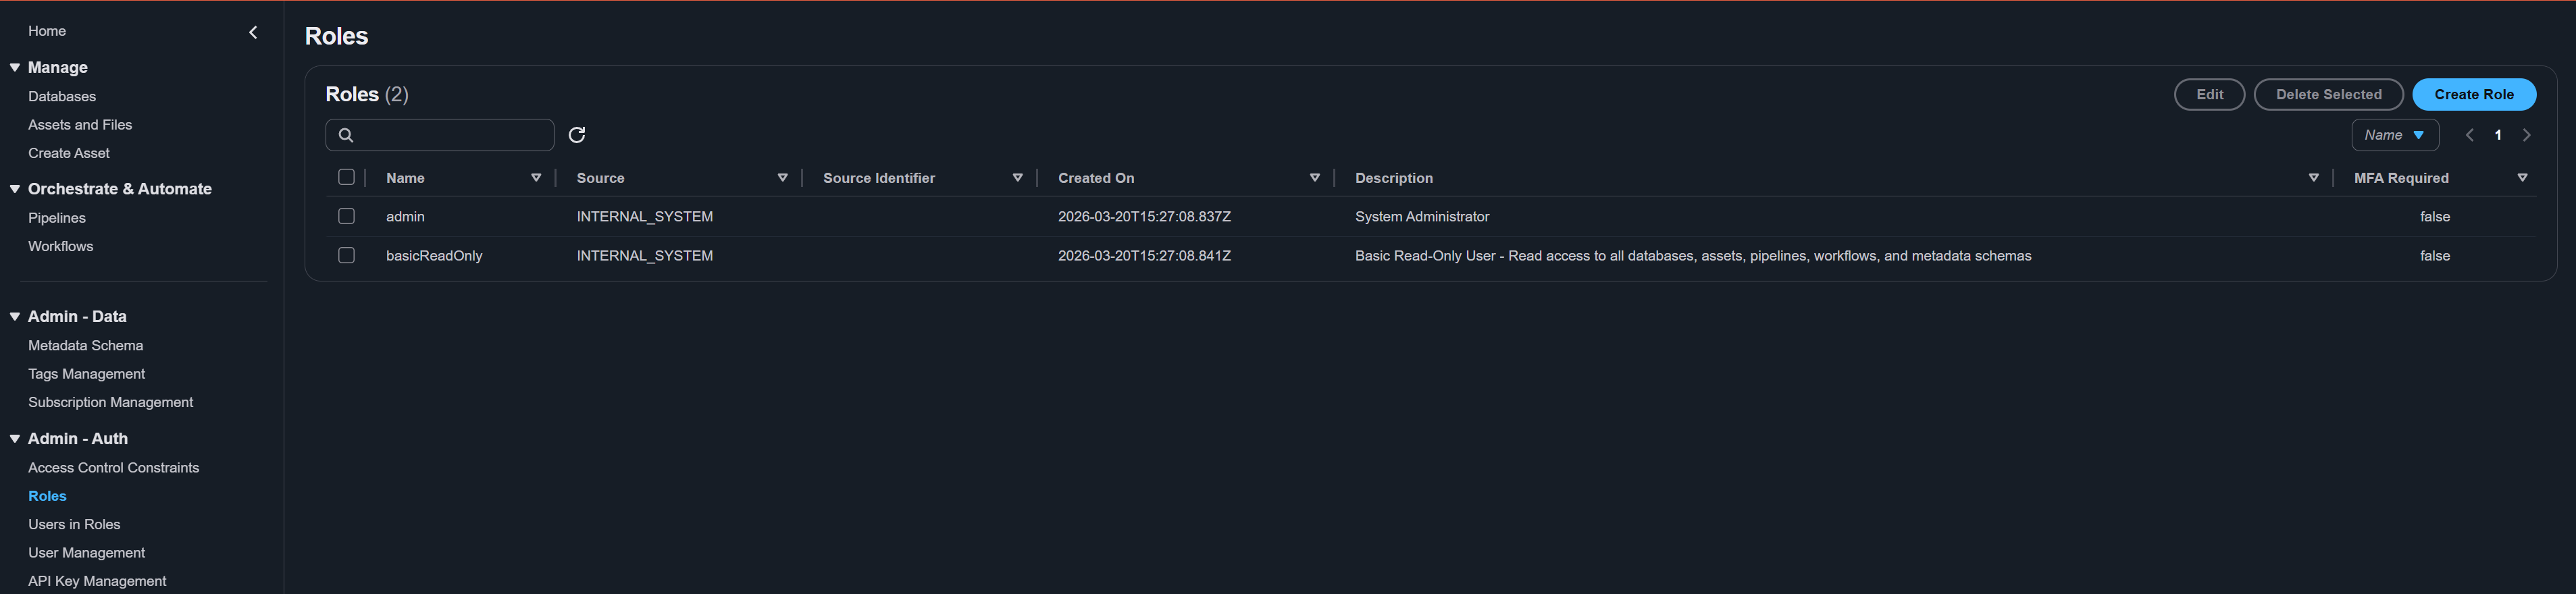
Roles
A role is a named collection of constraints that can be assigned to users. Roles themselves do not grant any permissions -- they act as containers for constraints.
Default roles
VAMS is deployed with two default roles:
| Role | Description |
|---|---|
| Admin | Full access to all features, all databases, and all administrative functions including user management, role management, and constraint management. |
| ReadOnly | Read-only access to view assets, databases, pipelines, and workflows across all databases. Cannot create, modify, or delete any data. |
Creating a custom role
- Navigate to Roles from the left navigation menu.
- Click Create Role.
- Enter a Role Name (3-64 characters, letters, numbers, hyphens, and underscores).
- Enter a Description (4-256 characters).
- Optionally enable MFA Required -- when checked, this role is only active for users who have authenticated with multi-factor authentication.
- Click Create.
A newly created role has no constraints and grants no permissions. You must add constraints to the role before it provides any access.
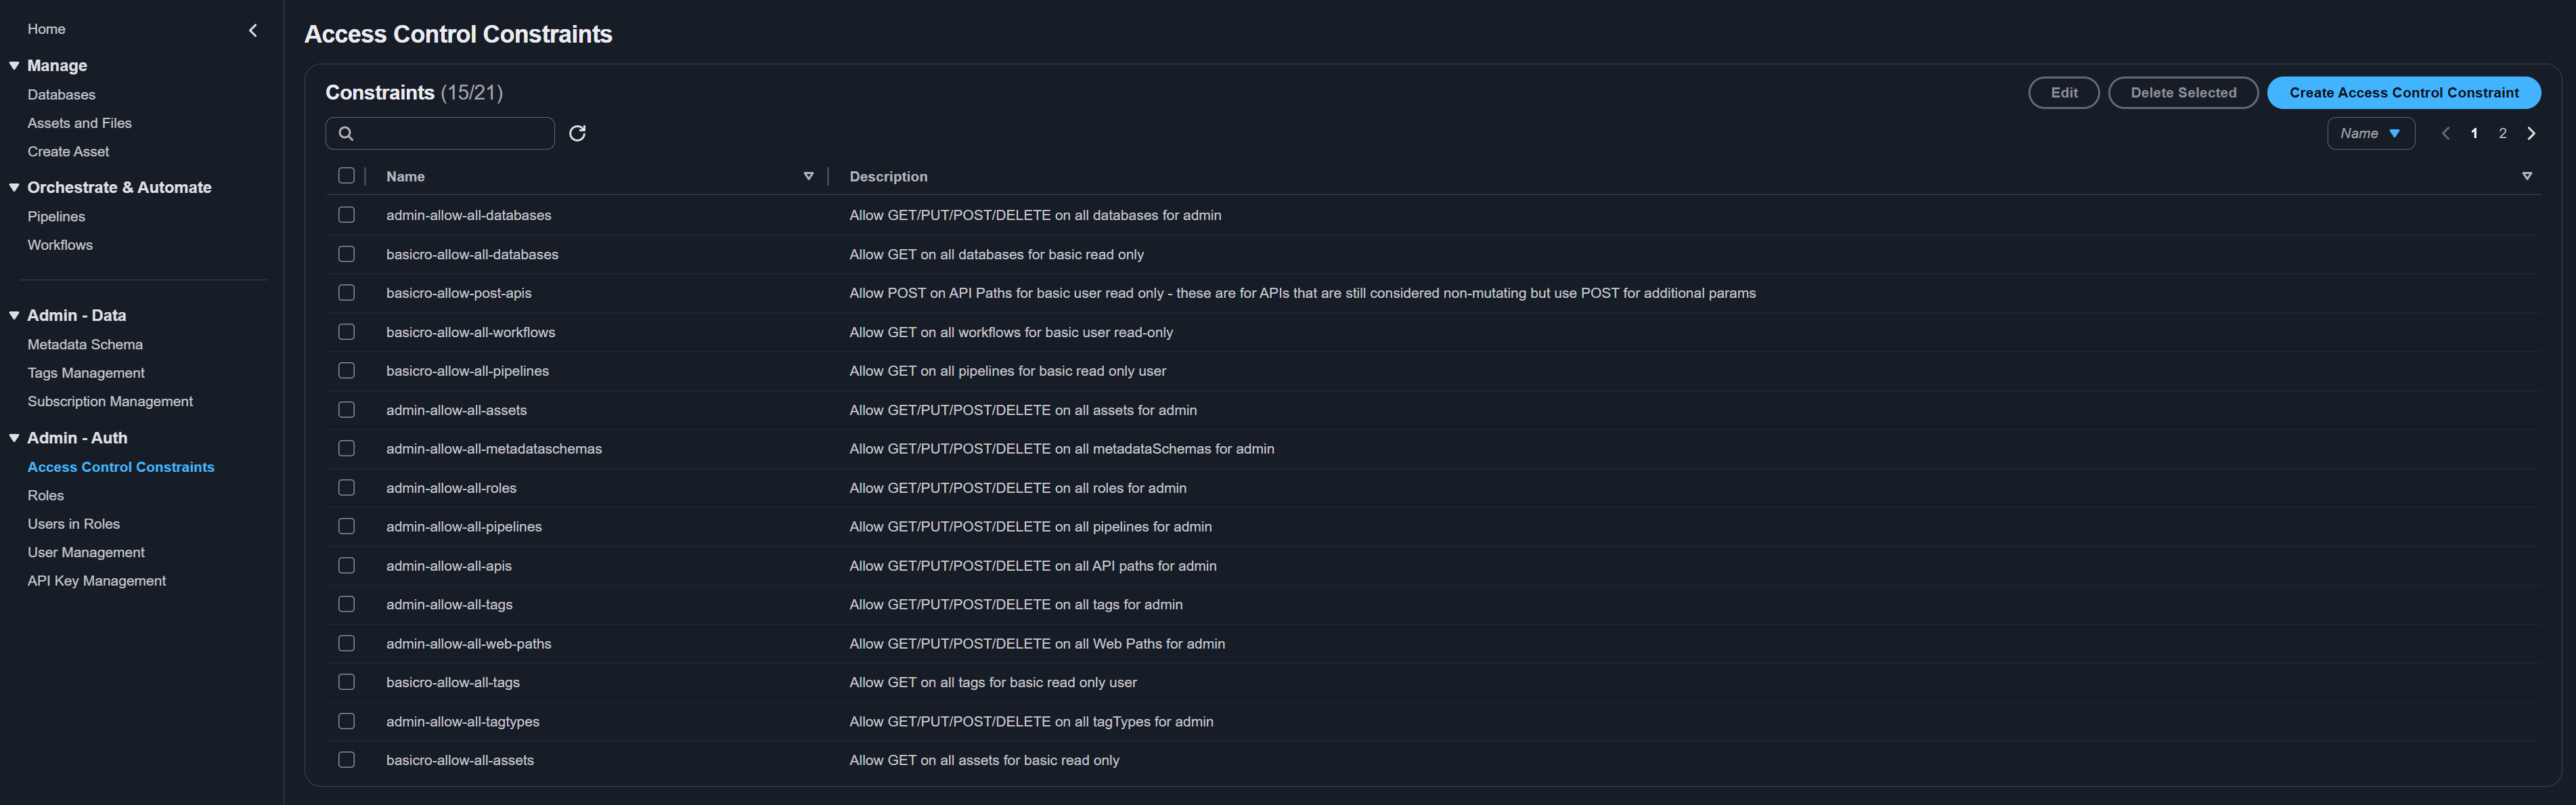
Constraints
Constraints are the rules within a role that define what a user can or cannot do. Each constraint targets a specific object type and specifies actions (HTTP methods) and criteria (filtering conditions).
Constraint components
| Component | Description |
|---|---|
| Name | Unique identifier for the constraint (3-64 characters). |
| Description | Human-readable description of what this constraint allows or denies. |
| Object Type | The type of resource this constraint applies to. For the full list, see Permissions Model. |
| Group Permissions | One or more action/effect pairs that define what HTTP methods are allowed or denied. |
| Criteria (AND) | Conditions that must ALL be true for the constraint to match. |
| Criteria (OR) | Conditions where ANY one must be true for the constraint to match. |
The GLOBAL keyword
Use GLOBAL as a criteria value for databaseId to match resources that are not scoped to any specific database. For example, GLOBAL pipelines and GLOBAL workflows use databaseId equals GLOBAL.
Allow vs. deny effects
Each group permission in a constraint specifies an effect:
- Allow -- Grants access for the specified action.
- Deny -- Explicitly blocks access for the specified action, overriding any allow rules.
The authorization engine evaluates all constraints for a user. If any constraint produces a deny result, access is blocked regardless of any allow results. This means deny always wins.
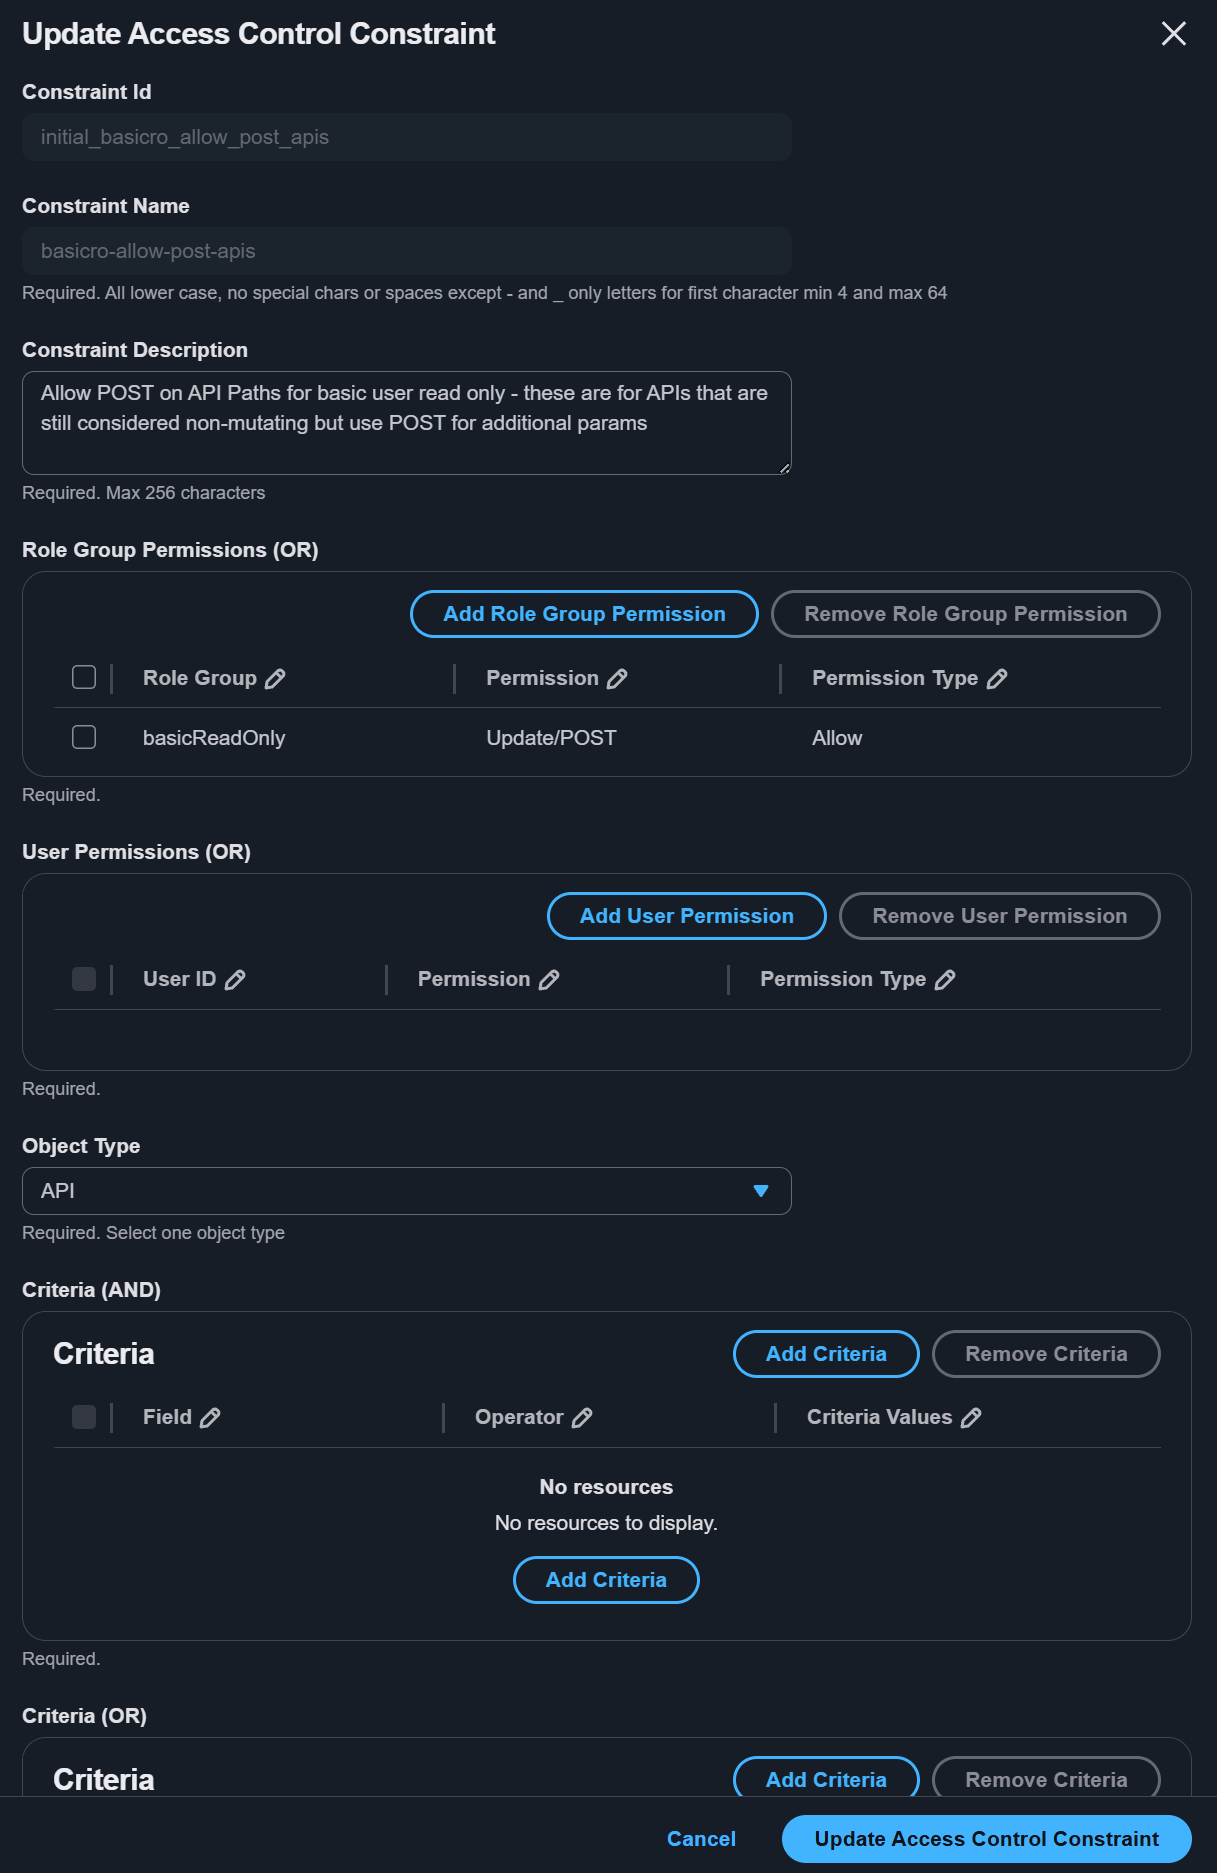
Creating a constraint
- Navigate to Constraints from the left navigation menu.
- Click Create Constraint.
- Fill in the constraint details:
- Name and Description.
- Object Type -- Select the resource type this constraint targets.
- Group Permissions -- Add one or more action/effect pairs (for example, GET/allow, PUT/allow).
- Criteria (AND) -- Add conditions that must all be true.
- Criteria (OR) -- Add conditions where any one must be true.
- Assign the constraint to one or more roles in the Role Group Permissions section.
- Optionally assign to specific users in the User Permissions section.
- Click Create.
The ability to create and edit constraints lets a role define the authorization policy itself, so it can grant access to any resource. Only assign constraint management (the Constraints page and its api route /auth/constraints) to fully trusted administrators. By default, only the Admin role can manage constraints. Avoid adding this access to roles meant for general users. See Permissions Model for details.
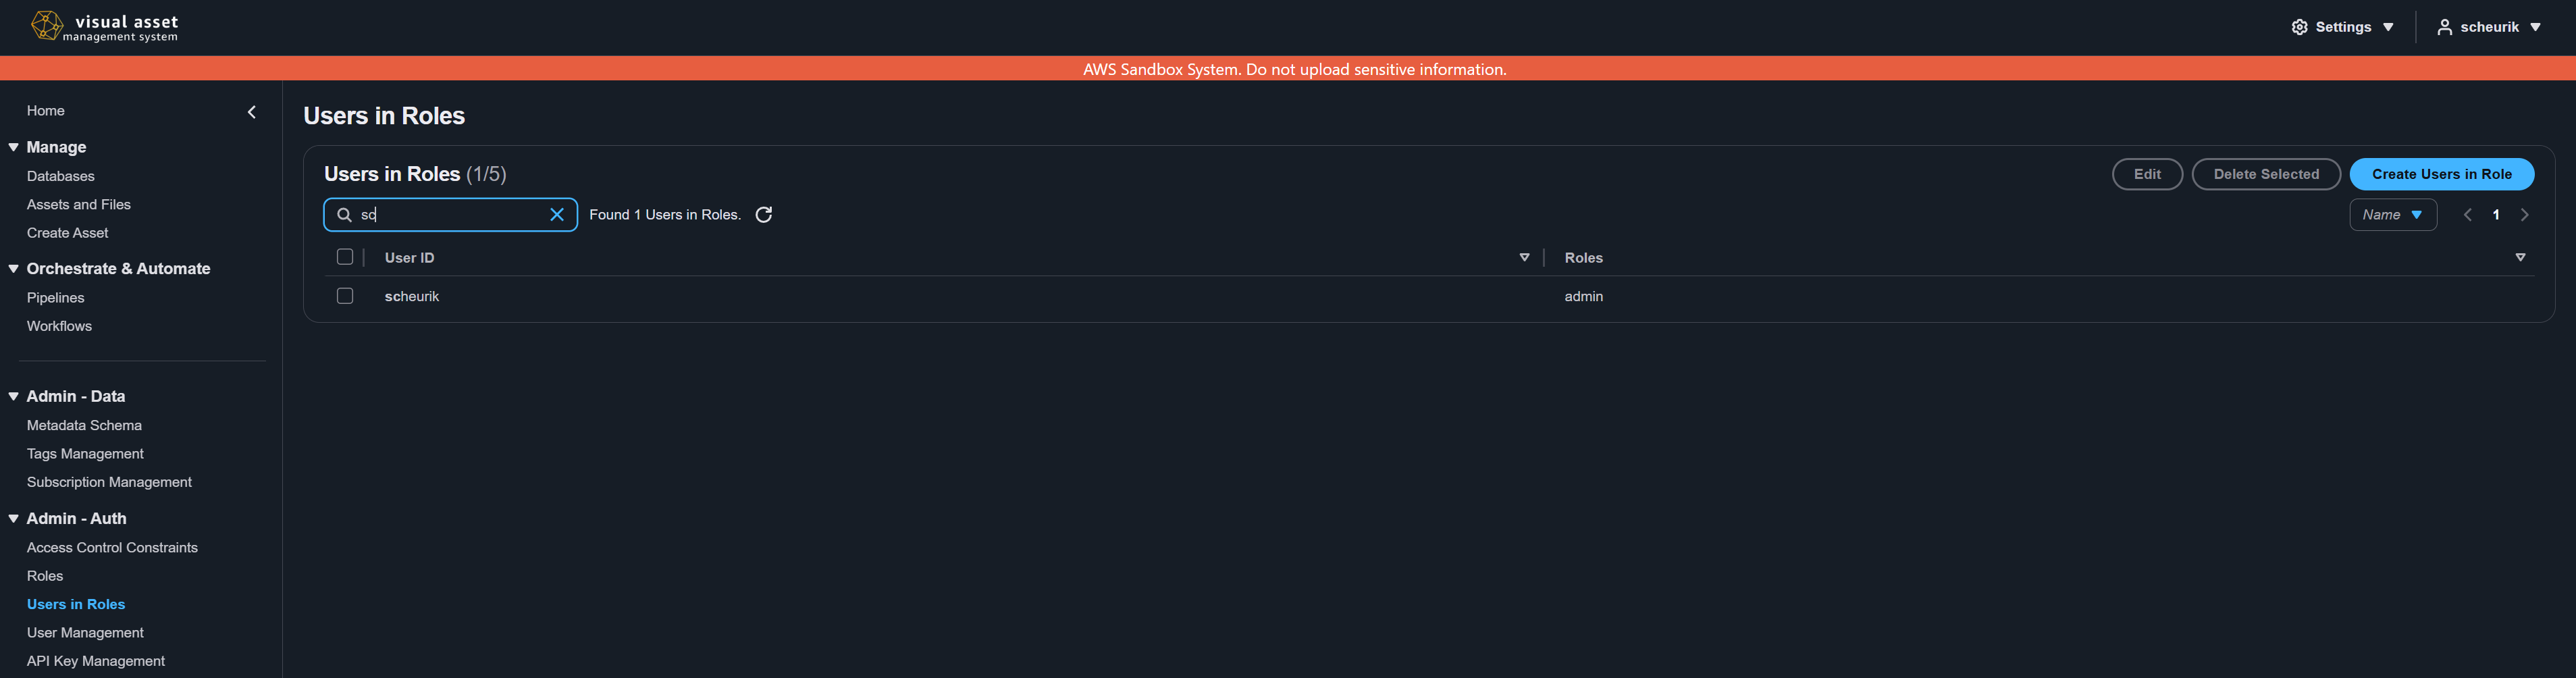
Assigning roles to users
- Navigate to User Roles from the left navigation menu.
- Click Create User Role.
- Select a User from the dropdown.
- Select a Role to assign.
- Click Create.
A user can have multiple roles assigned. The effective permissions are the union of all constraints from all assigned roles, with deny effects taking precedence.
MFA-required roles
Roles can be configured to require multi-factor authentication (MFA). When a role has MFA required:
- The role's constraints are only active when the user has authenticated with MFA in their current session.
- If the user has not completed MFA, the role is effectively ignored during authorization.
- This is useful for elevating privileges that should only be available during high-assurance sessions.
Web route permissions
Web route constraints control which pages appear in the navigation menu and are accessible by URL. If a user does not have a web constraint that allows GET access to a specific route path, that page is hidden from the navigation and returns a 403 error if accessed directly.
The landing page routes (/ and *) are always allowed regardless of constraints, ensuring all users can reach the landing information page.
For the complete list of web routes, see Permissions Model: Web Route Reference.
Permission templates
VAMS includes pre-built permission templates for common access patterns such as Database Admin, Database User, Database Read-Only, Global Read-Only, and Deny Tagged Assets. Templates automate the creation of the full constraint matrix and support variable substitution for database-scoped roles.
For template details, JSON format, and instructions on applying templates via the CLI or API, see Developer Guide: Permissions.
Troubleshooting: why can't I access a resource?
If you receive a 403 Forbidden error or cannot see expected data, check both authorization tiers:
-
Check Tier 1 (API/web routes):
- Does the user's role have a
webconstraint allowing GET access to the page route? - Does the user's role have an
apiconstraint allowing the appropriate HTTP method on the API route?
- Does the user's role have a
-
Check Tier 2 (entity access):
- Does the user's role have a constraint on the correct object type (for example,
asset,database)? - Does the criteria match the specific resource? Check
databaseId,assetName, or other filter fields. - Is there a deny constraint that overrides the allow?
- Does the user's role have a constraint on the correct object type (for example,
-
Check role assignment:
- Is the role assigned to the user on the User Roles page?
- If the role requires MFA, has the user authenticated with MFA?
Administrators can view a user's effective permissions by examining all roles assigned to the user and the constraints within each role. The Constraints page lists all constraints organized by role.
Roles, constraints, and user-role assignments can also be managed via the command line. See CLI Permissions Commands.
Related topics
- Permissions Model -- Complete reference for object types, constraint fields, operators, web routes, and API routes
- Developer Guide: Permissions -- Permission patterns, JSON constraint examples, and template details