Upload Your First Asset
This tutorial walks you through creating a database, uploading your first asset, and viewing it in the VAMS web interface. By the end, you will have a working database with an asset containing files, metadata, and optional relationships.
You must be signed in to VAMS with a role that grants access to the Databases, Create Asset, and Assets and Files navigation pages. If you do not see these items in the side navigation, contact your administrator.
Step 1: Create a Database
Assets in VAMS are organized into databases. If your administrator has already created a database for you, skip to Step 2.
- In the side navigation, select Databases.
- Select the Create Database button in the top-right corner of the page.
- In the Create Database modal, fill in the following fields:
| Field | Requirements | Description |
|---|---|---|
| Database Name | 4-64 characters, alphanumeric plus - and _ only. Cannot be "GLOBAL". | A unique identifier for your database. This cannot be changed after creation. |
| Database Description | 4-256 characters. | A human-readable description of the database's purpose. |
| Default Bucket and Prefix | Required. Select from available buckets. | The Amazon S3 bucket where assets in this database will be stored. If only one bucket is available, it is selected automatically. |
| Restrict Metadata Outside Schemas | Optional checkbox. | When enabled, only metadata fields defined in applied metadata schemas are allowed. |
| Restrict File Upload Extensions | Optional. Comma-separated list (e.g., .jpg,.png,.pdf). | Limits file uploads to specified extensions. Leave blank or enter .all to allow all file types. |
- Select Create Database.
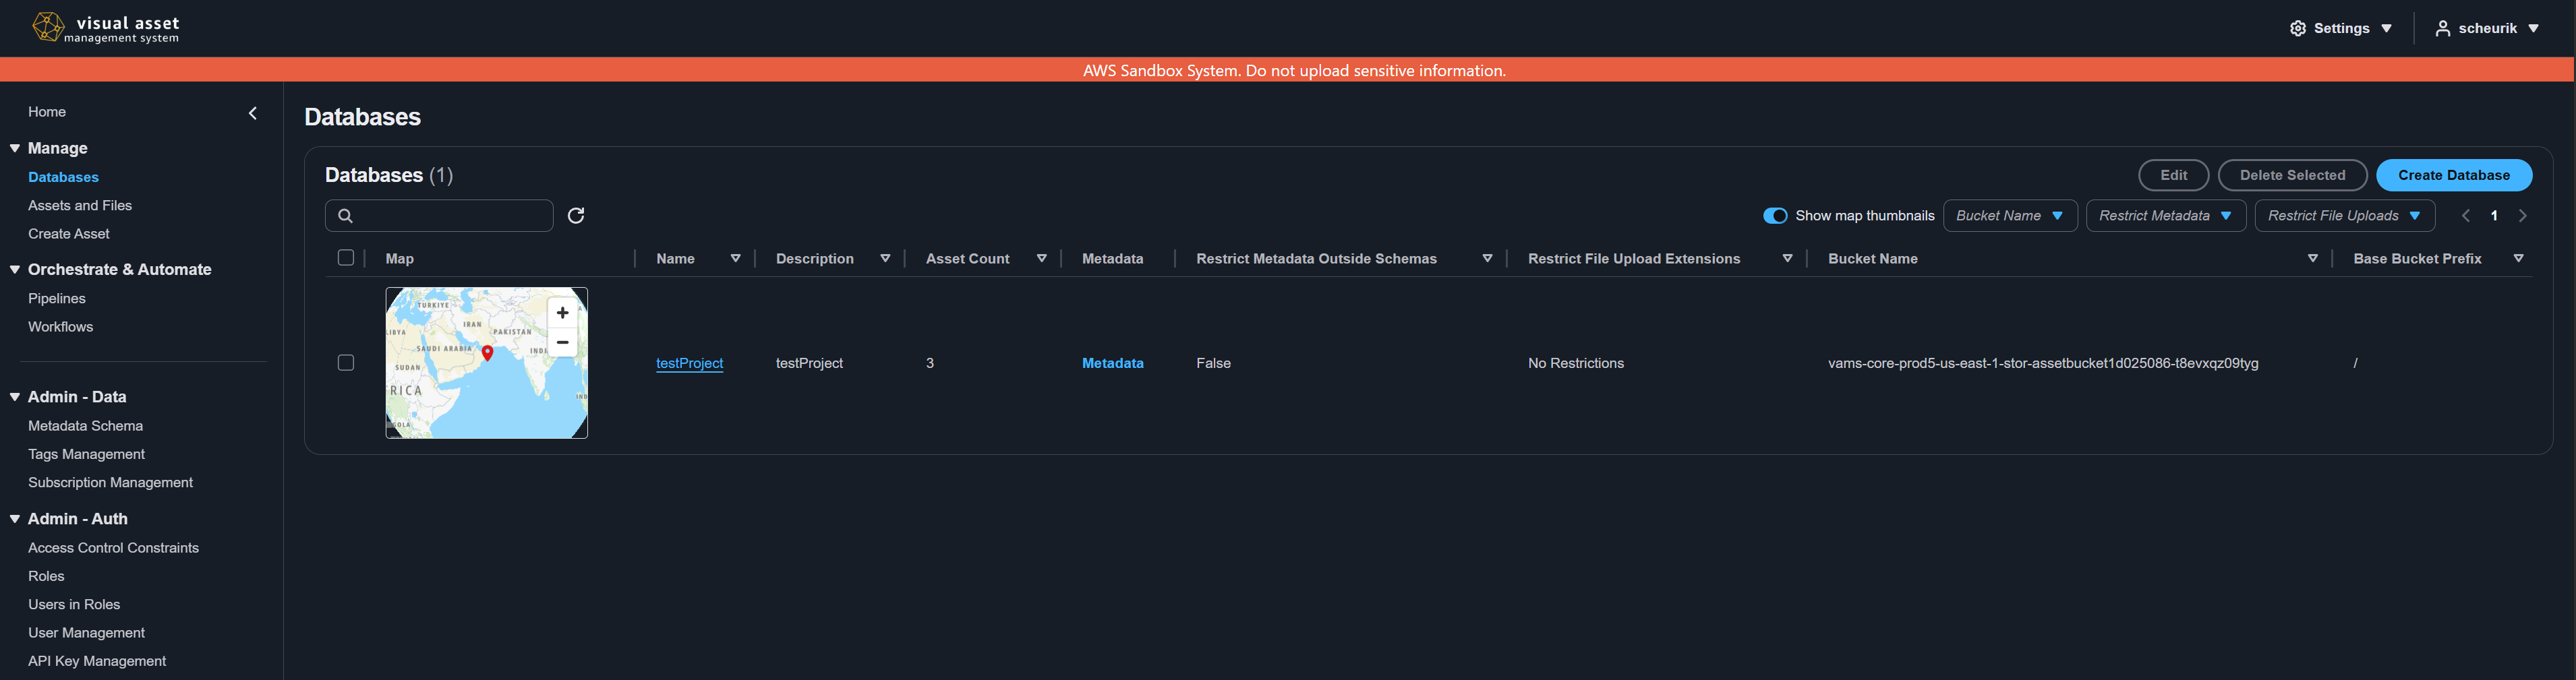
Choose a descriptive database name that reflects the type of assets it will contain, such as building-models or site-scans-2024. The name becomes part of asset URLs and cannot be changed later.
Step 2: Navigate to the Upload Page
- In the side navigation, select Create Asset.
- The upload wizard opens with the first step: Asset Details.
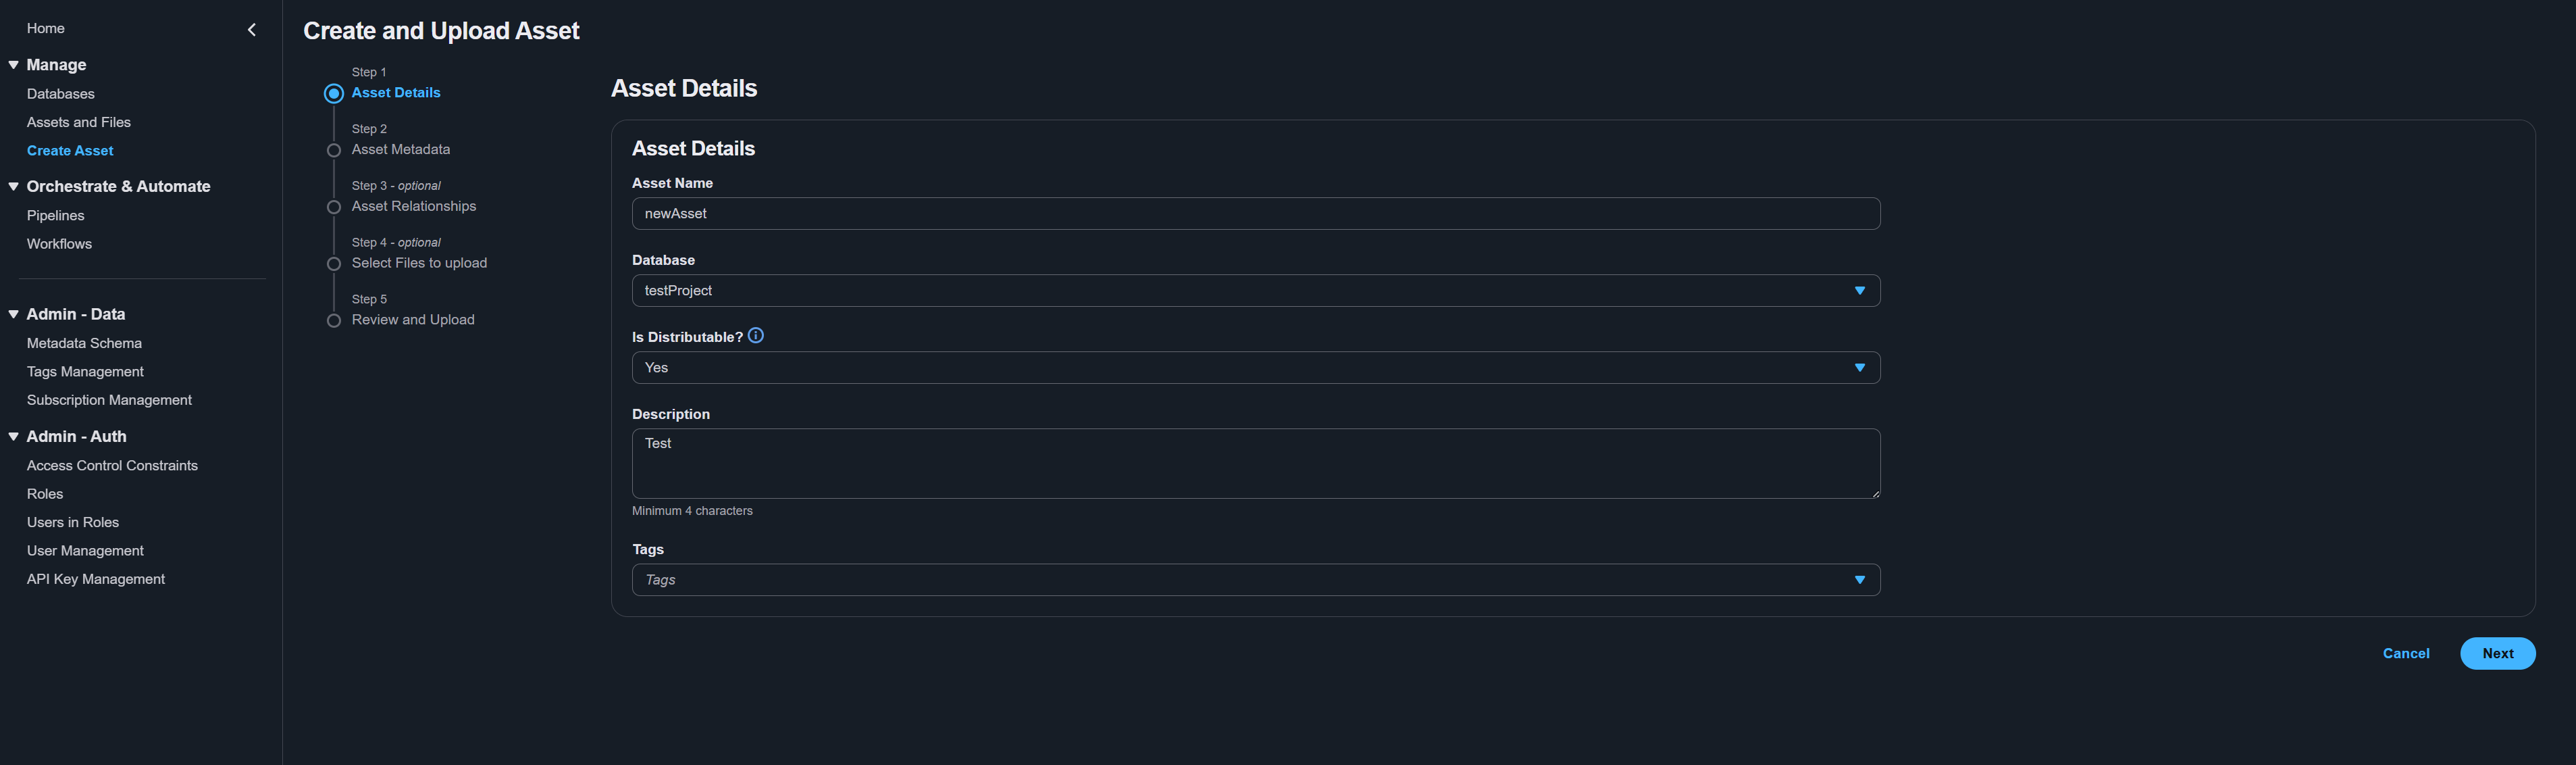
Step 3: Enter Asset Details
Fill in the required fields on the Asset Details step:
-
Asset Name -- Enter a descriptive name for your asset. This is the primary display name used throughout VAMS.
-
Database -- Select the database you created in Step 1 (or any database you have access to) from the dropdown.
-
Is Distributable? -- Select Yes or No.
!!! info The Is Distributable setting controls whether file downloads are enabled for this asset. Select Yes if users should be able to download files from this asset. Select No to restrict the asset to viewing only.
-
Description -- Enter a description of at least 4 characters. This helps other users understand what the asset contains.
-
Tags (optional) -- Select one or more tags from the dropdown to categorize your asset. Tags are defined by your administrator in the Tags Management page.
!!! warning If your administrator has configured required tag types, you must select at least one tag from each required type before proceeding. Required tag types are listed in the constraint text below the Tags field.
-
Select Next to proceed to the metadata step.
Step 4: Add Metadata
The Asset Metadata step allows you to attach key-value metadata pairs to your asset.
- If a metadata schema is applied to the selected database, required fields are displayed automatically. Fill in all required fields.
- To add custom metadata, use the metadata editor to add key-value pairs. Each entry requires a key name, a value, and a value type (string, number, or boolean).
- Select Commit changes to save your metadata entries before proceeding.
Metadata makes your assets searchable and organizable. Common metadata keys include project, location, captureDate, equipment, and author.
- Select Next to proceed to the relationships step.
Step 5: Configure Asset Relationships (Optional)
The Asset Relationships step lets you link your new asset to existing assets. This step is optional -- select Next to skip it.
VAMS supports three relationship types:
| Relationship | Description |
|---|---|
| Parent | The current asset is a child of the selected parent asset. Use this for hierarchical structures (for example, a building scan that belongs to a site). |
| Child | The selected asset becomes a child of the current asset. |
| Related | A general bidirectional association between assets with no hierarchy implied. |
To add a relationship:
- Select the relationship type tab (Parent, Child, or Related).
- Use the asset selector to search for and select an existing asset.
- Optionally add metadata to the relationship link.
- Repeat for additional relationships.
Relationships can cross database boundaries. You can link an asset in one database to an asset in a different database.
- Select Next to proceed to the file selection step.
Step 6: Select Files to Upload
The Select Files to Upload step lets you attach files to your asset. This step is optional -- you can create an asset without files and upload them later.
Selecting Files
-
Choose an upload mode using the toggle:
- File Upload -- Select one or more individual files.
- Folder Upload -- Select an entire folder, preserving the directory structure within the asset.
-
Drag and drop files onto the upload zone, or select the upload zone to open the file picker.
-
Selected files appear in a table below the upload zone, showing the file name, path, and size. You can:
- Remove individual files by selecting the remove button on each row.
- Remove all files to clear the selection and start over.
- Add more files by dragging additional files or using the file picker again. Duplicate files (same relative path) are automatically skipped.
File Extension Restrictions
If the selected database has file upload extension restrictions, an alert banner displays the allowed extensions. Files with disallowed extensions are flagged with validation errors and cannot be uploaded.
Preview files (filenames containing .previewFile.) are exempt from extension restrictions.
Preview Files
VAMS supports two types of preview files:
- Overall asset preview -- Use the Asset Overall Preview File uploader on the right side to select a single image (
.png,.jpg,.jpeg,.svg, or.gif, maximum 5 MB) that represents the entire asset. - File-level previews -- Include files named with the
.previewFile.{ext}convention in your upload. For example,model.gltf.previewFile.pngis automatically used as the preview thumbnail formodel.gltf.
- Select Next to proceed to the review step.
Step 7: Review and Submit
The Review and Upload step displays a summary of everything you have configured:
- Asset Detail -- Name, database, description, distributable status, and tags.
- Linked Assets -- Parent, child, and related asset relationships.
- Asset Metadata -- All key-value metadata pairs.
- File list -- All files to be uploaded, including their paths, sizes, and types (asset file or preview file).
- Review all information carefully. To make changes, select the Edit button next to any section or use the Previous button to go back to a specific step.
- When satisfied, select Upload Object to begin the upload.
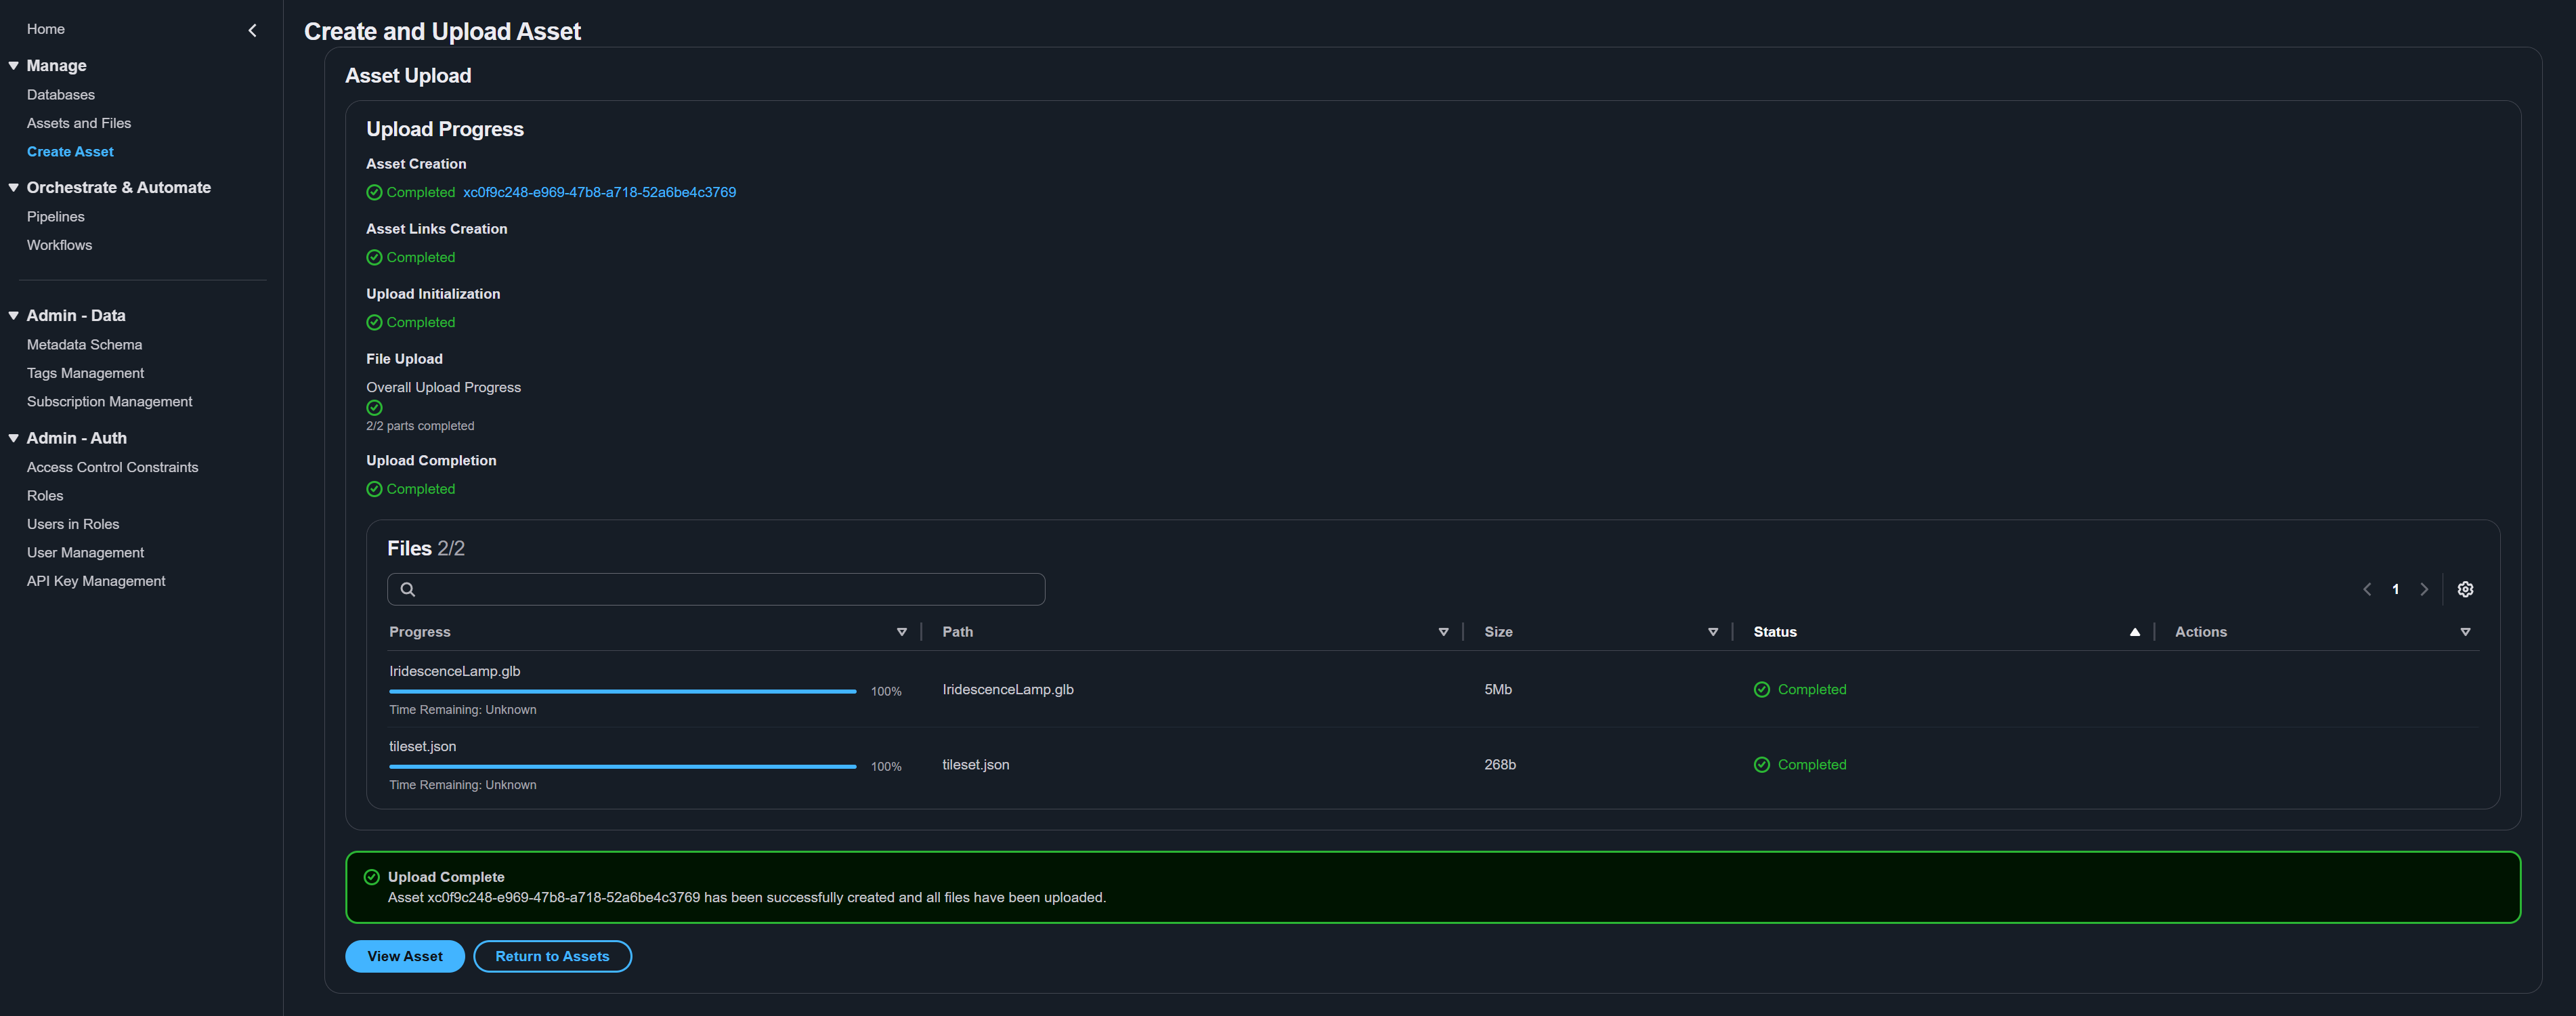
Step 8: Monitor Upload Progress
After submitting, the upload workflow begins:
-
The wizard transitions to a progress view showing the status of each operation:
- Asset creation in the VAMS backend
- File uploads to Amazon S3 (with individual progress bars per file)
- Workflow execution (if auto-triggered workflows are configured)
-
For large files, VAMS uses multipart upload to Amazon S3 for reliability. The progress bar updates in real time as each part completes.
-
Do not close or navigate away from the page until all uploads complete.
If you close the browser tab during upload, in-progress file uploads will be interrupted. Completed file uploads are retained, and you can resume uploading the remaining files from the asset detail page.
Step 9: View Your Asset
After the upload completes:
-
Navigate to the asset by selecting the link in the upload completion summary, or:
- Go to Assets and Files in the side navigation and search for your asset.
- Go to Databases, select your database, then find your asset in the list.
-
On the asset detail page, verify:
- The details pane shows the correct name, description, tags, and distributable status.
- The File Manager tab displays your uploaded files in a directory tree.
- The Metadata section at the bottom shows your key-value pairs.
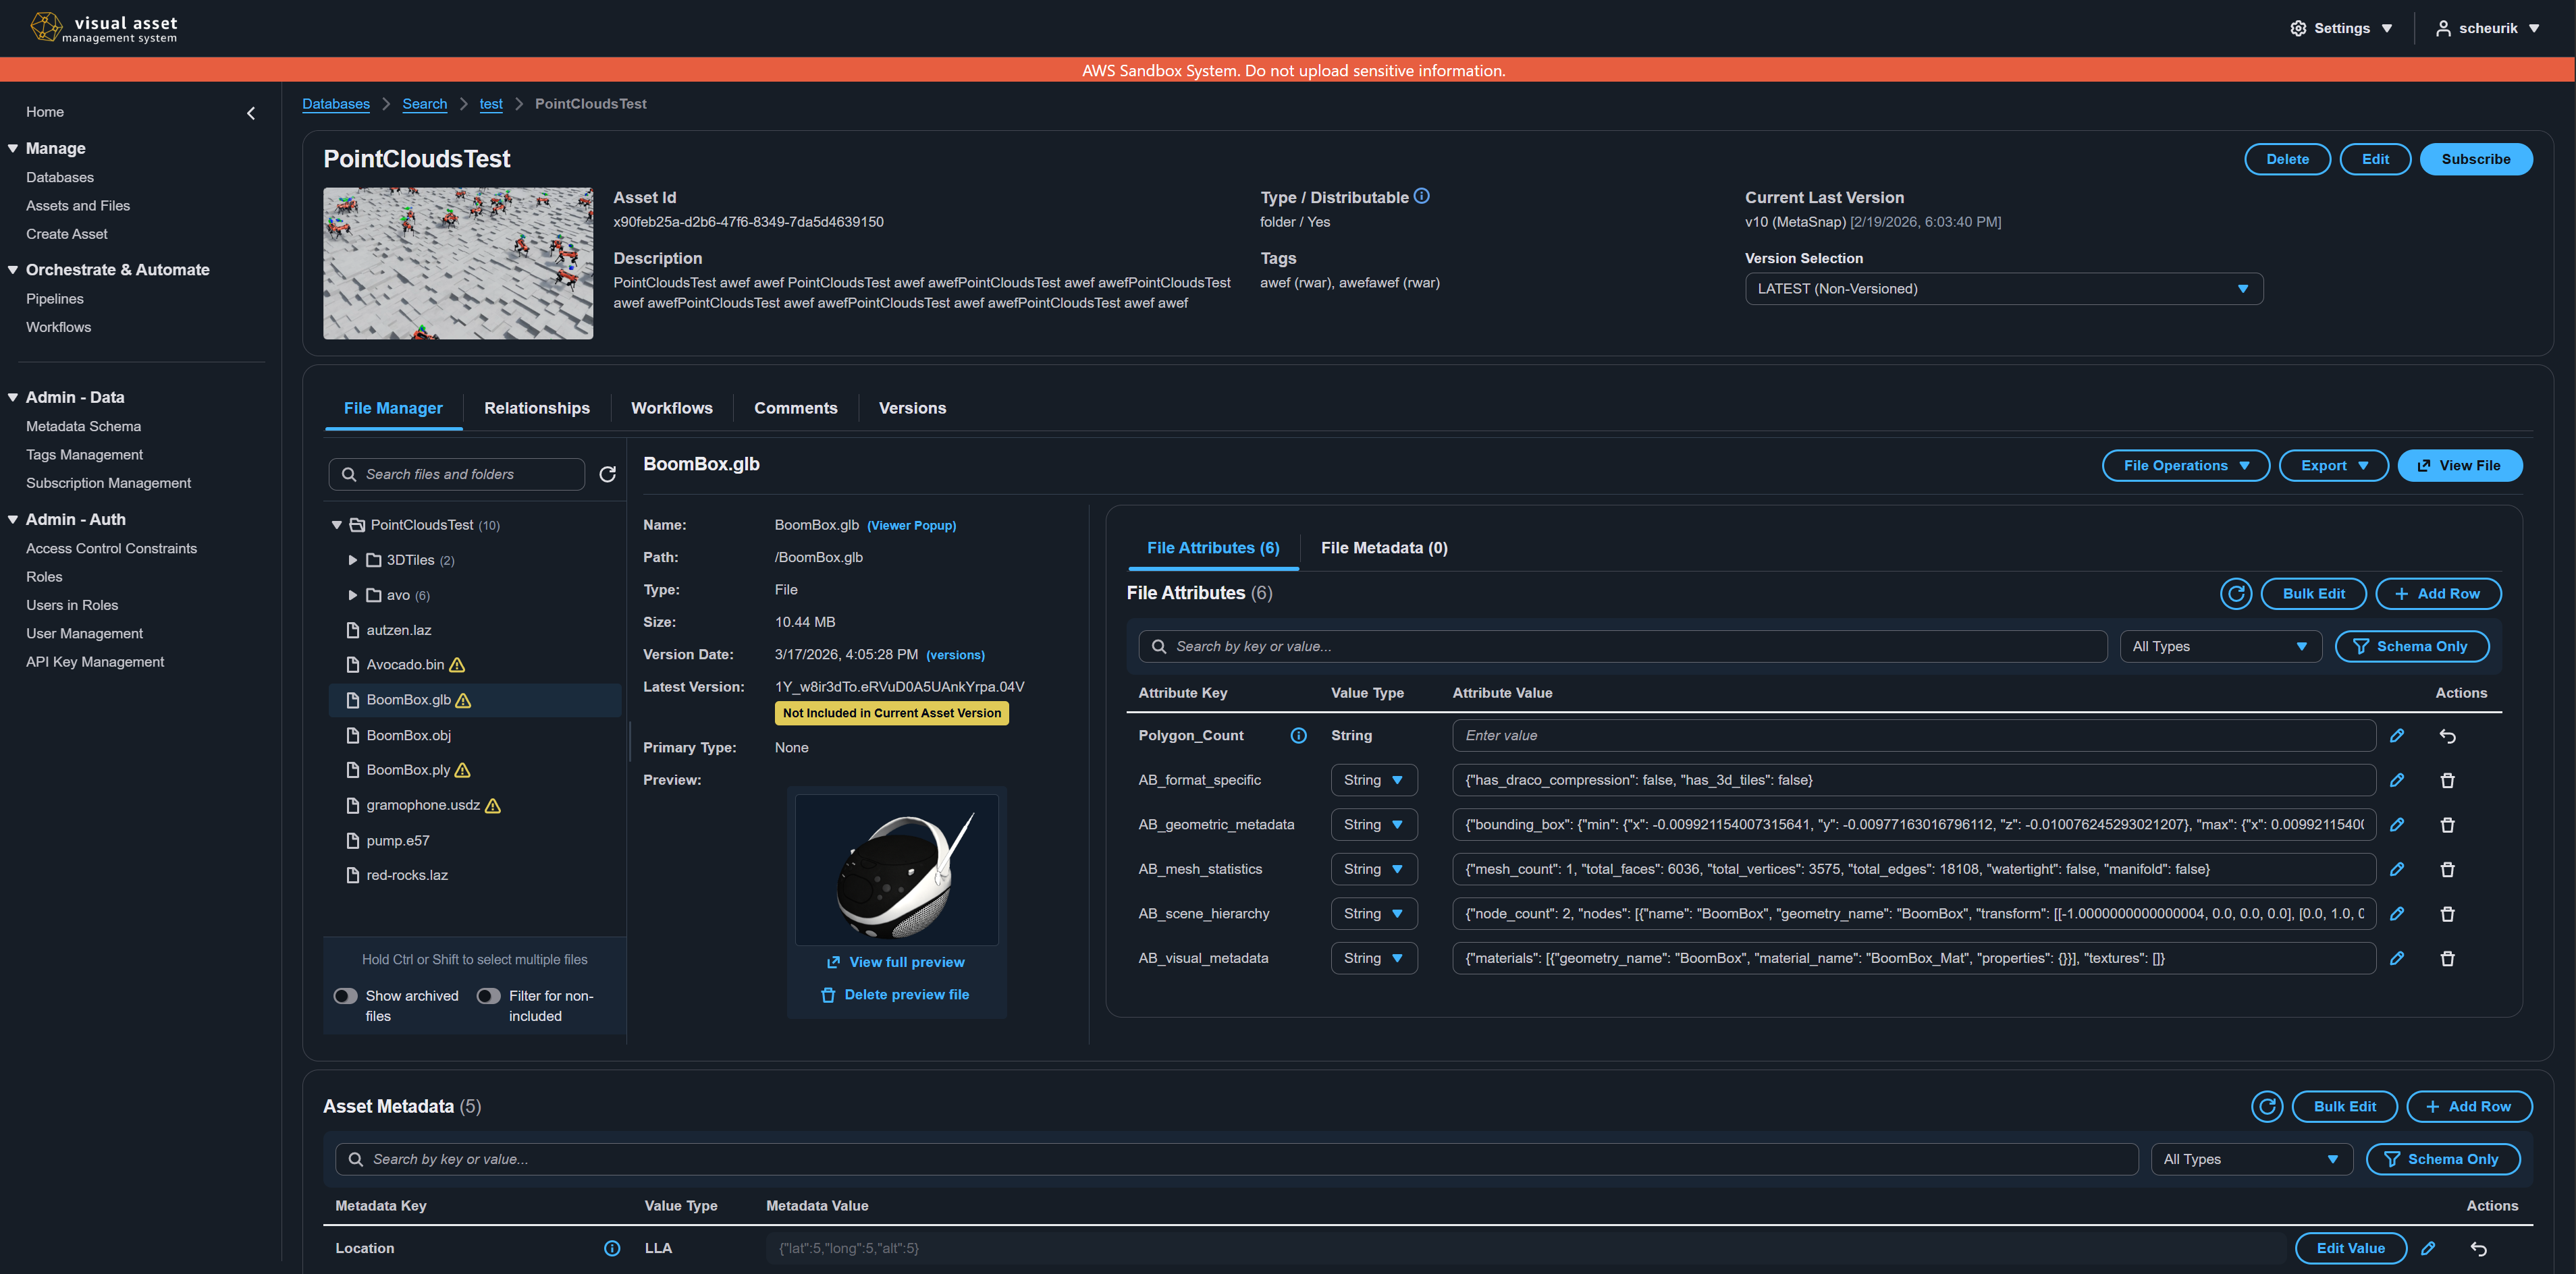
Step 10: Try the File Viewer
If you uploaded a file in a supported format (such as .gltf, .obj, .e57, .png, .pdf, or .mp4), you can view it directly in the browser:
- In the File Manager tab, select a file in the directory tree.
- In the file details panel on the right, select View File.
- VAMS opens the file in the appropriate viewer plugin. For 3D models, you can rotate, zoom, and pan the model interactively.
Commonly Used File Formats
| Format | Viewer | Description |
|---|---|---|
.gltf, .glb, .obj, .fbx, .stl | Three.js Viewer | 3D models with full rotation and zoom |
.e57, .las, .laz | Potree Viewer | Point cloud data with 3D navigation |
.usd, .usda, .usdc, .usdz | Needle USD Viewer | Universal Scene Description files |
.png, .jpg, .svg, .gif | Image Viewer | Raster and vector images |
.mp4, .webm, .mov | Video Player | Video playback with controls |
.pdf | PDF Viewer | Multi-page document viewing |
.csv | Columnar Data Viewer | Tabular data browsing |
If a file does not have a dedicated viewer but has a preview image, VAMS falls back to the preview viewer to display the thumbnail.
Next Steps
Congratulations -- you have created your first database and asset in VAMS. To continue learning:
- Asset Management -- Learn about versioning, file operations, relationships, and advanced asset management
- Web Interface Overview -- Explore all pages and features of the VAMS interface
- Metadata Management -- Deep dive into metadata schemas and metadata operations
- Tags -- Organize assets with tags
- Subscriptions -- Receive change notifications