Hardware Profiles & USB Device Allowlists
A Hardware Profile bundles a USB device allowlist and binds it to a Software Stack or a Project. When a virtual desktop launches from that stack (or project), the allowlist tells the DCV client which physical USB devices attached to the user's machine, such as a security key or a lab instrument, may be redirected ("remotized") into the remote desktop.
Hardware Profiles are managed by administrators under Admin Section > Virtual Desktops / DCV > Hardware Profiles.
Available on EDH 26.8.0 and newer
USB remotization is currently a VDI feature. The Windows delivery path is validated end-to-end; the Linux path uses a boot-time systemd hook.
Compatibility filter, not a security boundary
A USB allowlist is a device compatibility filter, not a security control. It tells the DCV client which device types to attempt to redirect. Do not rely on it to block data exfiltration; use the usb permission in a Session Sharing permission profile and your normal endpoint controls for that.
How the pieces fit together
- A USB Allowlist is a named list of USB device filters (one row per device or device class).
- A Hardware Profile references one USB allowlist (and, in the future, other sub-profiles such as disk or CPU).
- A Hardware Profile is bound to a Software Stack or a Project. When both a stack and its project bind a profile, the Project binding wins at launch.
USB Allowlists
Open the USB Allowlists tab. Give a new allowlist a name and optional description, then click Create.
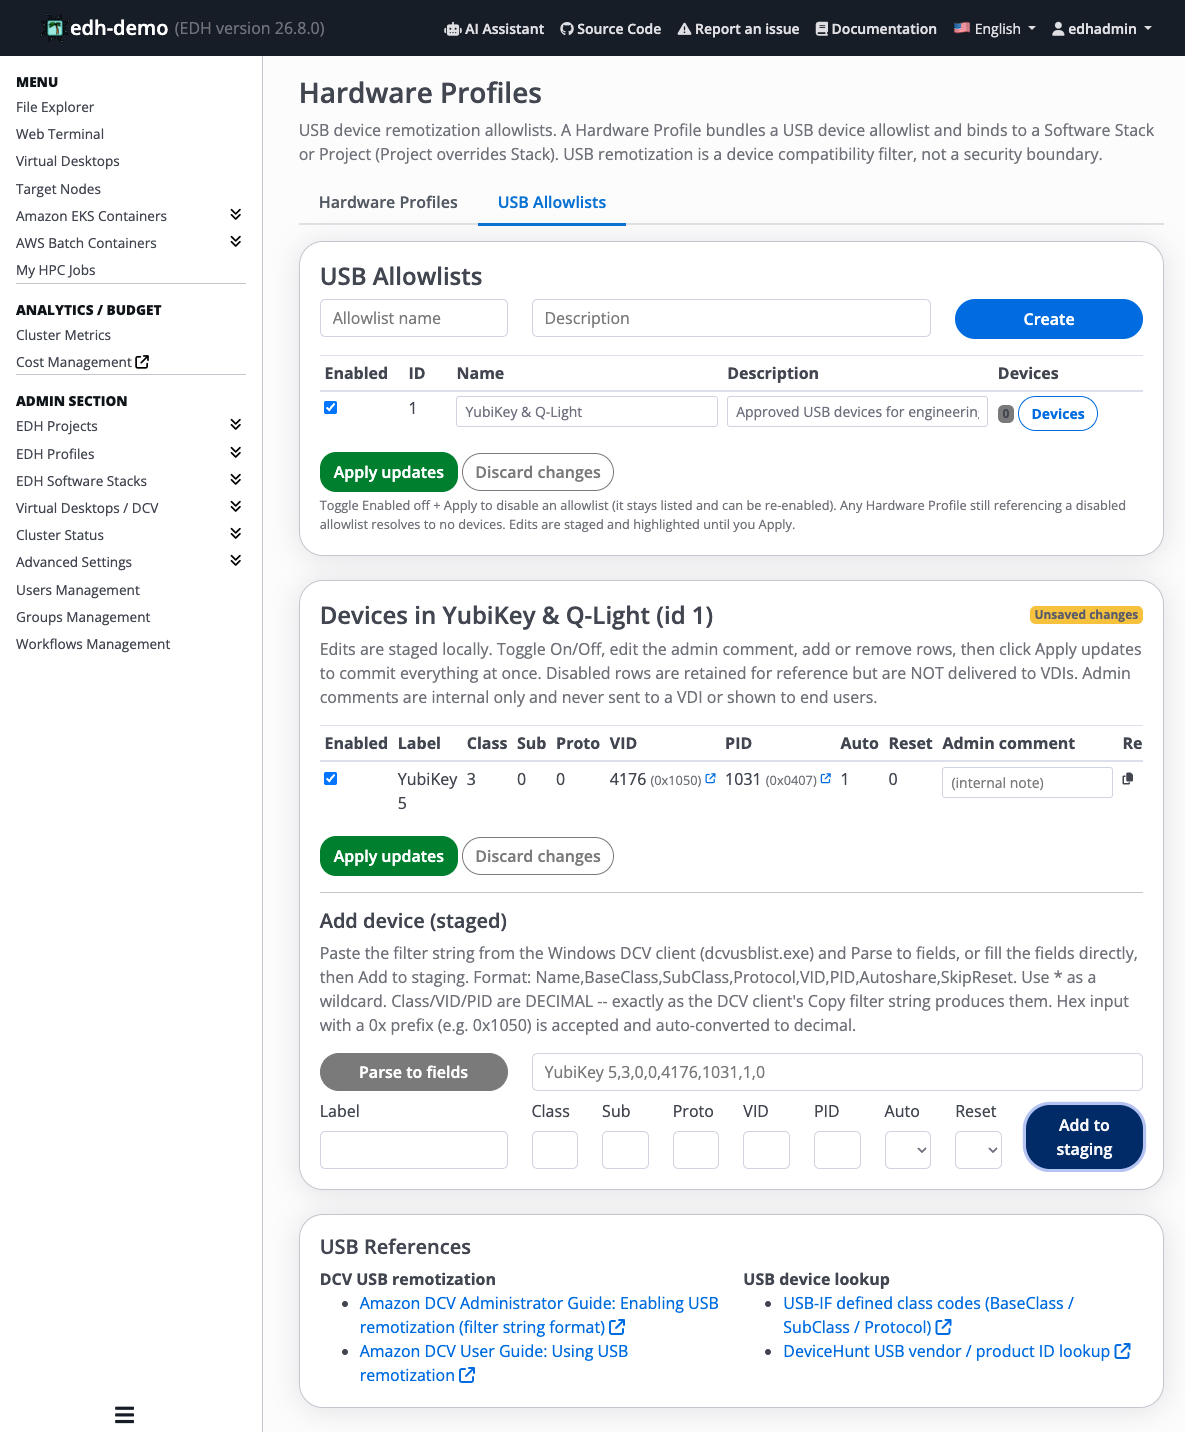
Each allowlist has an Enabled toggle. Turning it off disables the allowlist (it stays listed and can be re-enabled); any Hardware Profile still referencing a disabled allowlist resolves to no devices. Click Devices on an allowlist row to edit the devices it contains.
Add devices to an allowlist
In the device editor, every row describes one USB device or device class:
| Field | Meaning |
|---|---|
| Enabled | Whether the row is delivered to VDIs. Disabled rows are retained for reference but not sent. |
| Label | A human-friendly name (for example, YubiKey 5). |
| Class / Sub / Proto | USB base class, sub-class, and protocol codes. |
| VID / PID | USB vendor ID and product ID. |
| Auto | Auto-share: whether the device is redirected automatically on connect. |
| Reset | Whether to skip the device reset. |
| Admin comment | An internal note. It is never sent to a VDI or shown to end users. |
You can add a device two ways:
- Paste a filter string from the Windows DCV client tool (
dcvusblist.exe) into the field and click Parse to fields, or - Fill the fields directly, then click Add to staging.
The filter string format is:
Name,BaseClass,SubClass,Protocol,VID,PID,Autoshare,SkipReset
Use * as a wildcard. Class, VID, and PID are decimal, exactly as the DCV client's Copy filter string produces them; hexadecimal input with a 0x prefix (for example 0x1050) is accepted and auto-converted to decimal. For example, YubiKey 5,3,0,0,4176,1031,1,0 describes a YubiKey with VID 4176 (0x1050) and PID 1031 (0x0407).
Staged edits
Adding, editing, toggling, or removing rows stages the change locally and highlights it as Unsaved changes. Click Apply updates to commit everything at once, or Discard changes to abandon the staged edits.
The page links to the Amazon DCV Administrator Guide (filter string format), the DCV User Guide (using USB remotization), the USB-IF class code reference, and a USB vendor / product ID lookup to help you build the correct filter.
Hardware Profiles and bindings
On the Hardware Profiles tab, create a profile by giving it a name and description and selecting a USB allowlist, then click Create. Select a profile on the left to view and edit its details and sub-profiles.
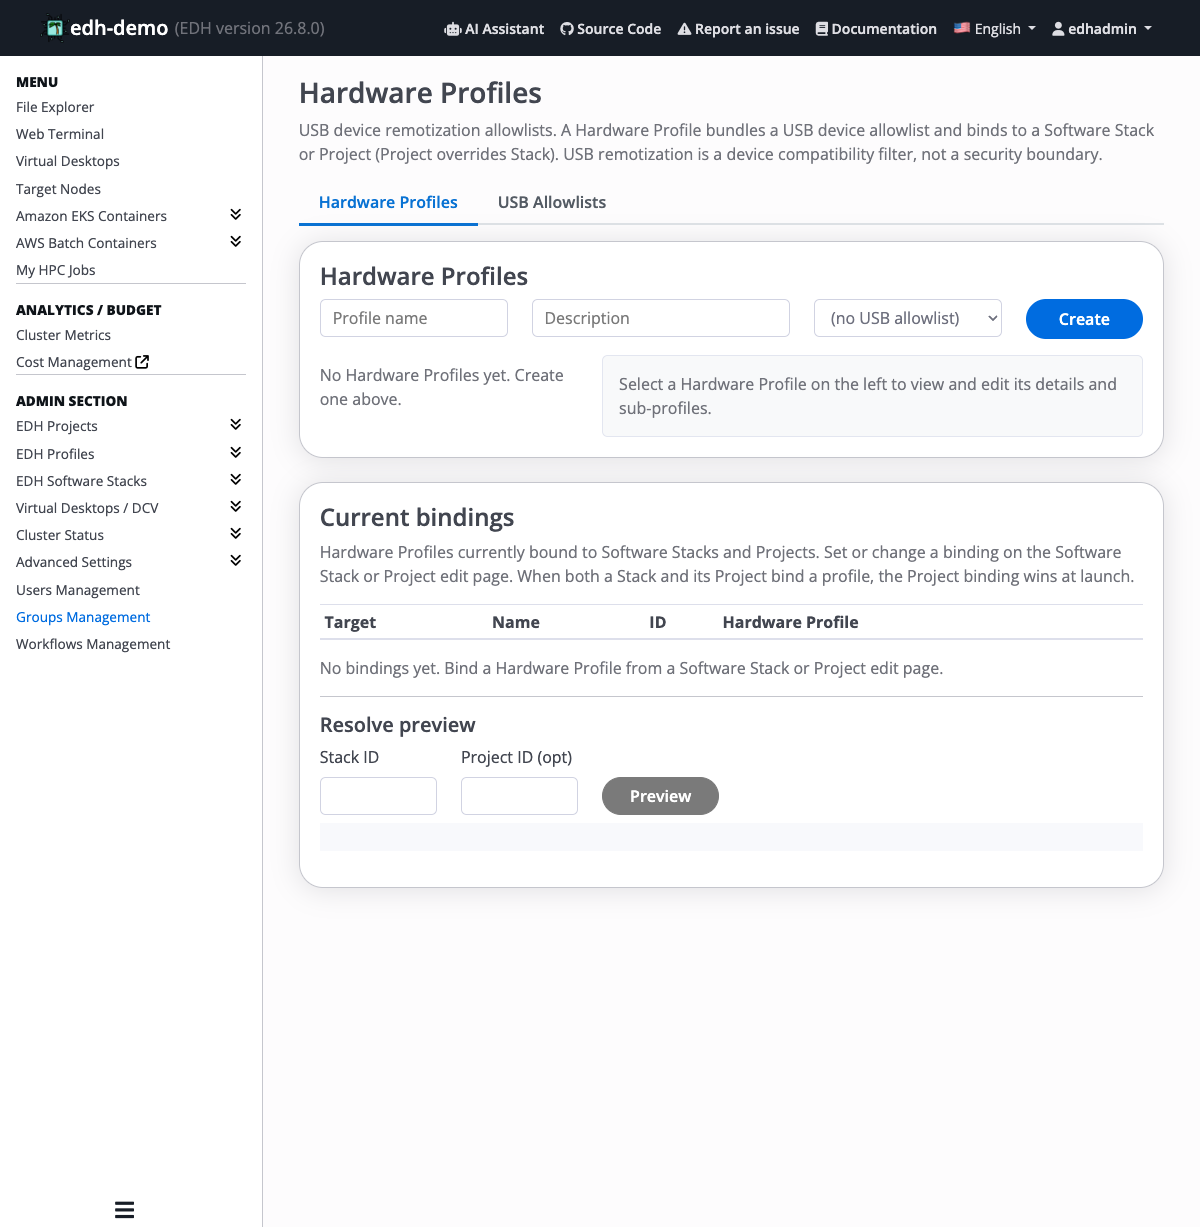
The Current bindings panel lists every Software Stack and Project currently bound to a Hardware Profile. You set or change a binding from the Software Stack or Project edit page, not from here. When both a stack and its project bind a profile, the Project binding wins at launch.
Use Resolve preview to check what a launch would actually apply: enter a Stack ID (and optionally a Project ID) and click Preview to see the effective Hardware Profile and USB allowlist that a desktop would receive.