Quickstart
To help you kickstart your journey with Project Lakechain, we are going to walk you through the step-by-step deployment of your first pipeline by deploying one of the examples we’ve built for you.
💁 The pre-requisites section helps you ensure you have the necessary setup on your development environment and are ready to go!
📔 Overview
For this first deployment, we are going to deploy a face detection pipeline we’ve created. The pipeline is triggered by images uploaded in a source S3 bucket. It uses AWS Rekognition to detect faces in the uploaded image, and creates a new image with the faces blurred and face landmarks drawn on top of them. Transformed images are then automatically stored in a destination S3 bucket.

🧬 Pipeline
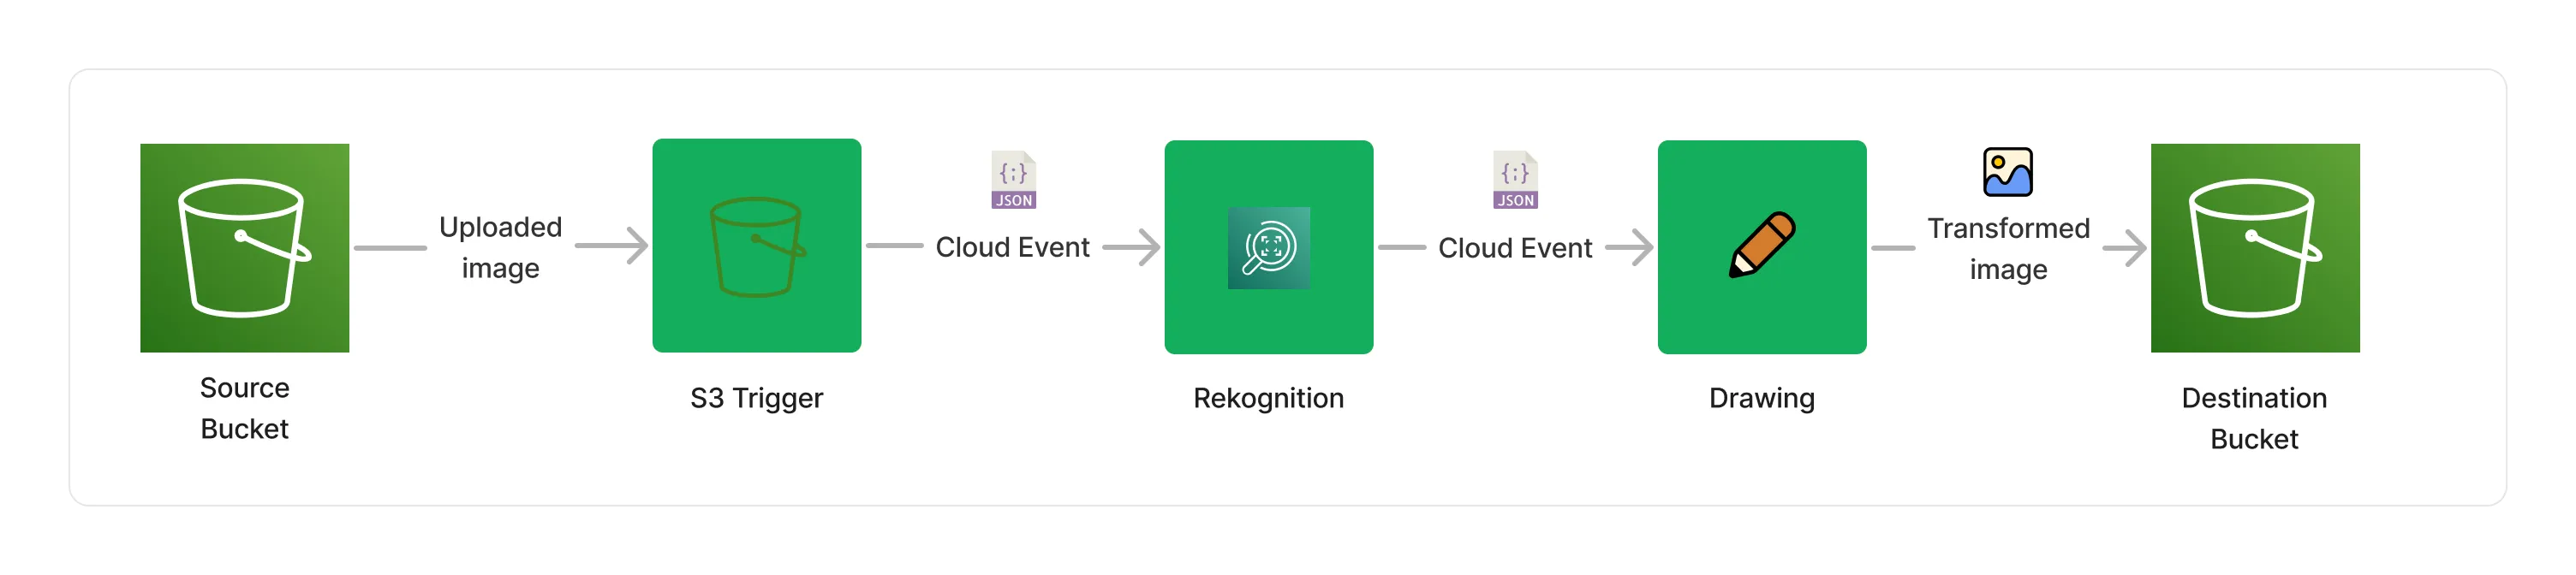
This is how the pipeline we are going to deploy looks like.
-
The S3 Trigger monitors any uploaded document from the source S3 buckets, and translates the S3 event into a Cloud Event that’s understood by the rest of the middlewares.
-
The Rekognition Image Processor handles face detections, and enriches document metadata with detected faces information.
-
The Image Layer Processor uses face detection information to blur faces and highlight face landmarks in the image.
-
At the end of the pipeline, the S3 Storage Connector stores the transformed image in the destination S3 bucket.
🚀 Get started!
First, you will need to clone the Project Lakechain repo, and install the project dependencies.
git clone https://github.com/awslabs/project-lakechain \ && cd project-lakechain \ && npm installNext, head to the examples/simple-pipelines/image-processing-pipelines/face-detection-pipeline directory in the repository, and build the example and the middlewares it relies on :
cd examples/simple-pipelines/image-processing-pipelines/face-detection-pipeline \ && npm run build-pkg> face-detection-pipeline@1.0.0 build-pkg
✔ @project-lakechain/sdk:build
✔ @project-lakechain/core:build
✔ @project-lakechain/s3-storage-connector:build
✔ @project-lakechain/rekognition-image-processor:build
✔ @project-lakechain/image-layer-processor:build
✔ @project-lakechain/s3-event-trigger:build
✔ face-detection-pipeline:build (4s)
————————————————————————————————————————————————————————————
> Successfully ran target build for 7 projects
Great! You can now deploy the example pipeline to your AWS account using the AWS CDK.
💁 Ensure your deployment machine does have valid AWS credentials and a Docker engine is running before proceeding.
npm run deploy> face-detection-pipeline@1.0.0 deploy
> npx cdk deploy
...
✅ FaceDetectionStack
✨ Deployment time: 56.44s
Outputs:
FaceDetectionStack.DestinationBucketName = {source-bucket}
FaceDetectionStack.SourceBucketName = {destination-bucket}
Once the deployment is completed, you will see in the Outputs in the console two references :
SourceBucketName- This is where you upload images to be processed.DestinationBucketName- This is where processing results will be stored.
⚡ Launch
To launch the pipeline, you upload one or multiple images in the source bucket using the AWS Console, and a pipeline execution will trigger automatically per uploaded images.
💁 Tip We recommend that you Live Tail the log groups associated with the middlewares to see the logs in real-time and be able to explore them in the AWS CloudWatch Logs console.
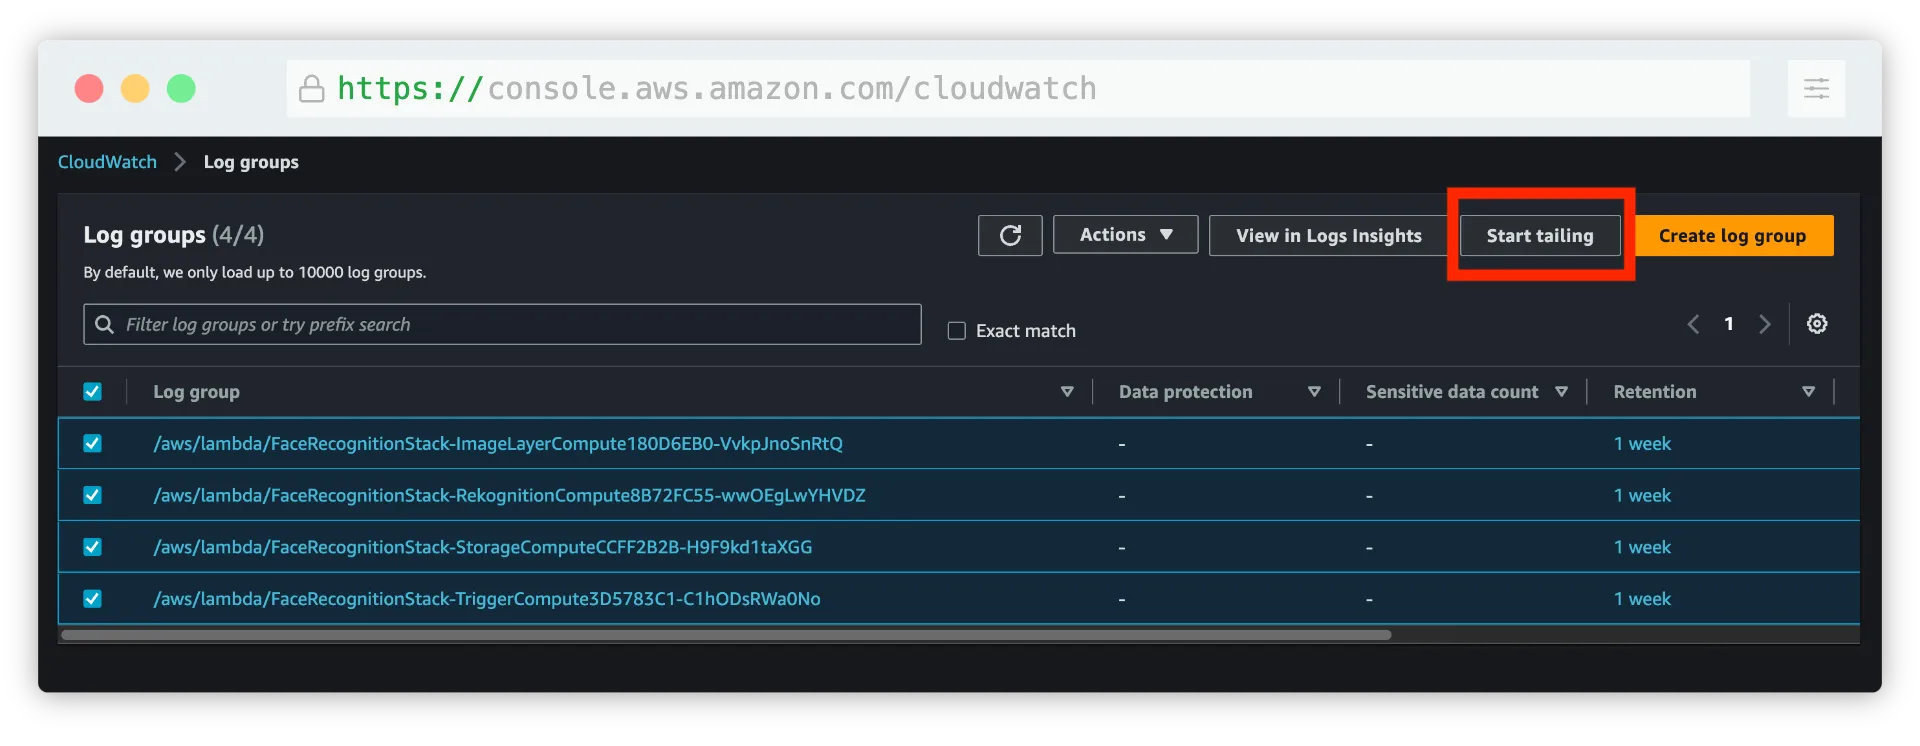
Once you upload an image, you should see logs appearing for each middleware execution, and an output directory being created in the destination bucket after a few seconds.
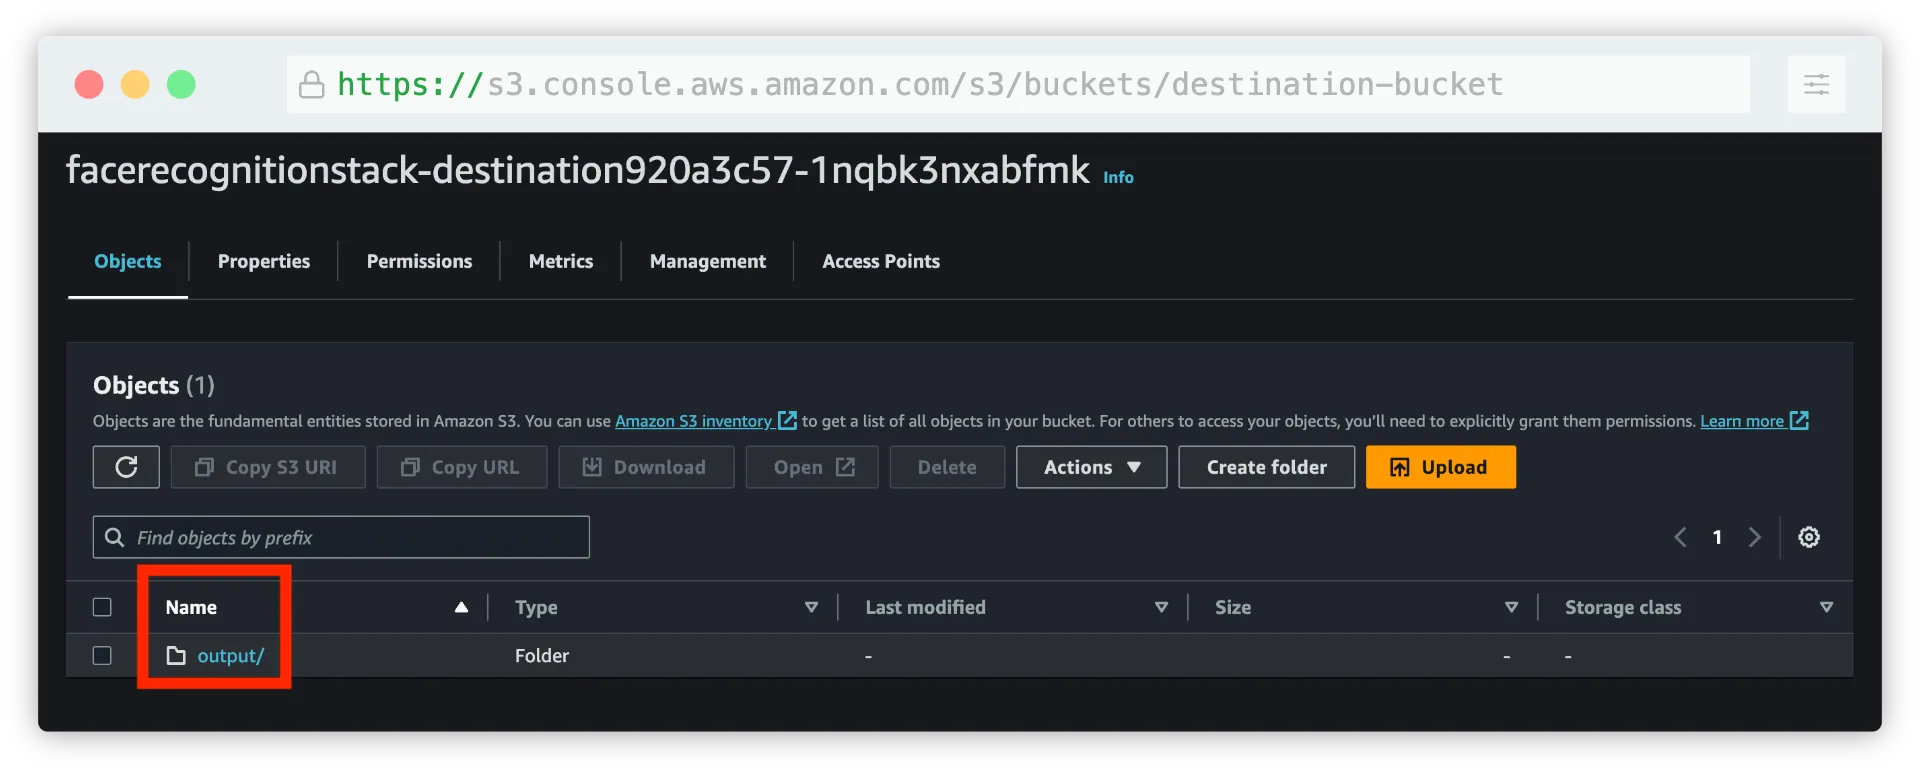
The output prefix is automatically created by the S3 storage connector which organizes results by execution identifier. This allows to partition different pipeline execution results under different unique identifiers.
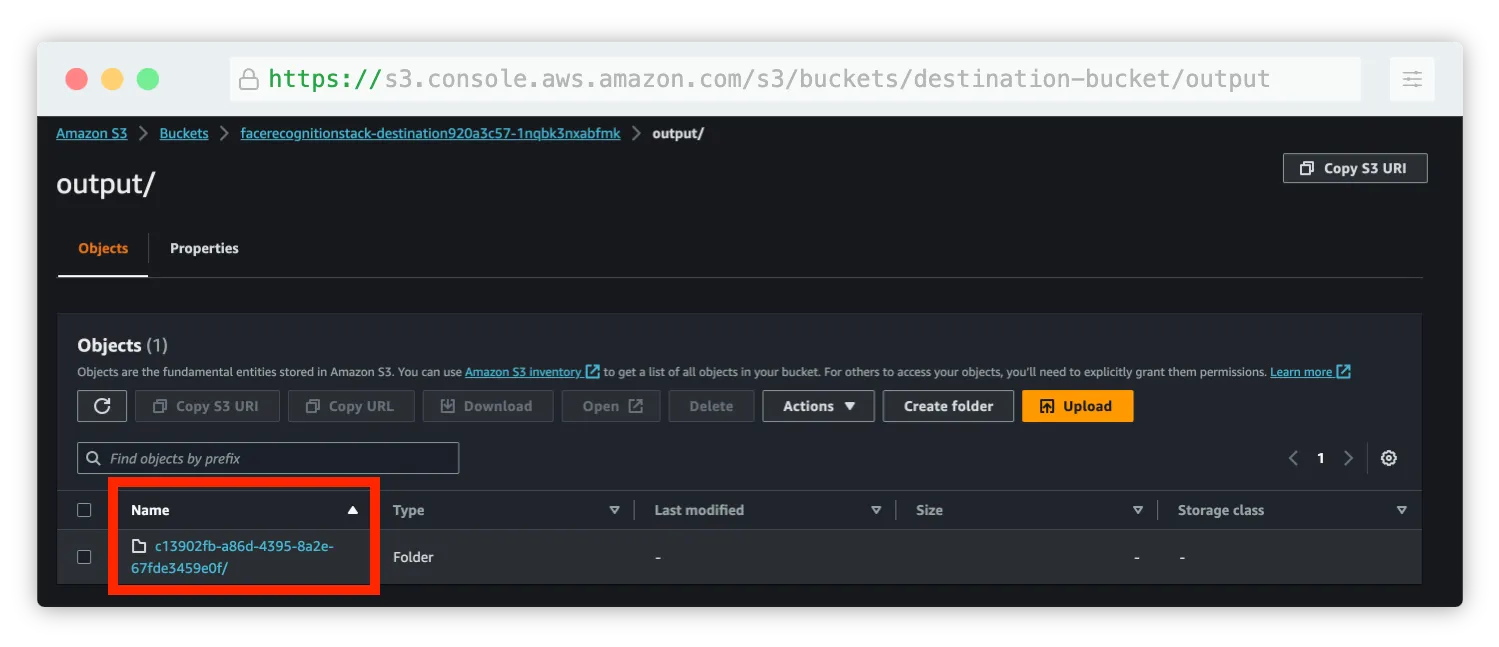
Within each execution identifiers are the files that the S3 storage connector aggregated from upstream middlewares. For each processed document, the S3 storage connector stores both the processed document and its description as a JSON file.
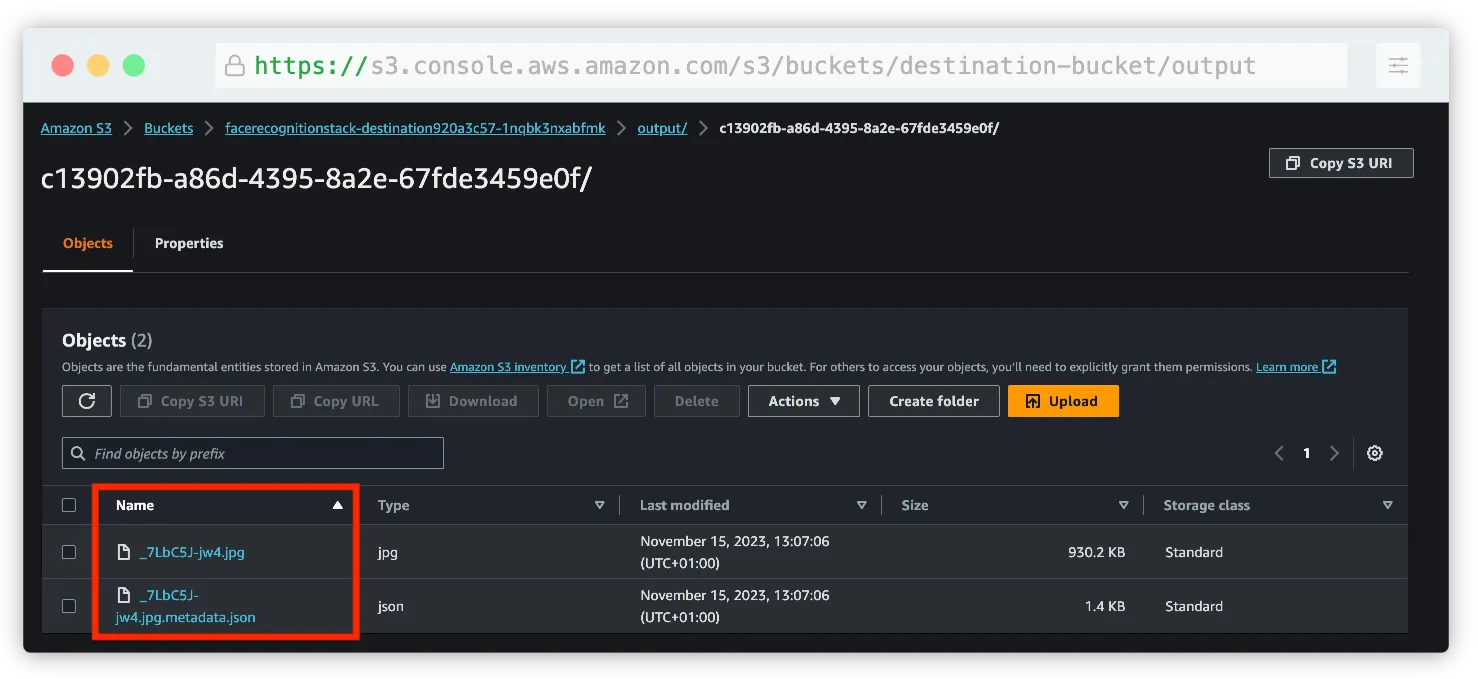
If you open the resulting image, you will see the new image modified by the pipeline.

Congratulations! You’ve successfully executed a document processing pipeline with Lakechain! 👍
👨💻 Making changes
Now that we know the basics of deploying and triggering a pipeline, we are going to apply some minor changes to it to see how we can leverage the flexibility of middlewares.
In the example directory, you will find a stack.ts file that contains the CDK code in TypeScript describing the pipeline. Locate the section defining the RekognitionImageProcessor middleware 👇.
const rekognition = new RekognitionImageProcessor.Builder() .withScope(this) .withIdentifier('Rekognition') .withCacheStorage(cache) .withSource(trigger) .withIntent( r.detect() .faces(r.confidence(80)) ) .build();The intent describes to the rekognition image processor what actions it is expected to perform on images. In this case, we are asking it to detect faces in the image, and to only return results that have a confidence score of 80% or more.
Let’s change that to also detect objects in the image that have a similar confidence, and limit the results to 10 objects.
const rekognition = new RekognitionImageProcessor.Builder() .withScope(this) .withIdentifier('Rekognition') .withCacheStorage(cache) .withSource(trigger) .withIntent( r.detect() .faces(r.confidence(80)) .labels(r.limit(10), r.confidence(80)) // 👈 Add this line ) .build();Perfect! Now let’s also modify the ImageLayerProcessor middleware to also highlight the detected objects in addition to blurring faces in the image.
This will cause the image processor to draw a bounding box around the detected objects.
const layerProcessor = new ImageLayerProcessor.Builder() .withScope(this) .withIdentifier('ImageLayer') .withCacheStorage(cache) .withSource(rekognition) .withLayers( l.pixelate(l.faces()), l.highlight(l.landmarks(), l.objects()) // 👈 Change here ) .build();You can re-deploy the pipeline to apply the changes.
npm run deployOnce done, you can upload a new image featuring both faces and objects to the source bucket.
👇 You can use the below image for example.

Credits Camden & Hailey George on Unsplash
The image will trigger a new pipeline execution, and this time, face and label detection will be performed on the image and drawn on top of it.

Credits Camden & Hailey George on Unsplash
Thank you for following this Quickstart! 🎉 We recommend you also explore the different use-cases implemented by our other examples for learning more in-depth how Lakechain works before creating your own pipelines!
🧹 Cleanup
When you are done experimenting with this example, don’t forget to clean up all resources from your account.
npm run destroy